in this article we will discuss how to prepare SCCM server to deploy windows 10 image
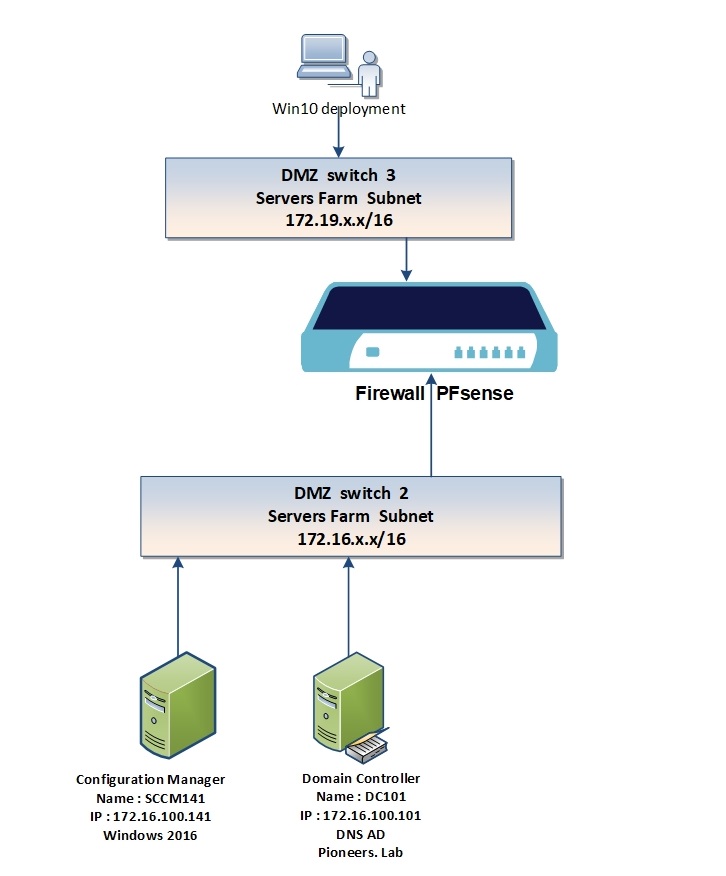
network diagram
For Better View > Open Image in different TAB
please have a look to diagram above
we will prepare SCCM in DMZ 172.16.x.x to deploy image in DMZ 172.19.x.x.
OSD process tasks
tasks of Operating system deployment include the following :
install DP
install DHCP
Enable SCCM PXE Role
BOOT Image Distribution
Add Operating System Image
configure software distribution point
Task Sequence Creation > Next Article
Deploy task sequence into Unknown Computer Collection > Next Article
Deploying Windows 10 via PXE boot > Next Article
install DP Distribution Point
normally DP role is installed during SCCM setup >
and here in network pioneers we have already installed DP previously
BUT ,,,
in case you choose to NOT install it early >> you can install DP role here
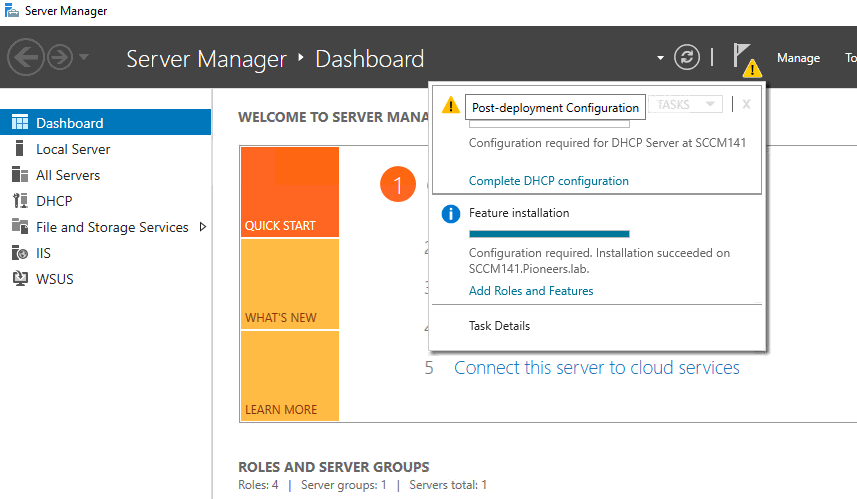
install DHCP
DHCP is responsible to lease IP address to client computer when the boot , so they can reach SCCM to get OS image
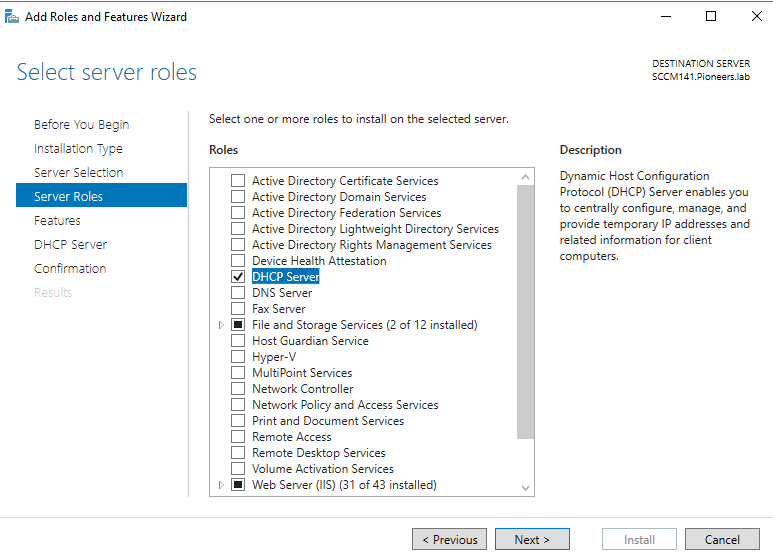
first we will install role DHCP
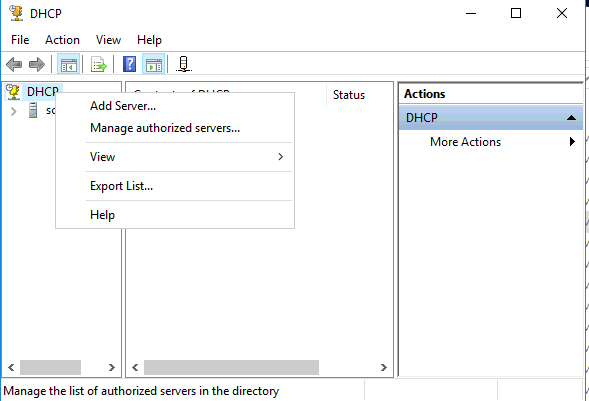
then authorize DHCP server in AD
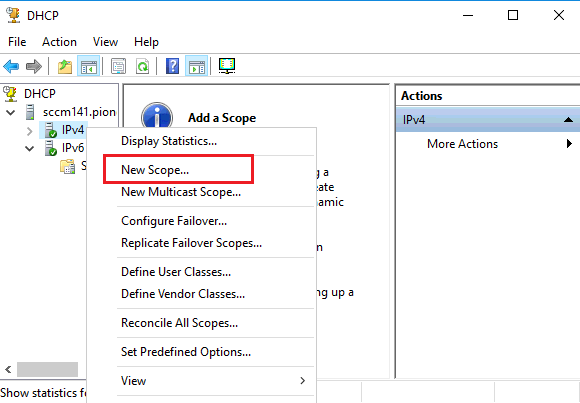
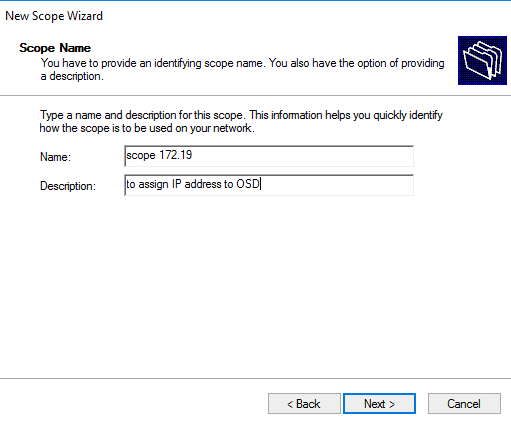
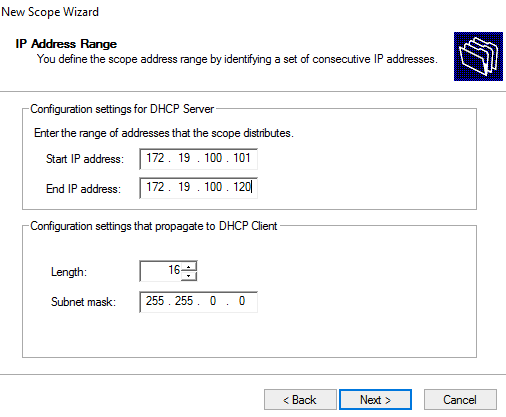
create scope for subnet 172.19.x.x
activate scope
set some scope options
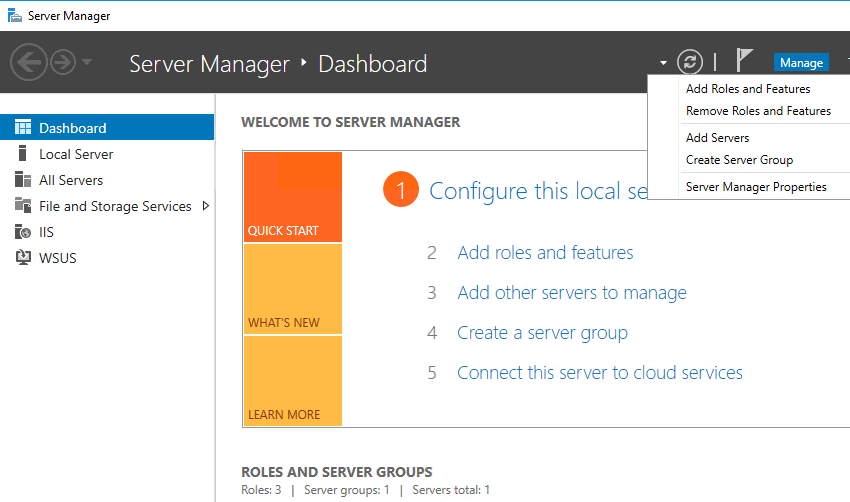
from server manager add role
select DHCP
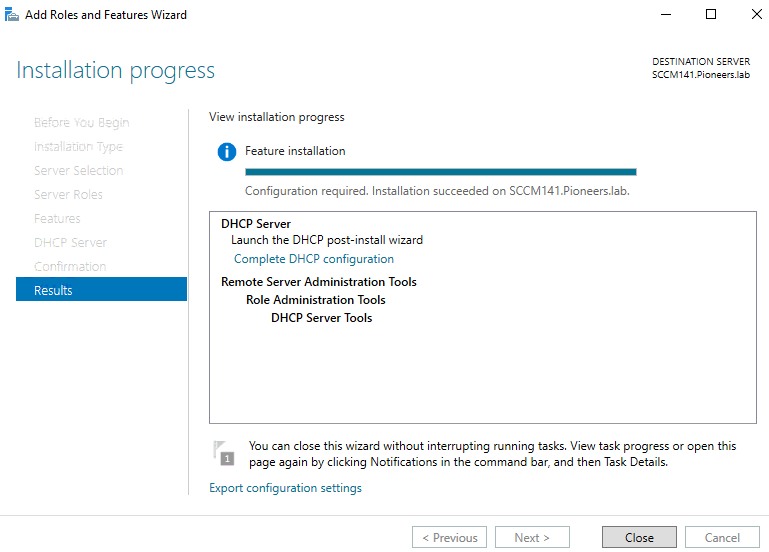
installation Done but need some configurations
select complete DHCP configuration
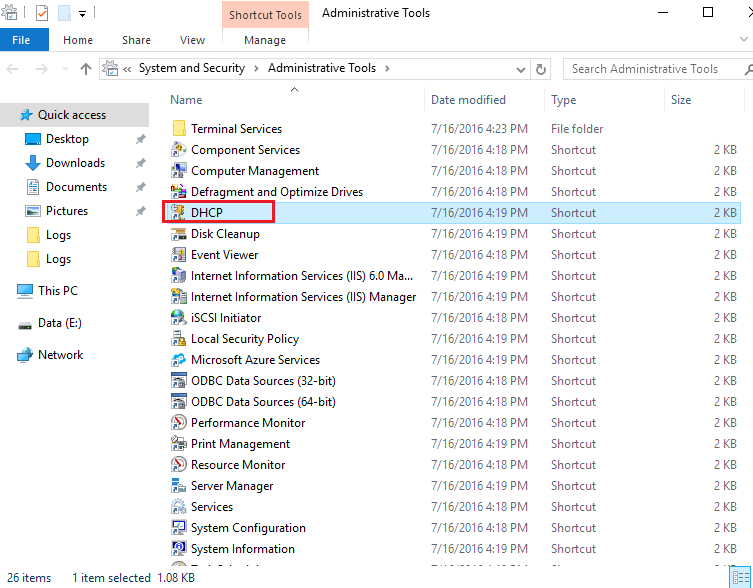
open DHCP from administrative tools
from DHCP console > check is DHCP require authorization
create new scope
set scope name
set > then finish to activate scope range
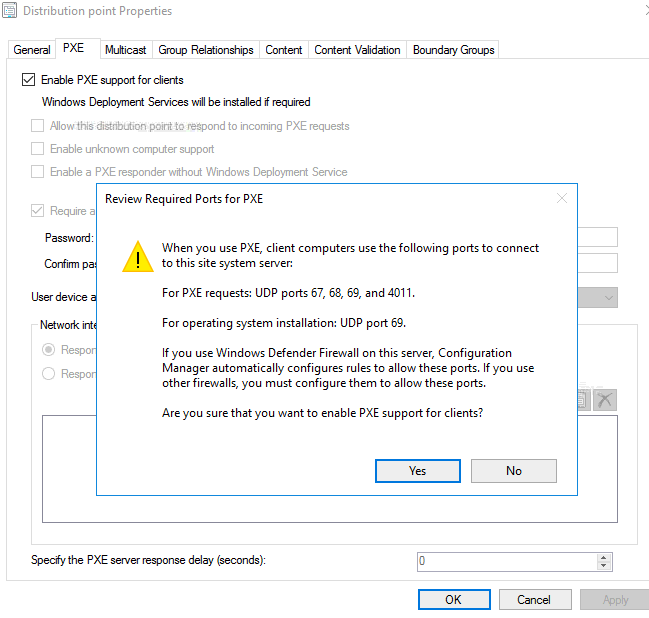
Enable SCCM PXE Role
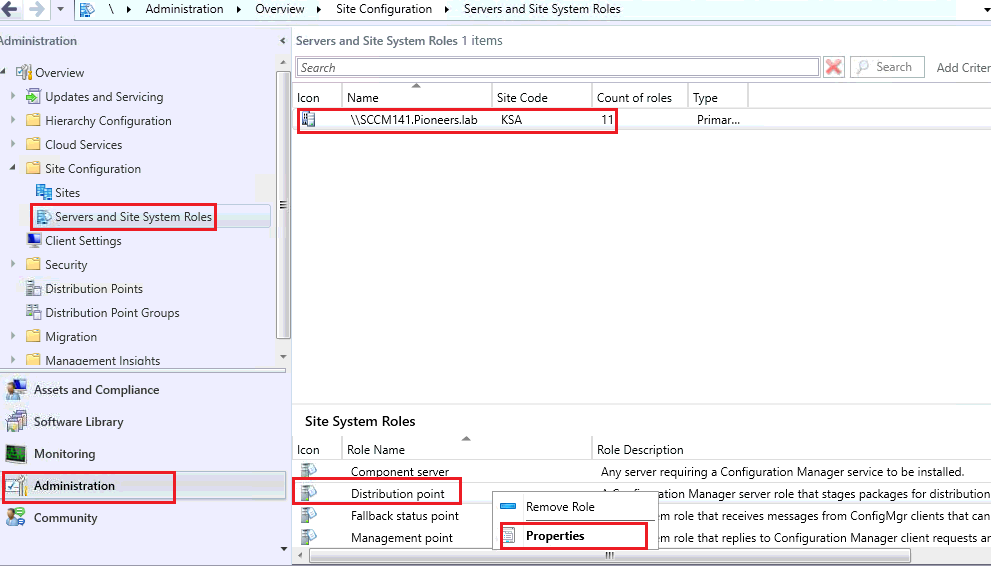
we have installed DP role , and it’s time to configure DP to support PXE boot
Go to Administration / Site Configuration / Servers and Site System Roles Select your distribution point and right-click on the Distribution point role on the bottom, select Properties
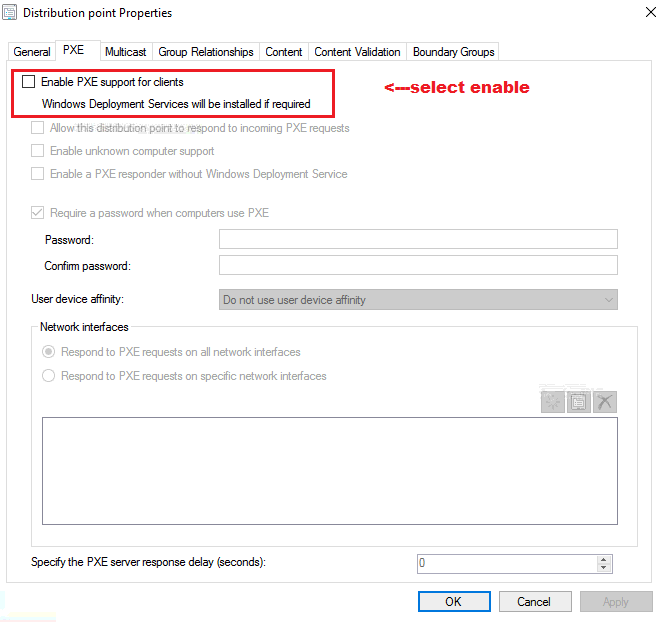
Select the PXE tab
Select the PXE tab Enable the Enable PXE support for Clients check-boxandanswer Yes when prompted about firewall ports (UDP ports 67, 68, 69 and 4011 )
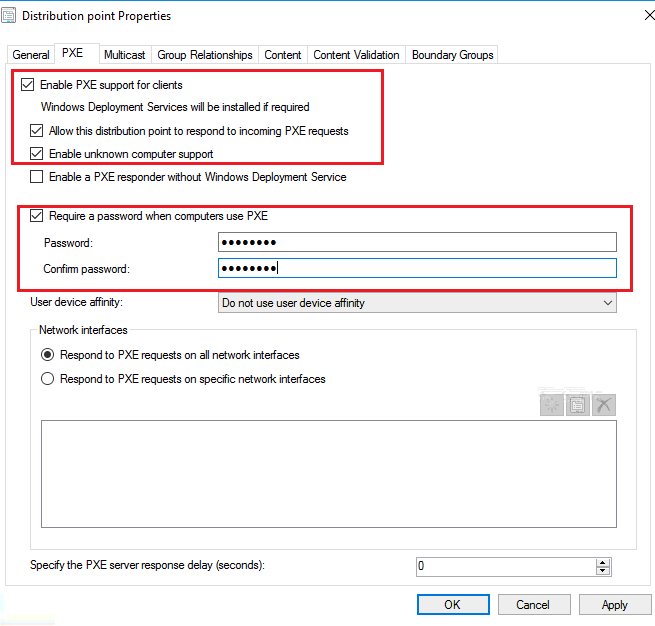
Check the Allow this distribution point to respond to incoming PXE requests check box Check the Enable unknown computer support check box Ensure that the Respond to PXE request on all network interfaces is selected Click OK
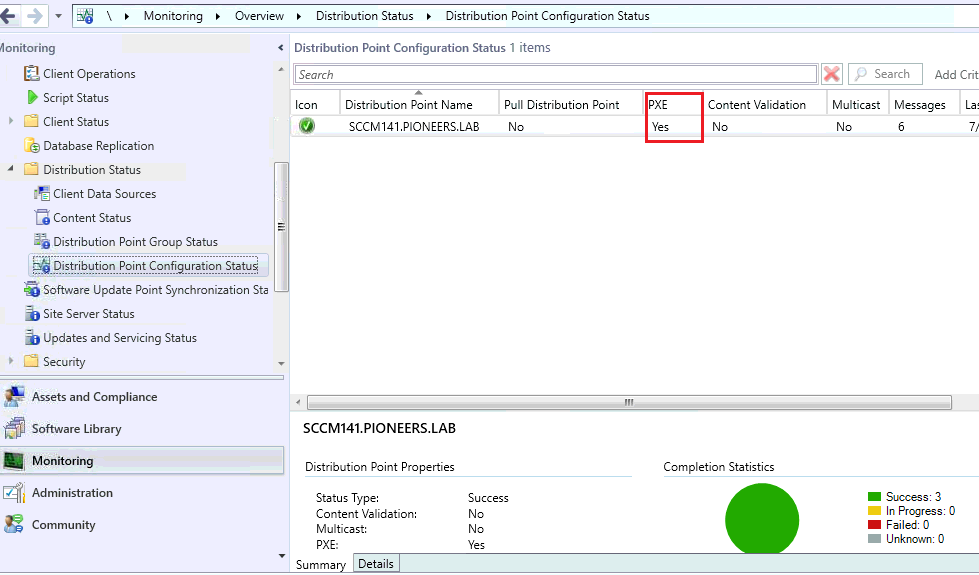
Go to Monitoring / Distribution Status / Distribution Point Configuration Status Click your distribution point on the top and select the Details tab on the bottom We will see that the distribution point PXE settings has changed
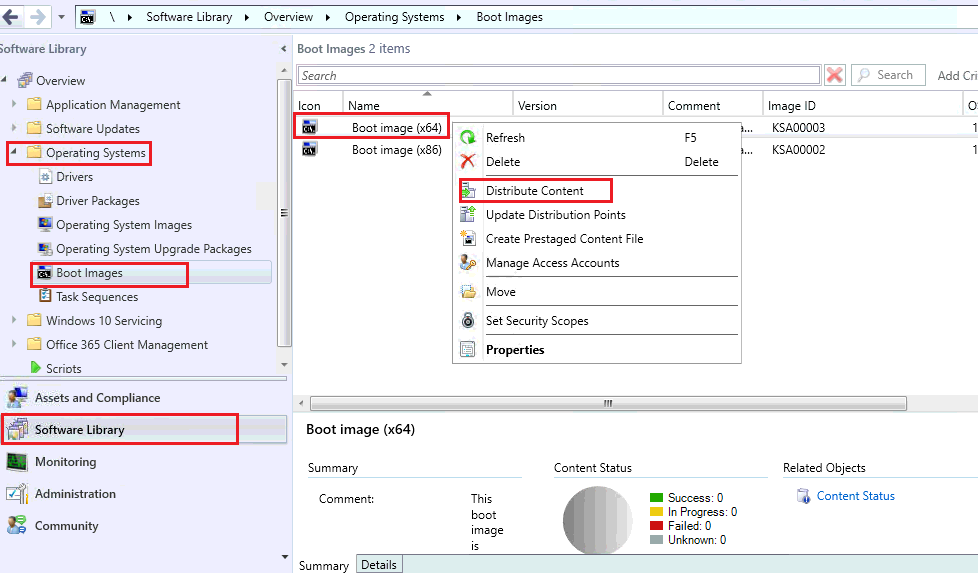
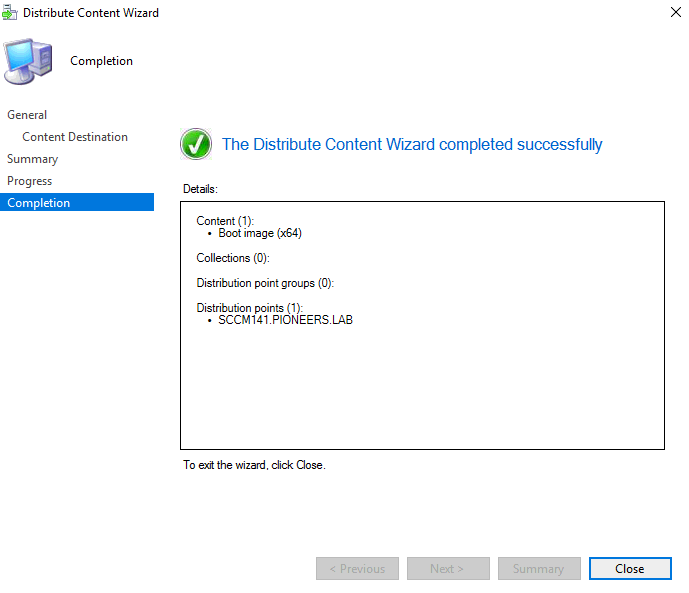
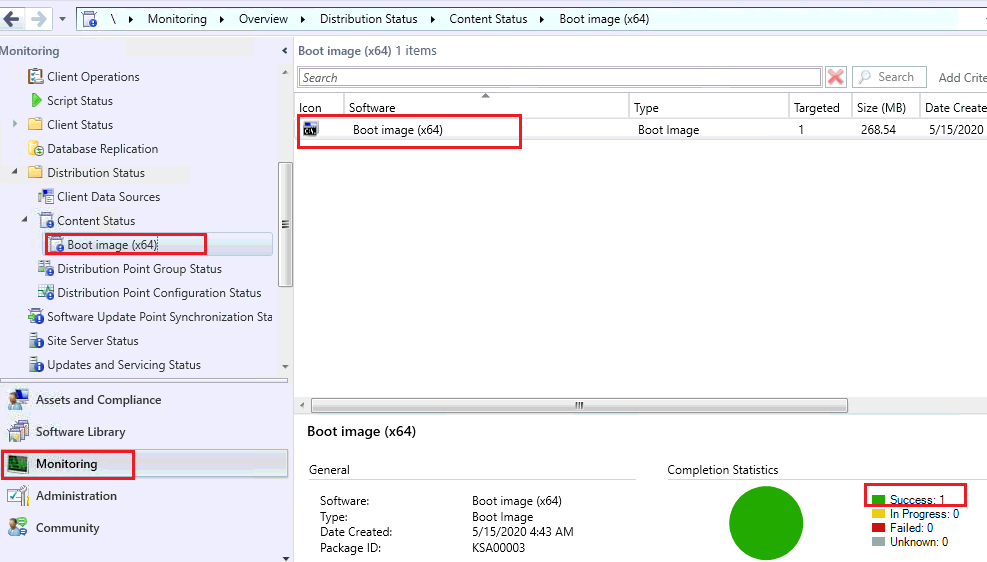
BOOT Image Distribution
our OS to deploy will be windows 10 64 bit >> SO ,,,, we will select boot image x64bit to distribute
Go to Software Library / Operating Systems / Boot Images, Right-click Boot Image (X64) and distribute to DPs.
selec DP server which is same SCCM since we have ONLY one server
DONE 🙂
boot image distributed successfully
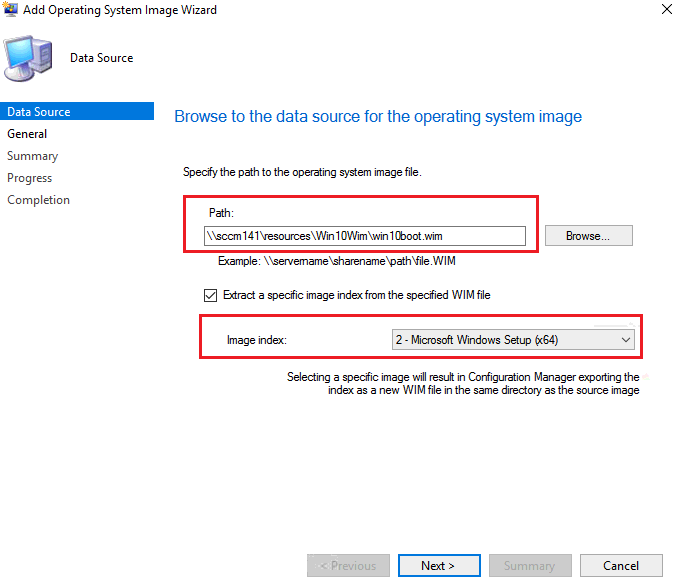
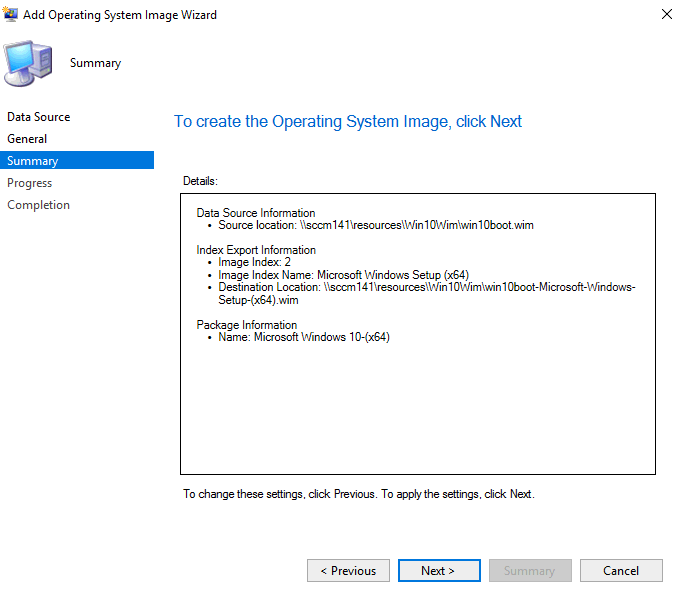
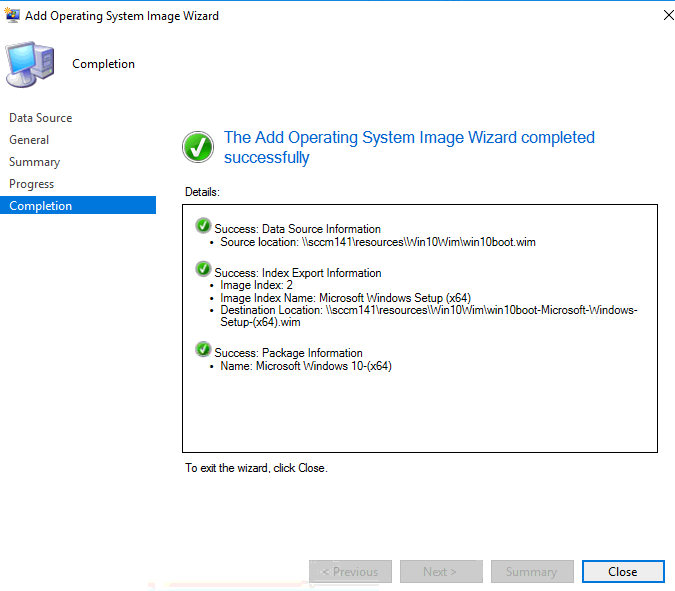
Add Operating System Image
is step above we add boot image with is x64bit
now we will add OS image which .wim file [ come with SCCM media [
Launch the Configuration Manager console, click on Software Library, click Operating Systems, right click on Operating systems images and click on Add Operating System Image.
select add OS image
seelct file .wim path and image index
set name for OS image
review and accept
done
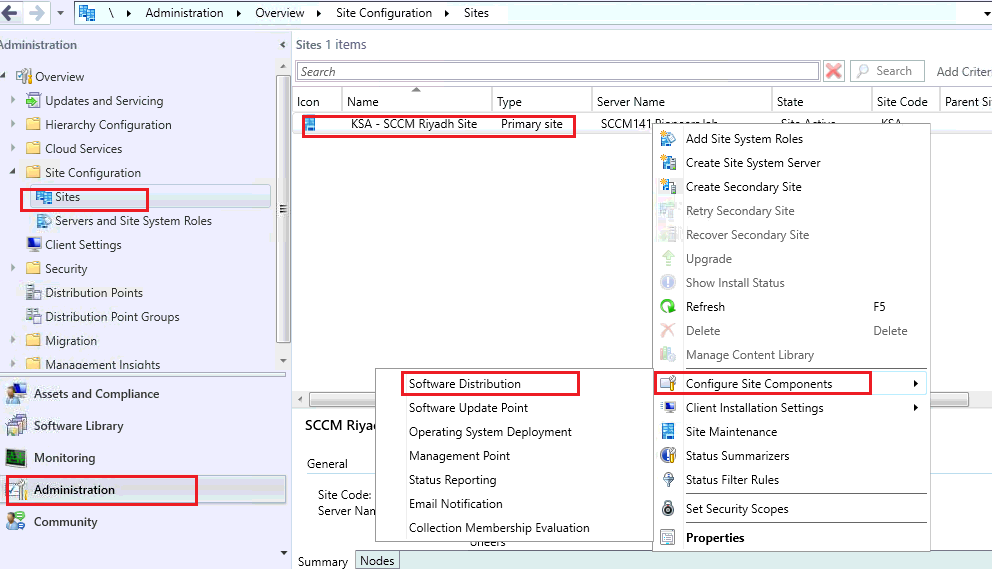
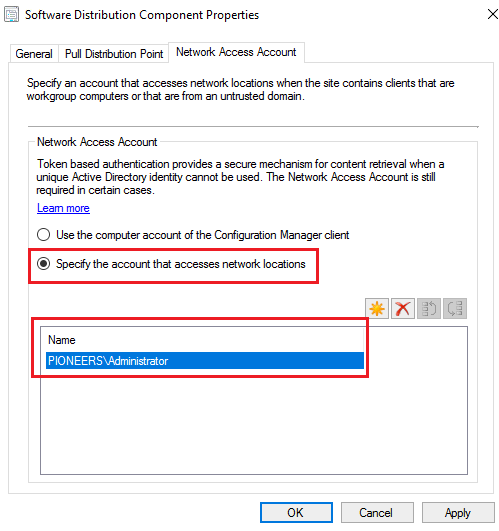
configure software distribution point
in this step we can set account that is responsible for network access
you set an domain y account
BUT ,,,,
here in Network pioneers will use pioneers\administrator to save time
select software distribution
from [network access ] TAB > select account
Conclusion
in this article : we have discussed how to prepare SCCM server to deploy OS image
next article we will see how to deploy OS image to client computer to install windows 10