WordPress on SLES Part II : WordPress installation

Suse

introduction

in previous article : we have successfully installed and configured LAMP [Linux ,Apache ,MySQL ,PHP]

all with text command 

in this article part 2  with text command also  ,we will :

  • Create and configure Maria database for WordPress
  • Download WordPress
  • Install WordPress
  • Customize our site


Please remember WordPress requires [Apache, PHP and MySQL]

So …   make  sure all step in article part 1 are done successfully

WordPress Network Diagram

Network Diagram

before Diving into configure wordpress 

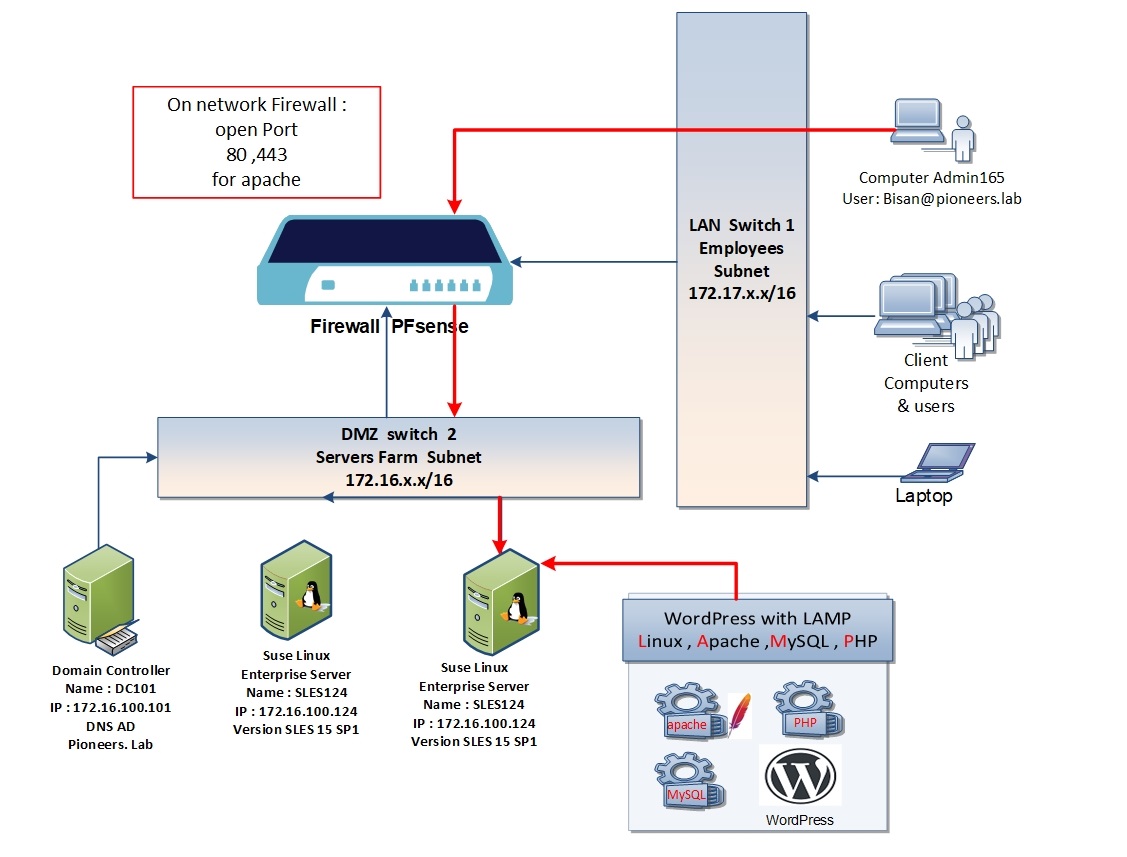
let us to have a look to above network diagram

SLES124 will be configured as :

  • apache HTTP server > Done
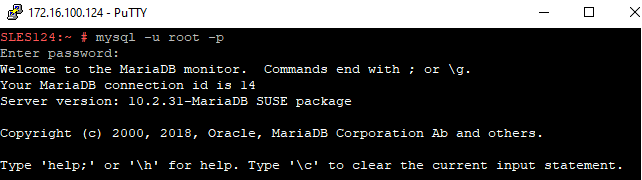
  • MySQL as Database Server >DOne
  • PHP scripting Lang server >Done
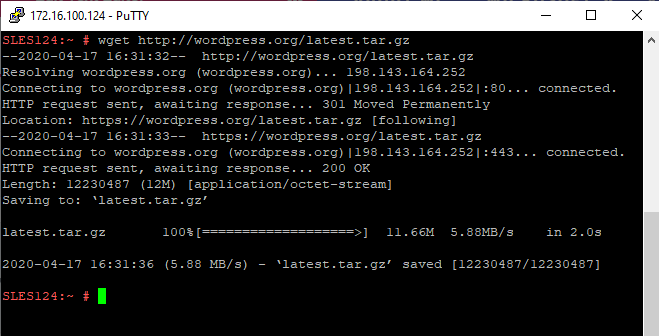
  • WordPress as CMS Content Management System > in this article 


since SLES124 in DMZ [servers farm] : we we have to consider network firewall [which is PFsense in our case  ]

Step 01 create Maria Data base

in previous article we have successfully installed MySQL >

now just we will create Database called hr > since we will create web site for HR department 

use command to login to MySQL command prompt 

mysql -u root -p 

then provide credential 

For Better View > Open Image in different TAB

create database called hr01 > since we will create website for HR department (for example )

CREATE DATABASE hr01;
For Better View > Open Image in different TAB

create user called wp admin which will be responsible to manage DB hr01 

CREATE USER 'wpadmin'@'localhost' IDENTIFIED BY 'wppassword';
For Better View > Open Image in different TAB

now grant user wpadmin full privileges on DB hr01 

GRANT ALL PRIVILEGES ON hr01.* TO 'wpadmin'@'localhost';e
For Better View > Open Image in different TAB

finally flush database privileges 

FLUSH PRIVILEGES;
For Better View > Open Image in different TAB

Download latest WordPress from official site,

we can use browser [chrome of firefox] to download latest version from wordpress.org 

but today we will learn to use grate command tool called [wget]

this tools is NOT installed 

so … first we will install it 

zypper install wget
For Better View > Open Image in different TAB

now use wget to download latest version of wordpress 

wget http://wordpress.org/latest.tar.gz
For Better View > Open Image in different TAB

file is compressed > just extract it 

tar -zxvf latest.tar.gz
For Better View > Open Image in different TAB

move wordpress to folder htdocs

/srv/www/htdoc is the default folder for website > its equevilant  to fodler [wwwroot] in microsoft IIS 

mv wordpress/* /srv/www/htdocs
For Better View > Open Image in different TAB

then copy wp-config file 

cp /srv/www/htdocs/wp-config-sample.php /srv/www/htdocs/wp-config.php
For Better View > Open Image in different TAB

edit wp-config file

since we have installed graphic desktop environment on SLES previously > we can use default GNOME to open file wp-config : and you are free to use it 

but let us to supposed that SLES is fully text command and X11 is NOT installed 

SLES have grate text editor tool called [vim]

it’s NOT installed > let us to install it 

zypper install vim 
For Better View > Open Image in different TAB

now it’s time to edit wp-config file with vim text editor 

vi /srv/www/htdocs/wp-config.php

set the following parameter

  • define( ‘DB_NAME’, ‘hr01’ );
  • /** MySQL database username */
    define( ‘DB_USER’, ‘wpadmin’ );
  • /** MySQL database password */
    define( ‘DB_PASSWORD’, ‘wppassword’ );
  • /** MySQL hostname */
    define( ‘DB_HOST’, ‘localhost’ )
For Better View > Open Image in different TAB


Make the apache user as the owner to WordPress directory.

chown -R wwwrun /srv/www/htdocs


For Better View > Open Image in different TAB

install WordPress

wordpess package is downloaded  and extracted ,as we see above on /srv/www/htdocs 

to install wordpress : just open browser 

htt://SLES124 or  http://172.16.100.124

then follow wizard 

to be continue 


For Better View > Open Image in different TAB