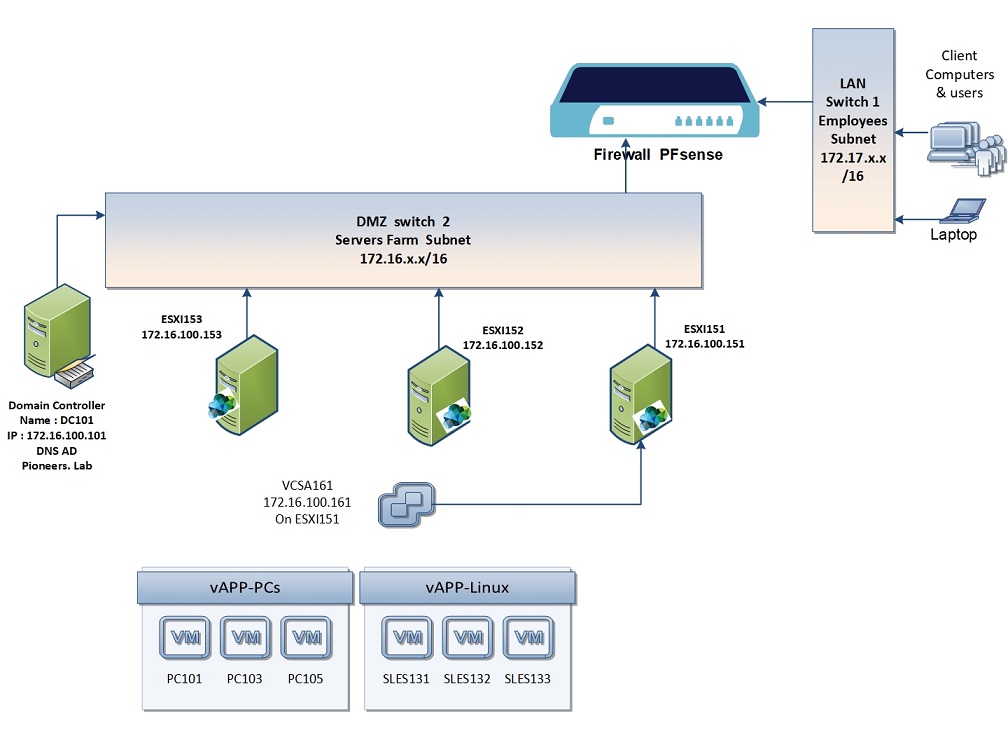
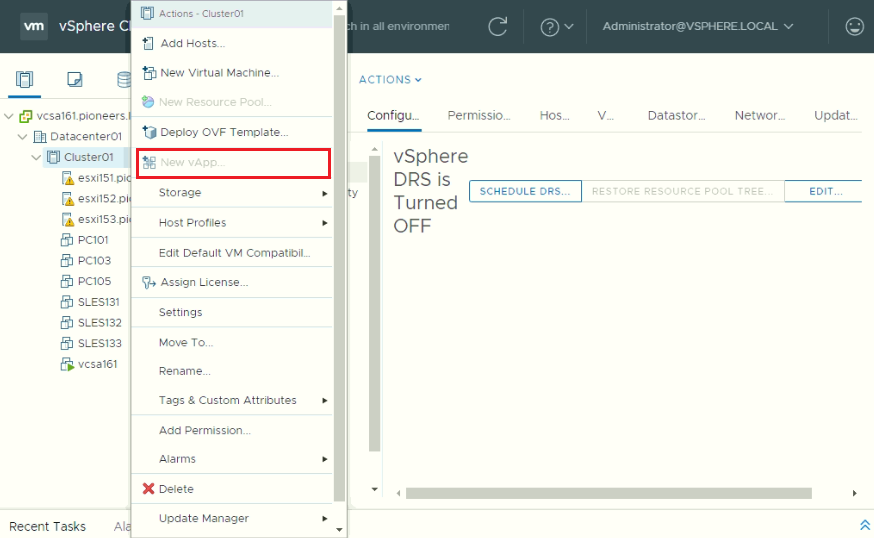
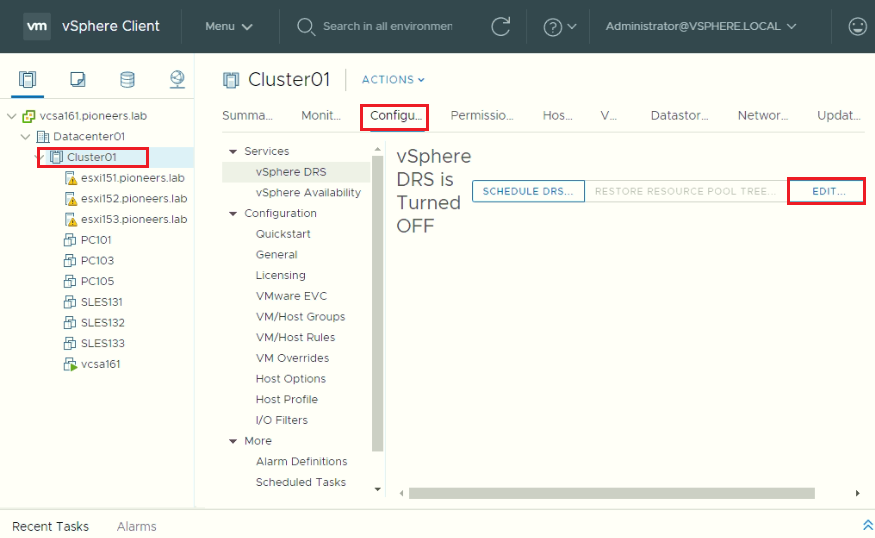
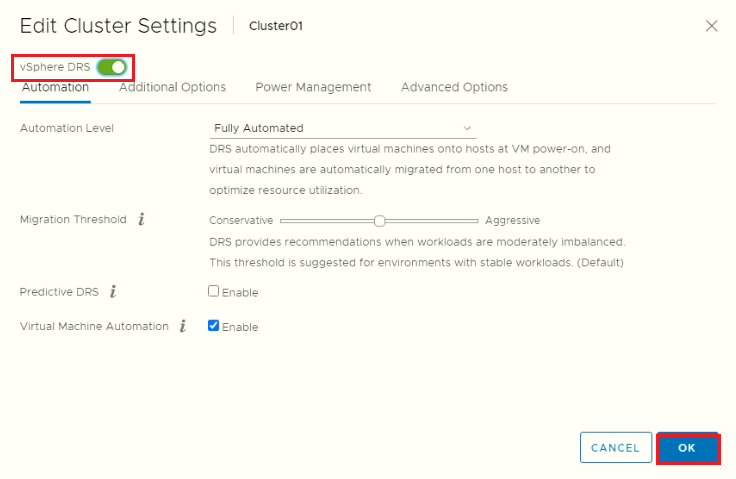
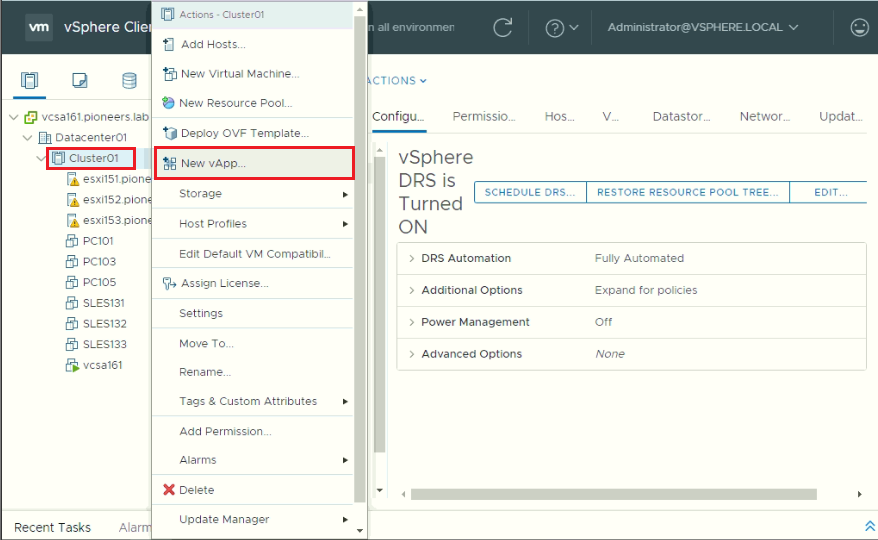
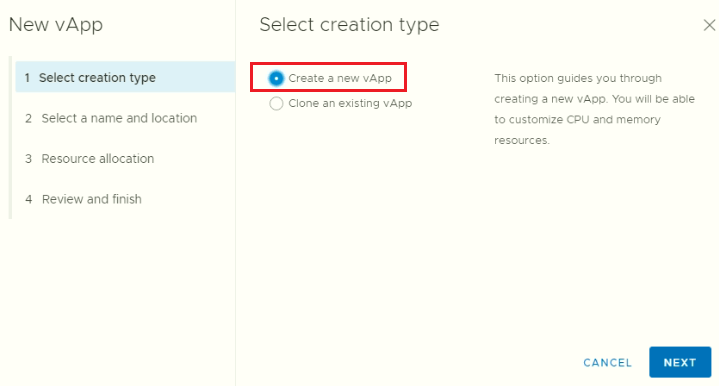
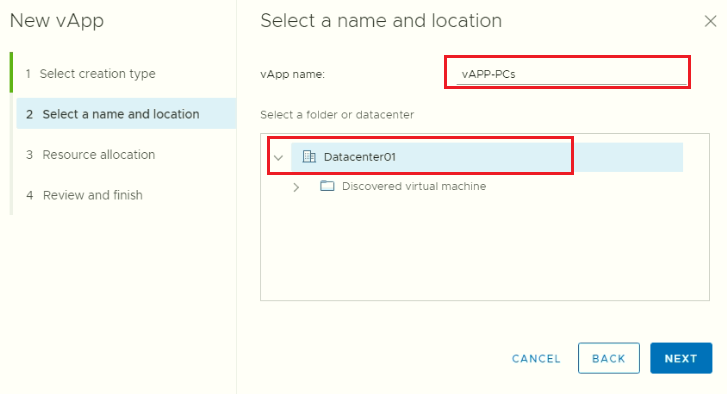
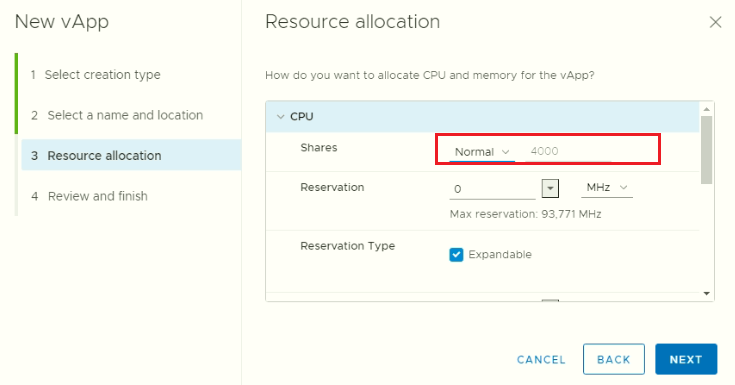
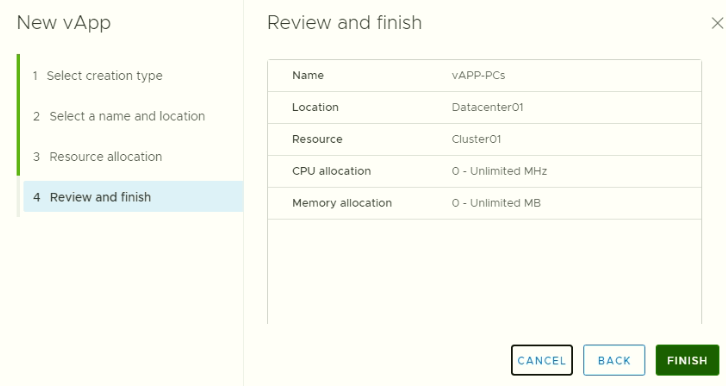
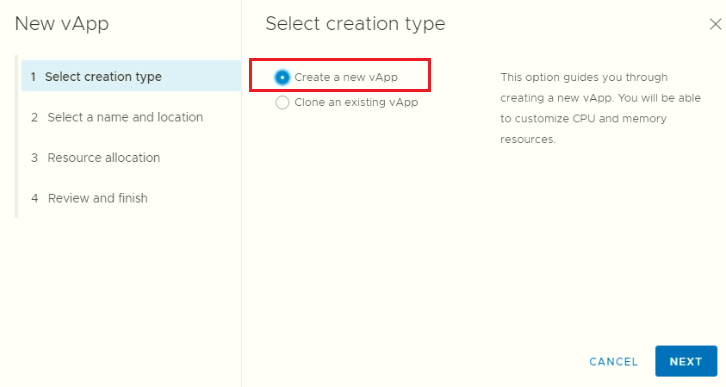
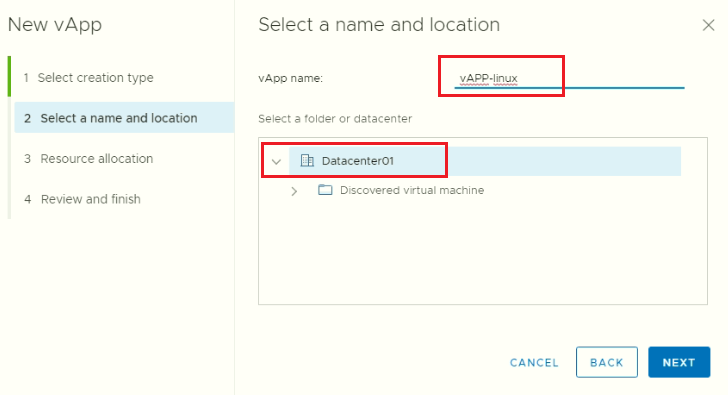
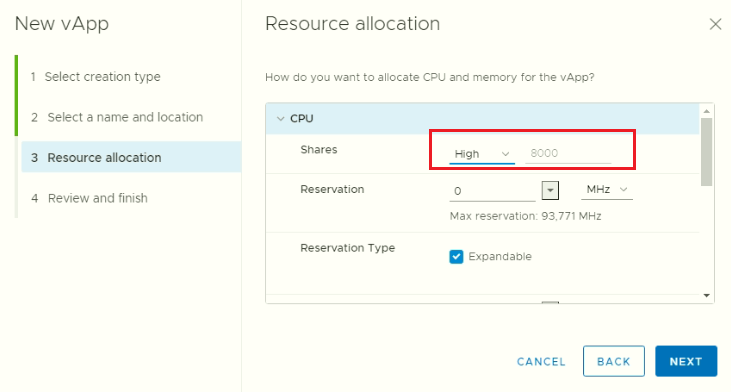
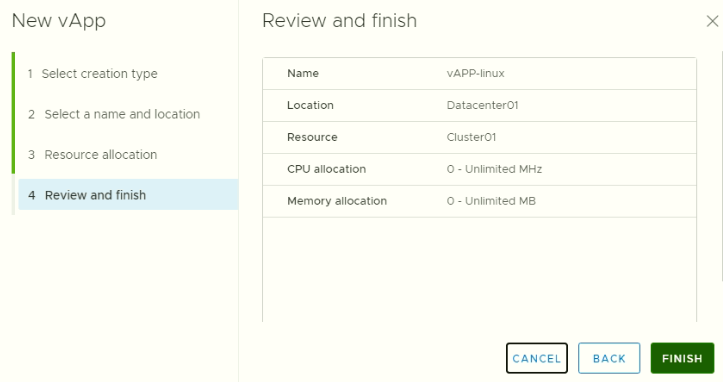
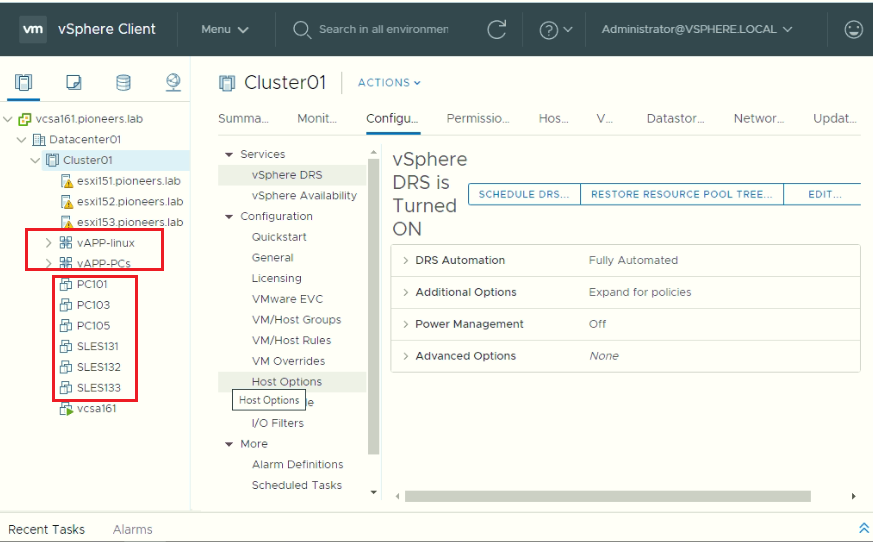
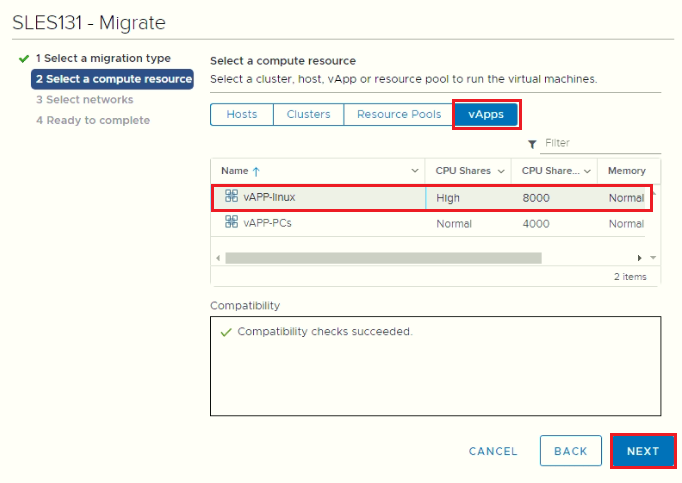
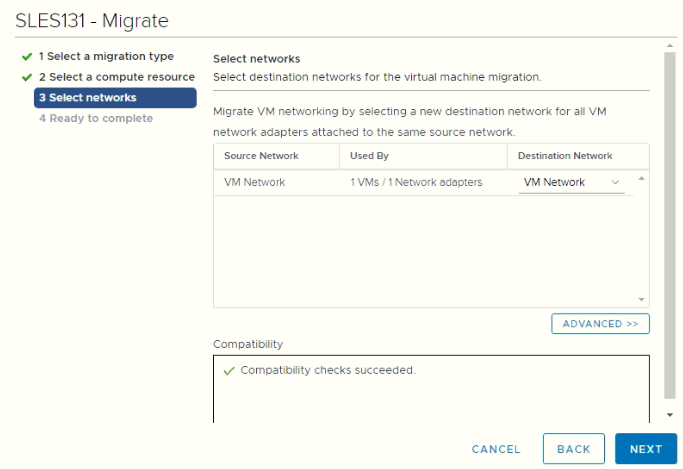
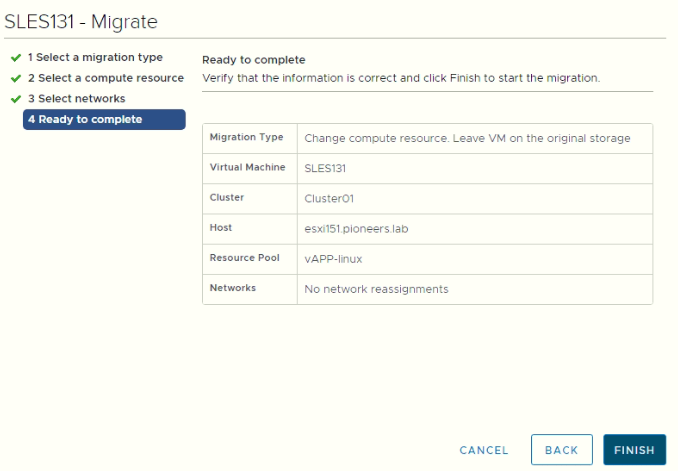
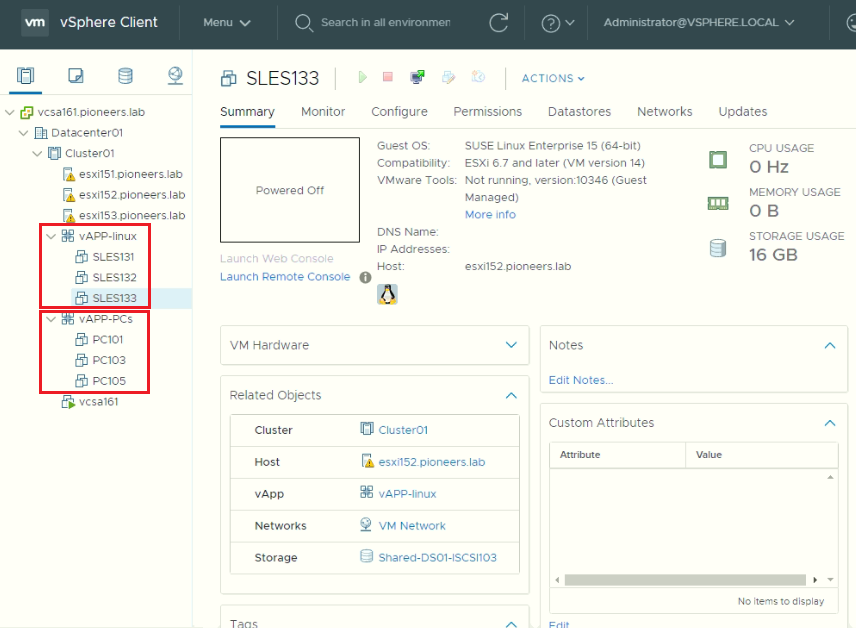
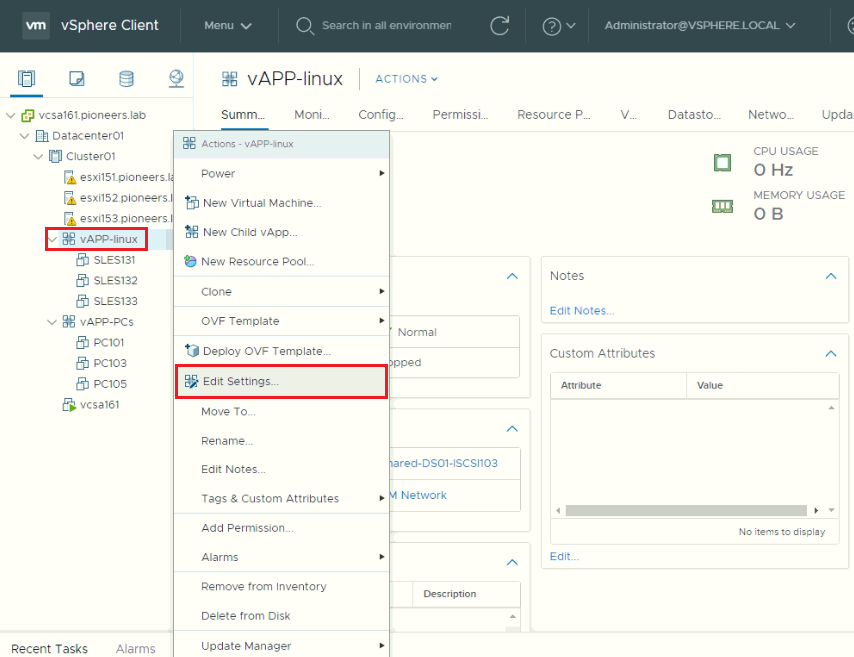
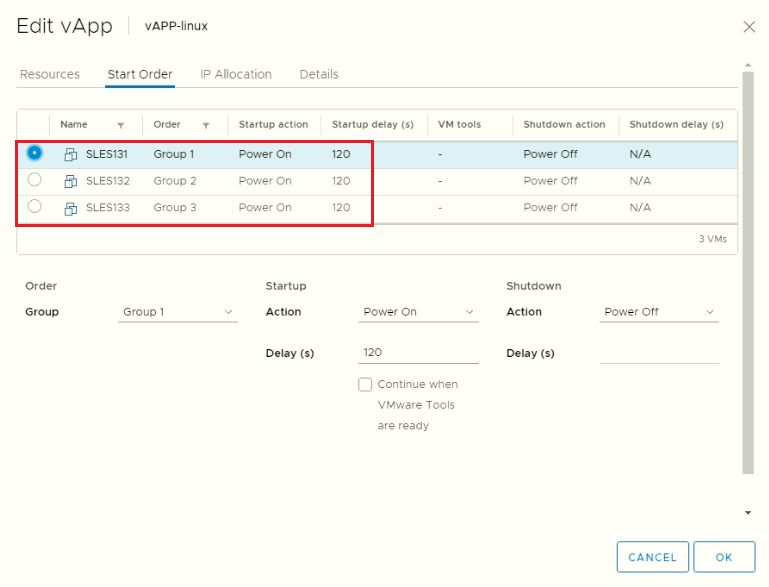
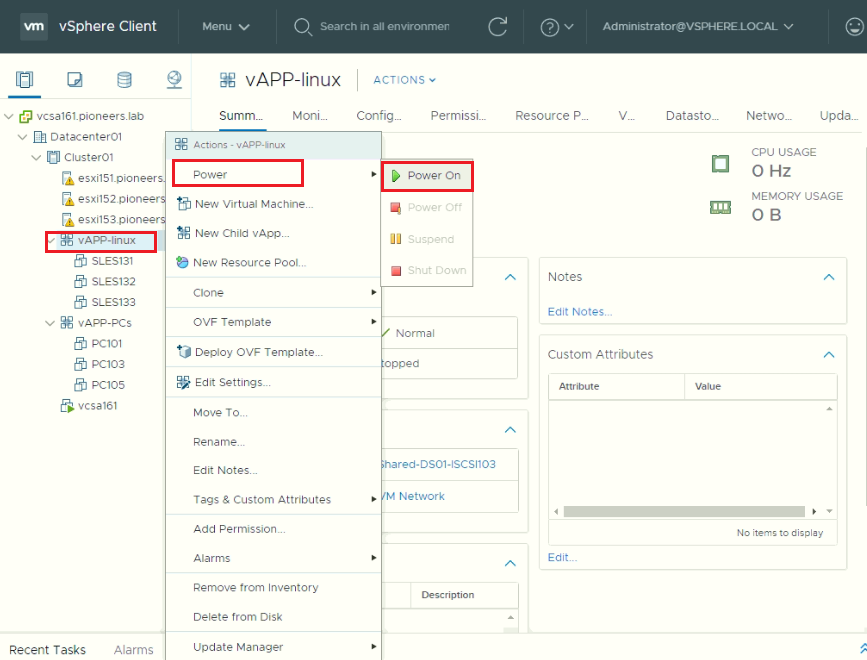
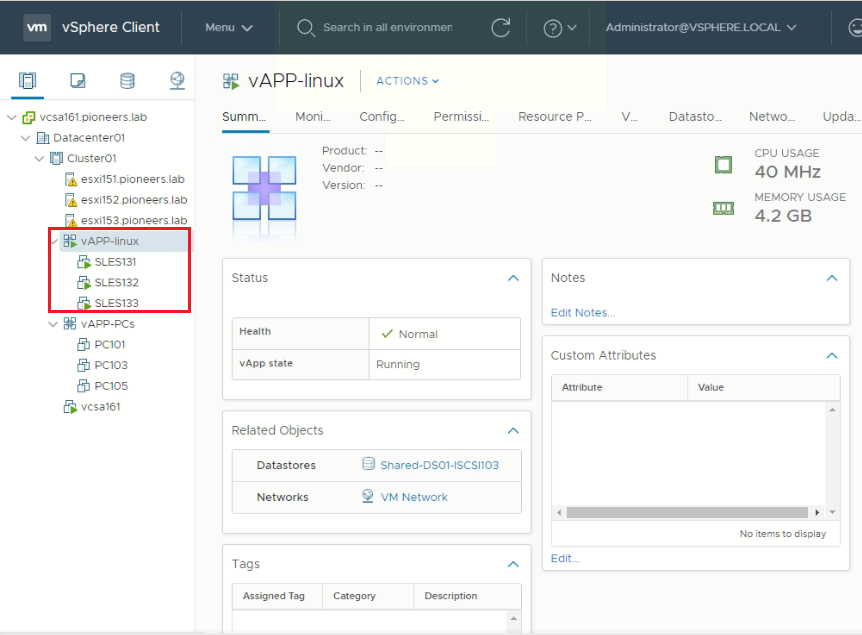
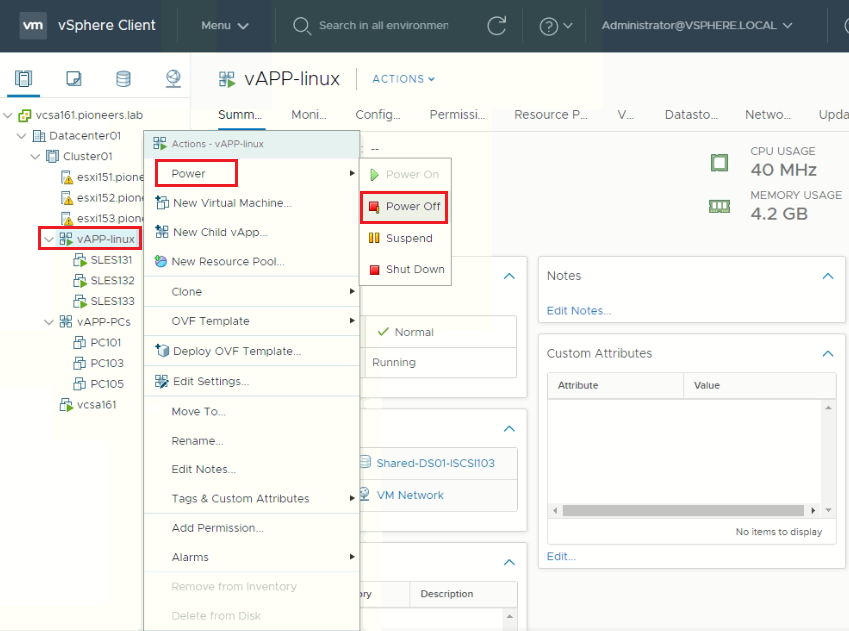
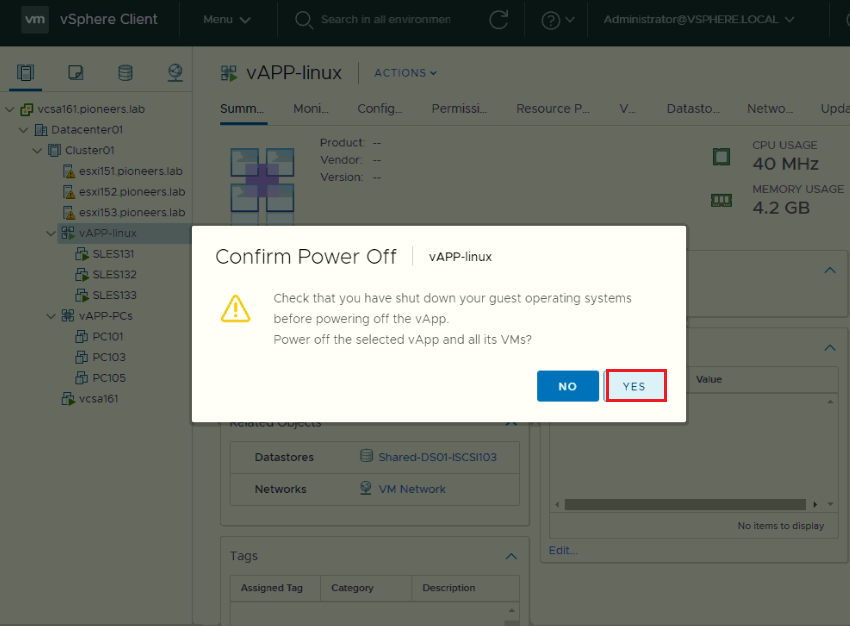
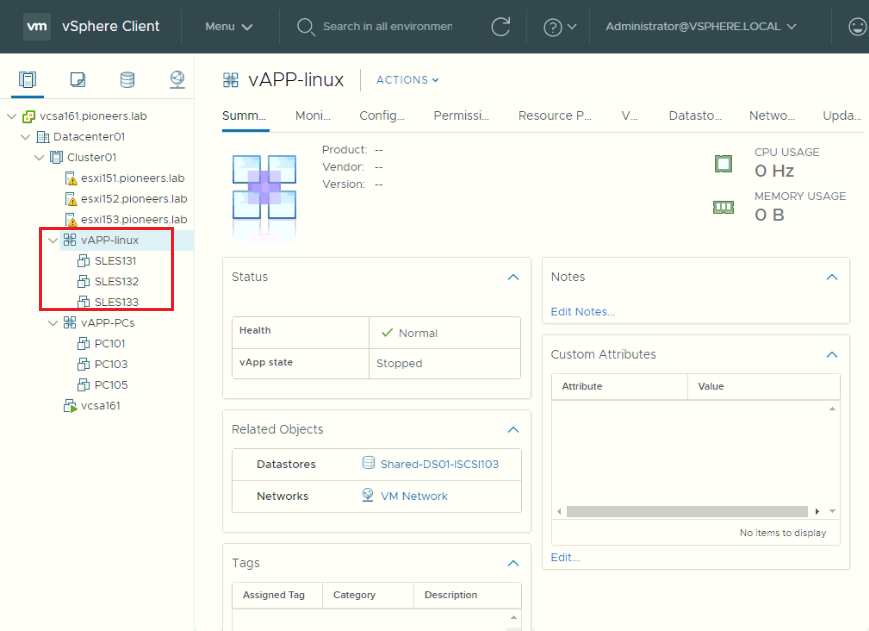
vAPP Part II : Configure and Manage vSphere-O&S July 3, 2020July 4, 2020 maher islaieh introduction VApps allow VMs to work together in a stack as an application, and support cloud computing architecturesin previous article we got introduction about vAPP beforethis article we will discuss how to configure it in pioneers LAB network diagram For Better View > Open Image in different TAB For Better View > Open Image in different TAB please have a look to above network diagram we have vsphere environment which include 6 Virtual machines :3 windows 10 VMs :PC101 PC103PC1053 Suse Linux VMs :SLES131SLES132SLES133we will create 2 vAPP :vAPP-PCs with normal option and contain windows 10 VMs vAPP-Linux with High option and contain Suse Linux VMs vAPP requirements In order to use vApps You will need:VMware vCenterDRS enabled enable DRS as we mentioned above :we have to enable DRS Distributed Resource Scheduler on cluster levelby default DRS is disabledso we are unable to create vAPP as seen below For Better View > Open Image in different TAB to enable DRS : open vCenter > cluster > configure > DRS > edit > enable DRS For Better View > Open Image in different TAB enable DRS Create vAPP after we enable DRS : we can create vAPP right click on cluster > new vAPP new vAPP create new vAPP set vAPP name : vAPP-PCs set share to normal finish again to create vaPP-linux create new vAPP set name and location set share to high finish two vAPP created > but still VMs outside vAPP move VM to vAPP after we created vAPP : its time to move each VM to it’s vAPPwe will move SLES131 to vAPP-linux right click on VM > migrate migrate from vAPP TAB > select vAPP-linux next finish repeat same step to move ALL VMs to desired vAPP final shape set VM power-on /power-off order in vAPP now vAPP is created and VMs moved inside we can set order of power-on OR power-off VMs right click vAPP > edit settings right click vAPP > edit settings set your VMs order for power-on power-on / power-off VMs in vAPP to test vAPP functionality : we can click power-on vAPP : which will shutdown ALL VMs inside vAPP based on order power-on vAPP VMs powered-on with latency 120 second between each VM also we can power-off ALL VMs in vAPP based on order accept warning message ALL VMs in vAPP shutdown