in previous article : we have got some brief intro about vCenter
and we differentiate between [basic installation] VS [best practice deployment ]
in this article we will start installation vCenter 6.7 as VCSA
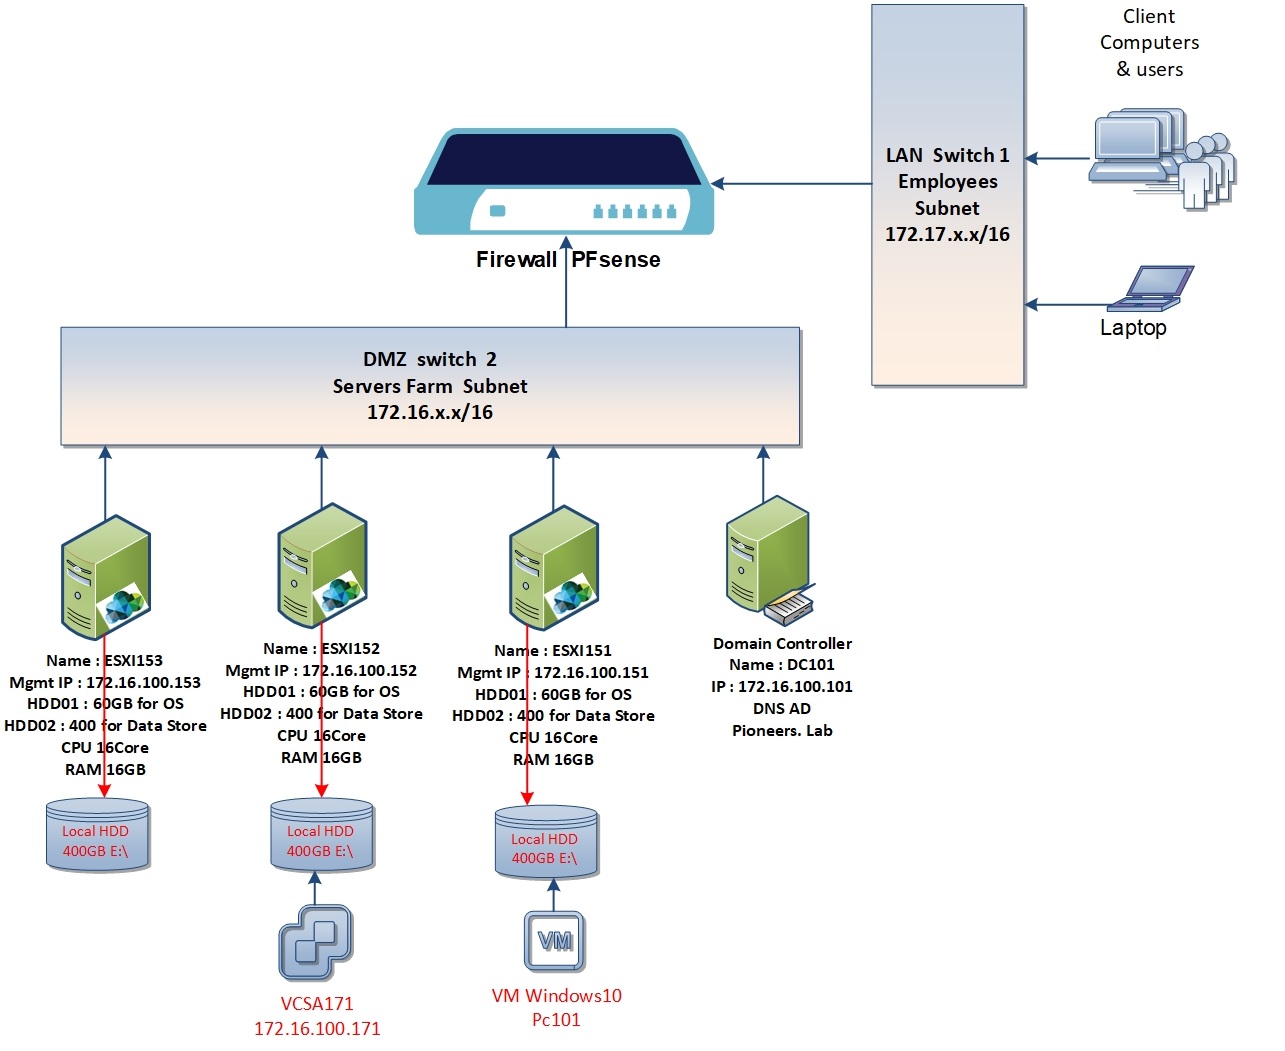
it’s good idea to look at network diagram below
For Better View > Open Image in different TAB
we have 3 ESXI servers as the following
ESX151 with IP 172.16.100.151
ESX152 with IP 172.16.100.152
ESX153 with IP 172.16.100.153
each server has the following:
HDD 60 GB for OS ,
HDD 400 GB for Datastore
2 CPU x 8 core = 16 core
16 GB RAM
8 NIC : first NIC assigned for management , and the other remain for advanced usage like [vMotion , ISCSI Adapter , vSAN , VM traffic …etc]
ESXI151 currently has VM installed in Datastore called [Windows10 VM ]
so …. we will install vcenter on ESXI152 and call it VCSA171
VCSA installation requirements
hardware requirements for Tiny environment (up to 10 hosts or 100 virtual machines) :
2 CPU
10GB RAM
300GB Storage
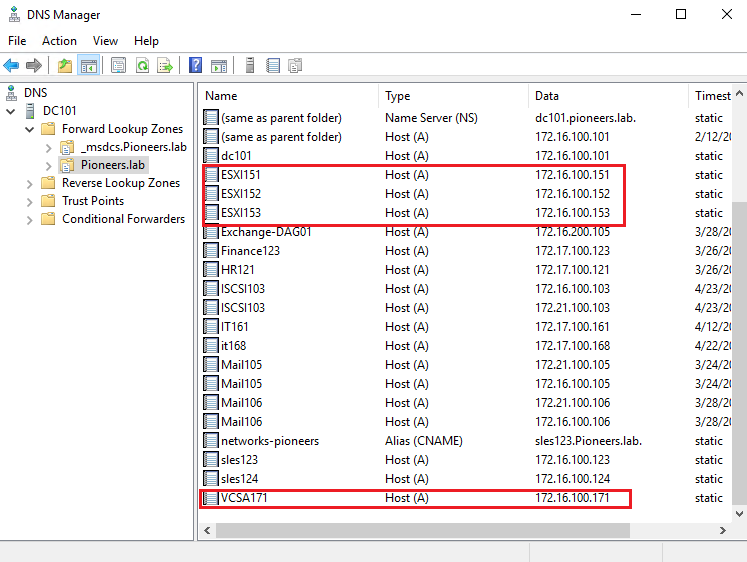
second step is to : register VCSA171 in DNS with IP address 172.16.100.171
and the third step is to open the oprt between LAN and server farm at network firewall : which PFsense
for update list of port please check vmware site here
now let us to check requirements before start installation
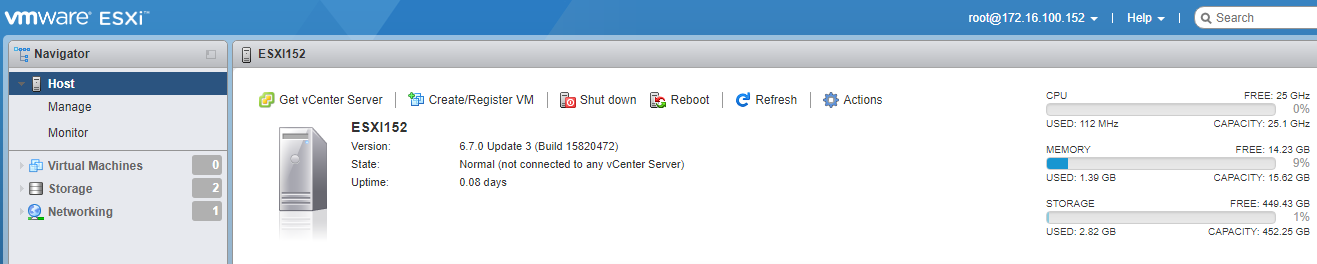
01 - ESXI151 Datastore
02 - ESXI151 hardware
03 - ESXI152 Datastore
04 - ESXI152 hardware
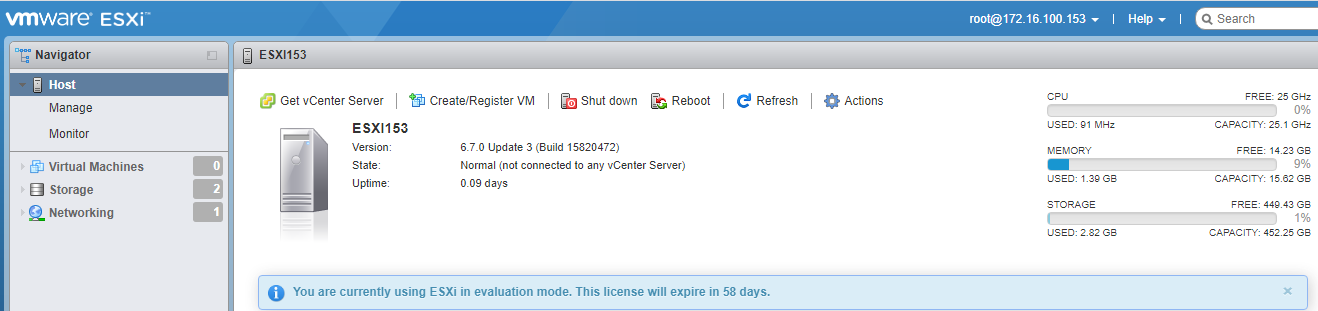
05- ESXI153 Datastore
06 - ESXI153 hardware
07- Check DNS record
VCSA installation steps
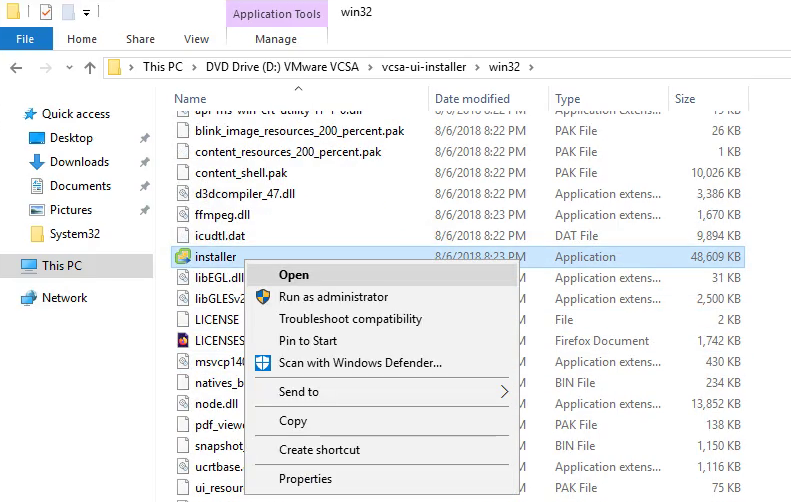
now insert VCSA installation DVD in you computer and open it to start VCSA installation as VM operating system
open DVD and run installation in path above
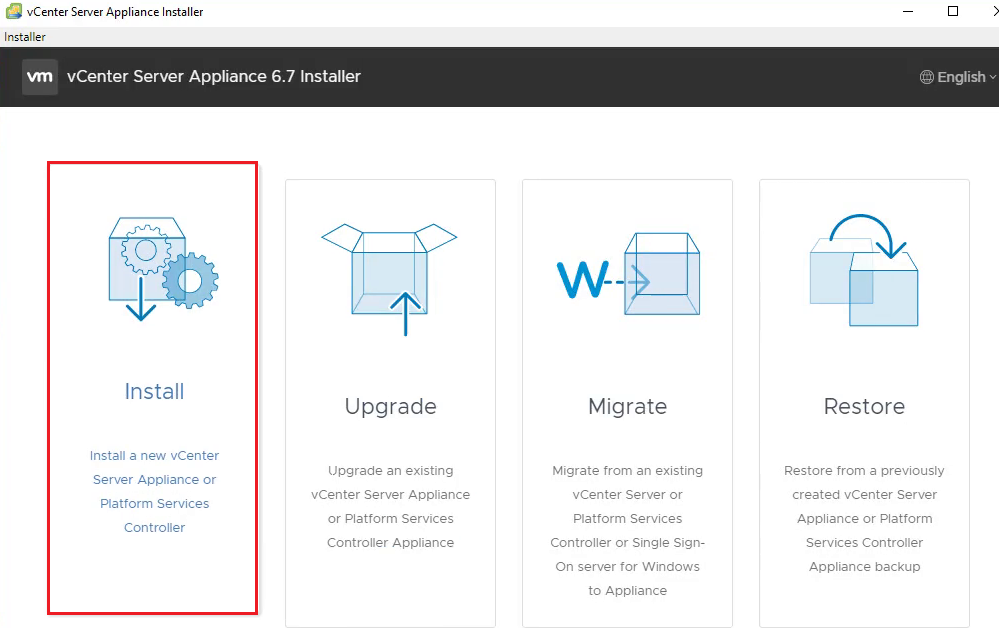
select install
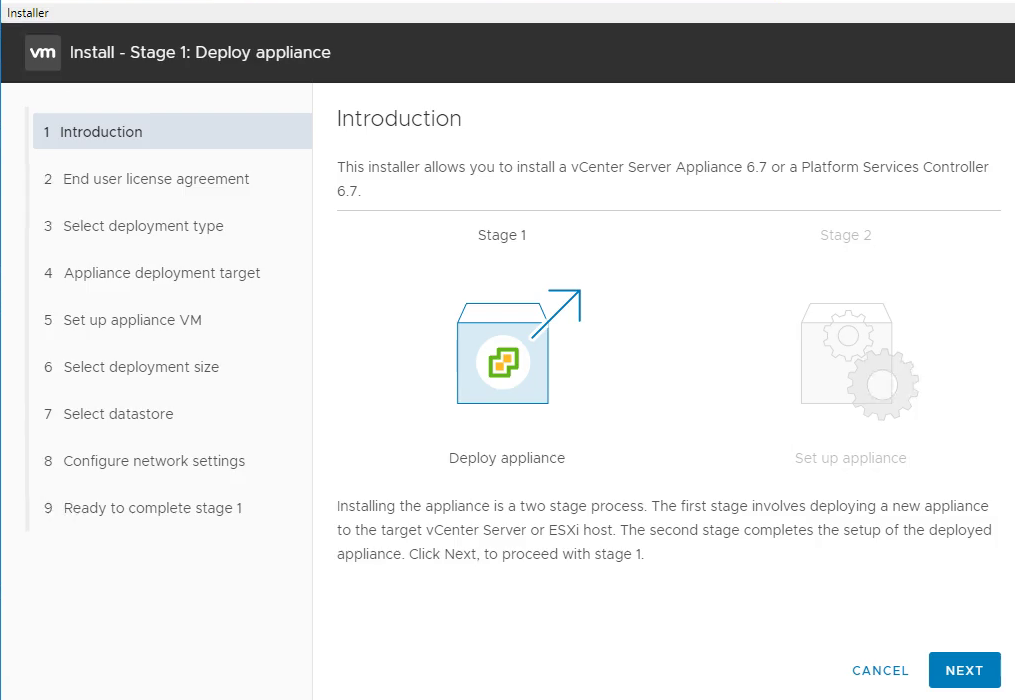
select next to deploy VCSA
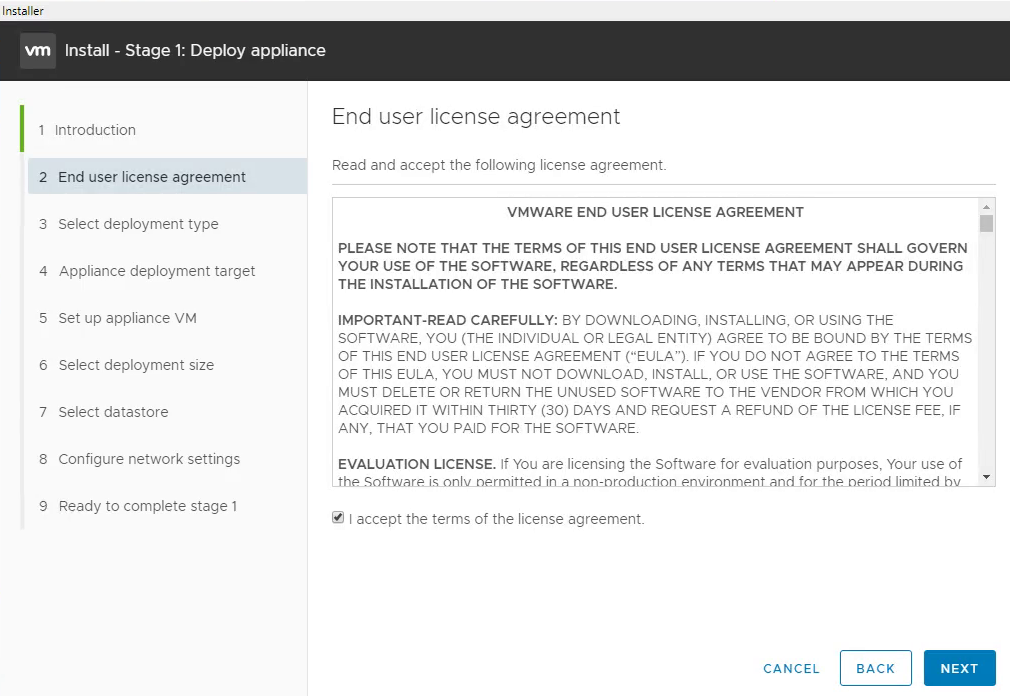
accept agreement
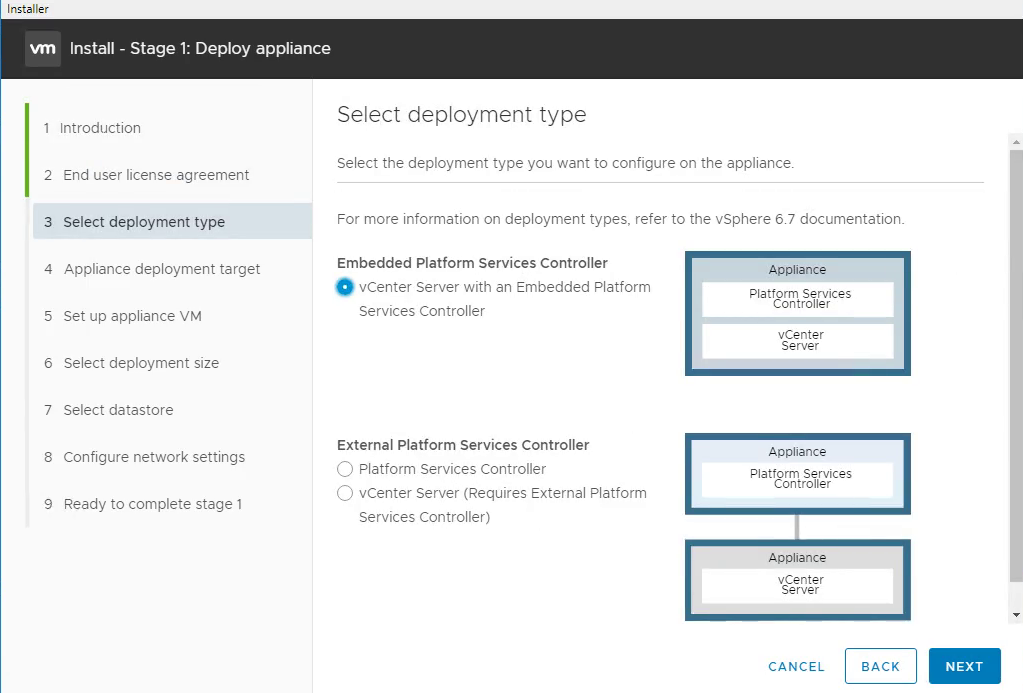
as we siad : PSC will be embedded in same VCSA since we have small environment [less than 100 ESXI hot 🙂 ]
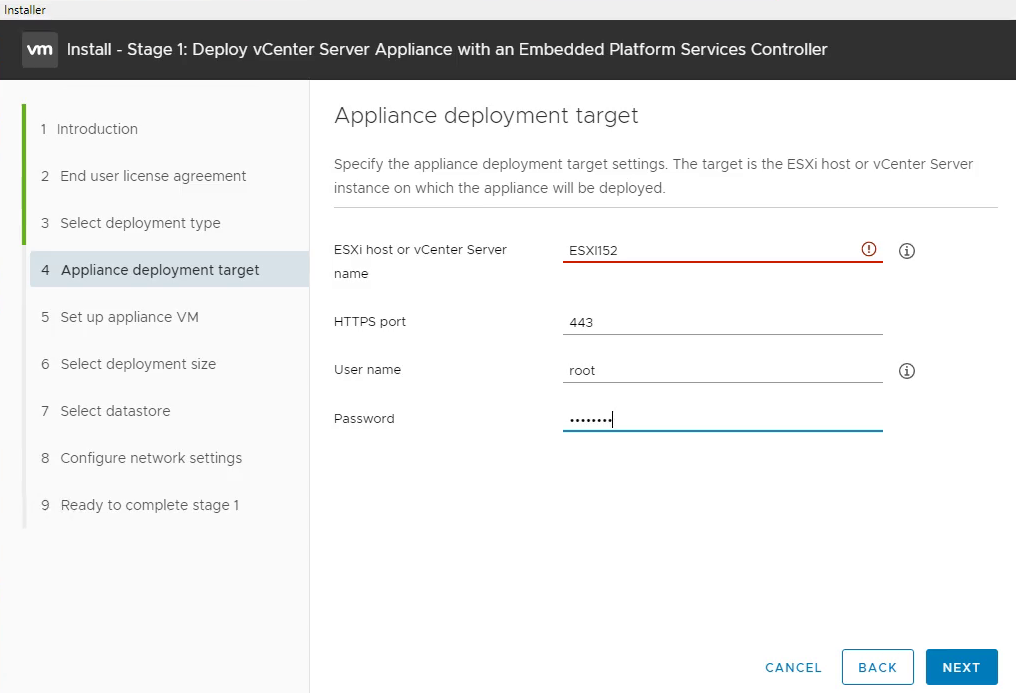
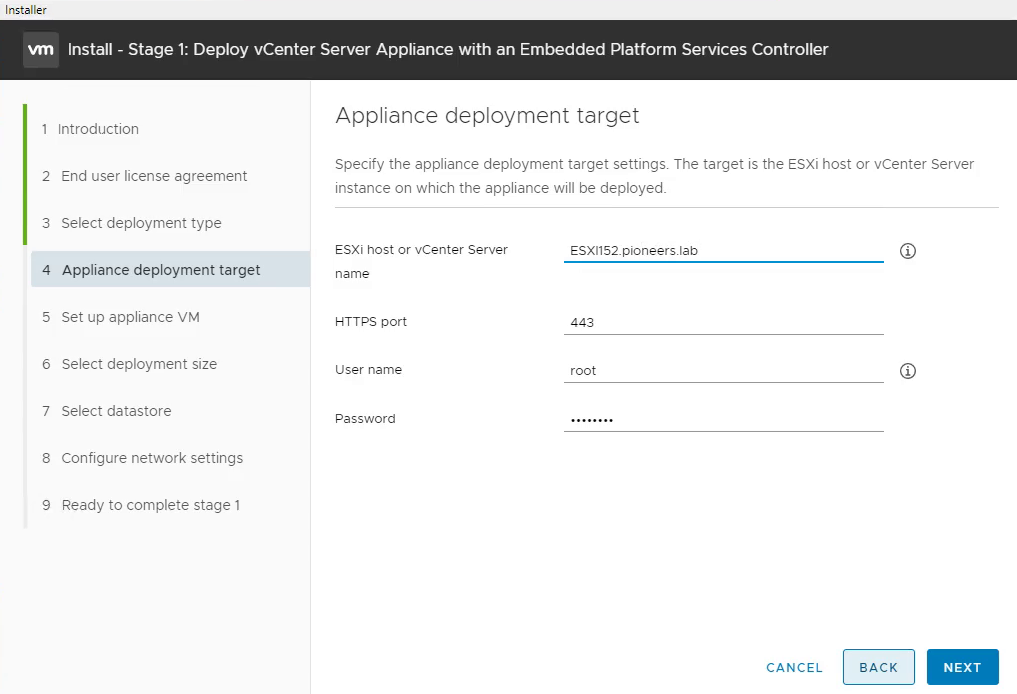
select ESXI target ESXI152 : please remember we should provide Full name FQDN
select ESXI target ESXI152 : please remember we should provide Full name FQDN
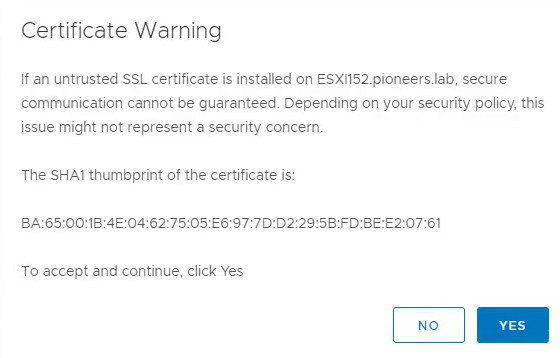
setup connect ot ESXI152 and check SSL certificate : accept
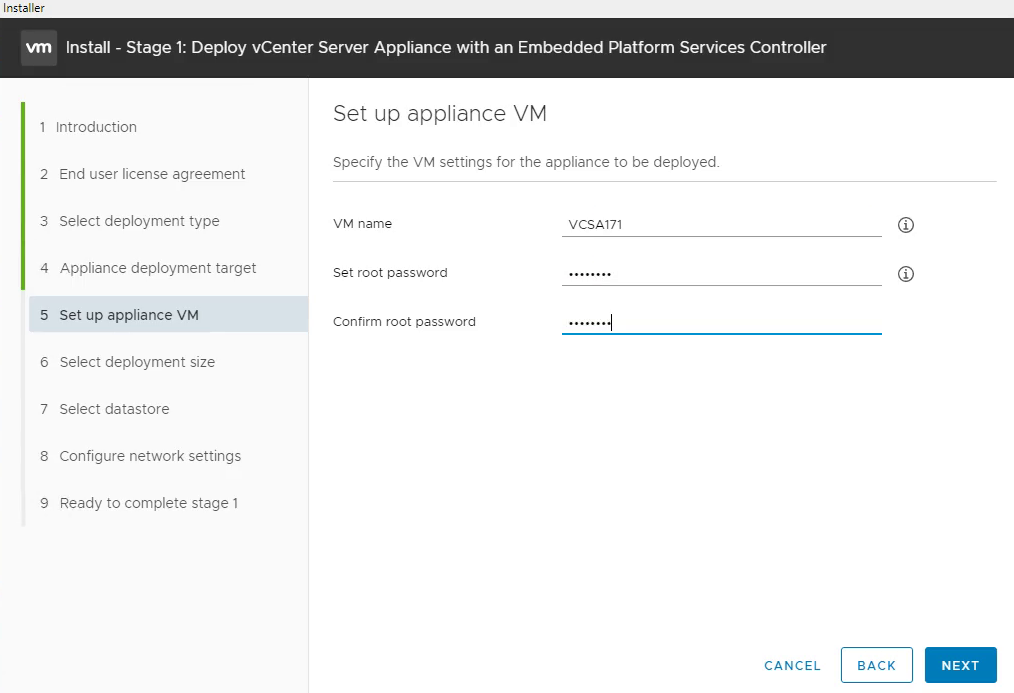
set VCSA name :VCSA171
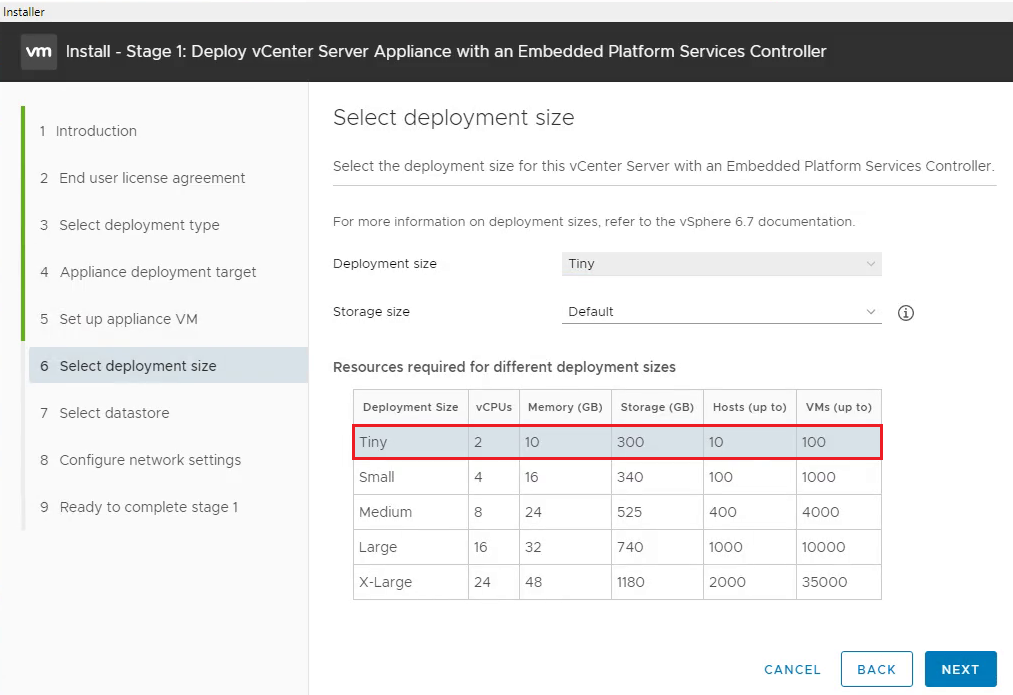
select tiny : less than 100 ESXI host
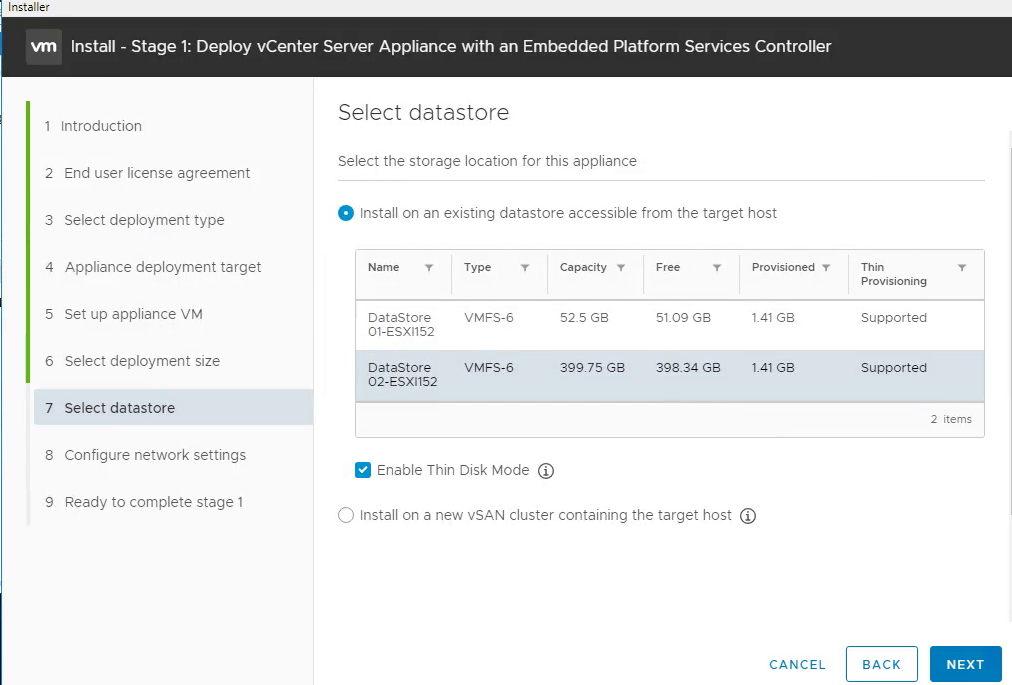
VCSA171 VM will be installed on Datastore02
set VCSA171 identity like name and ip address beside other settings
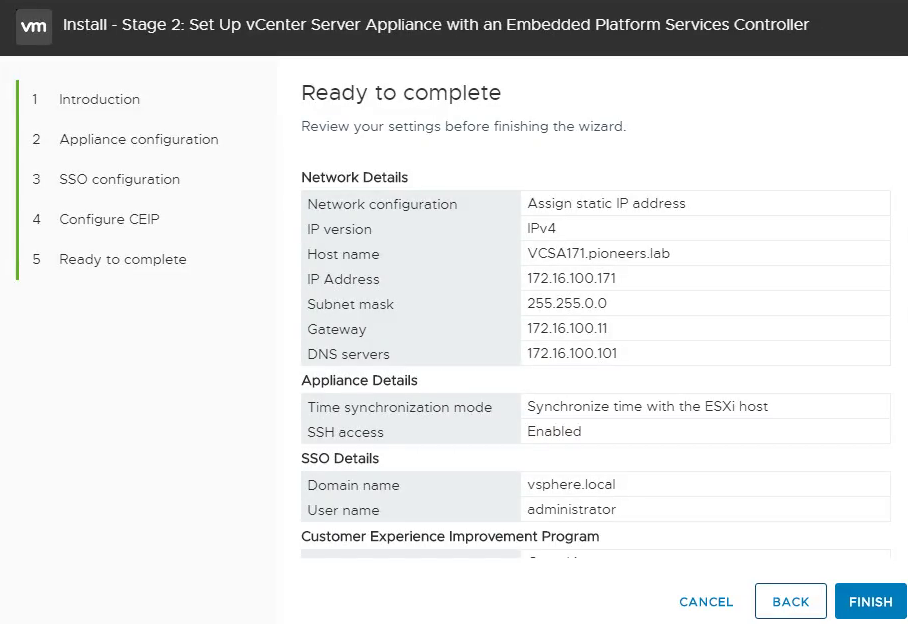
review settings and confirm
setup process
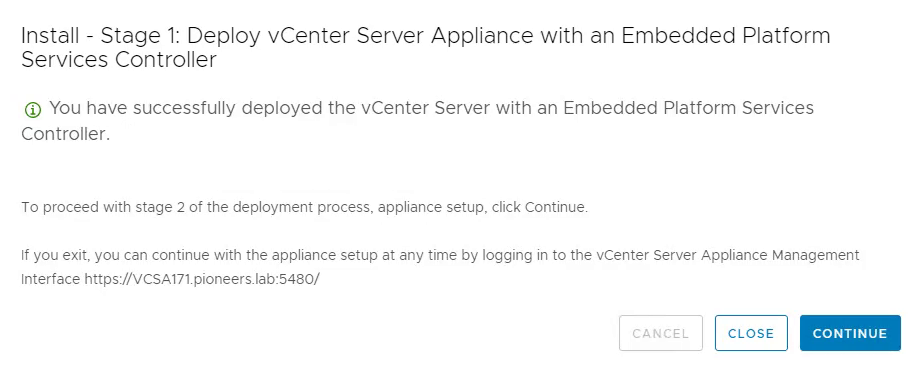
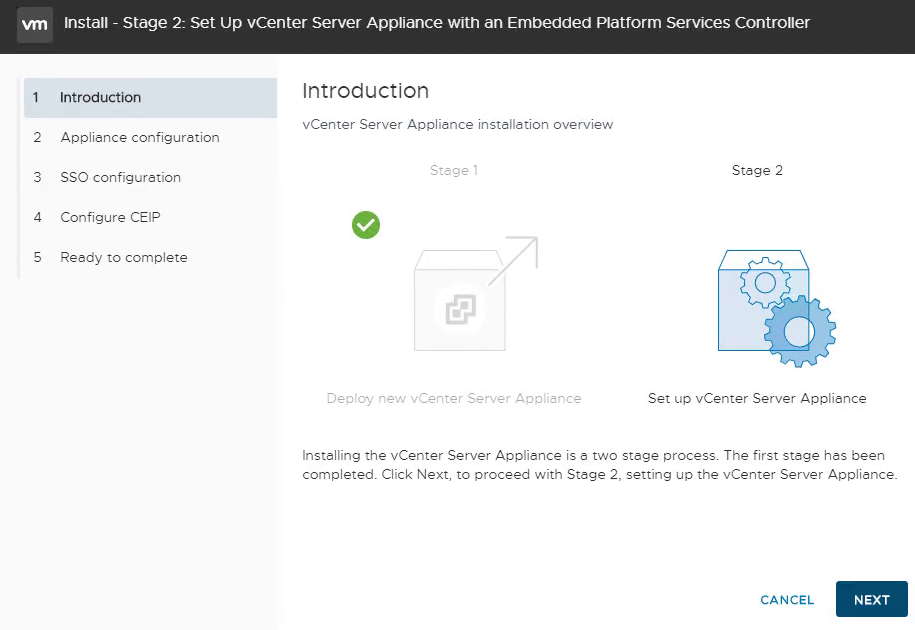
installtion VCSA as VM Done : moce to next process which is configure vcenter as application
configure vCenter Application
in previous section we have seen ho to install VCSA as VM operating system
now we will continue to configure VCSA171 as vcenter application
select next
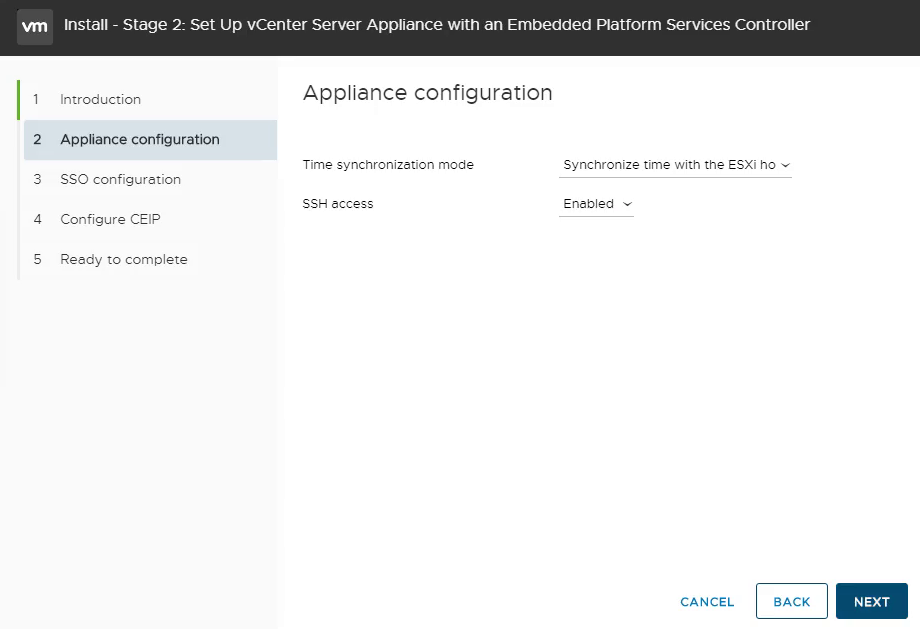
configure NTP and SSH
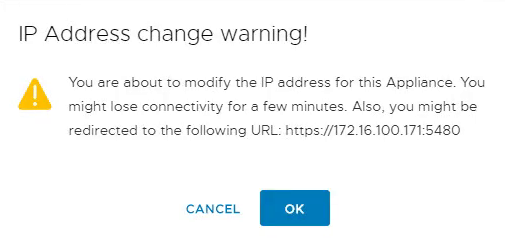
accept warning
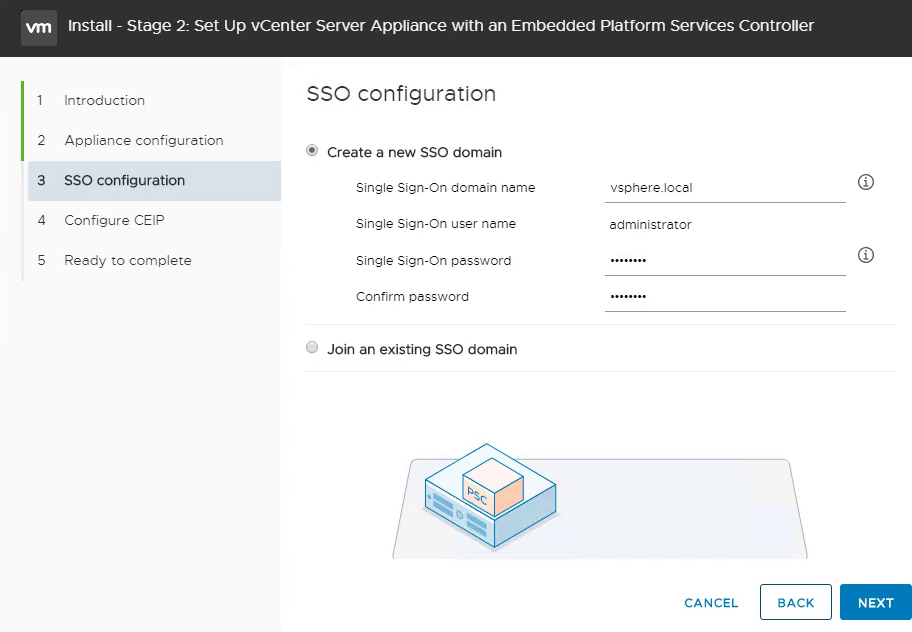
create new domain called vsphere.local just to manage vcenter application
review settings and confirm : finish
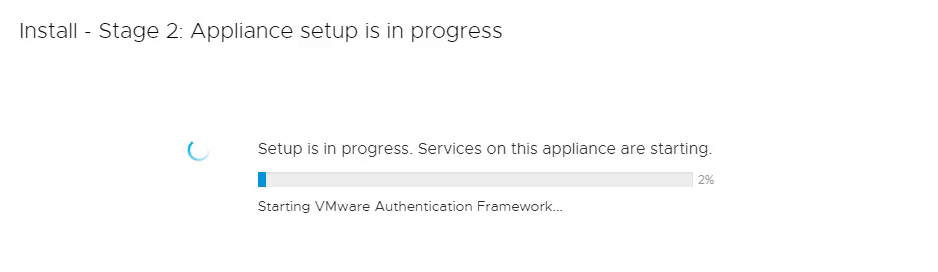
configuration process get start
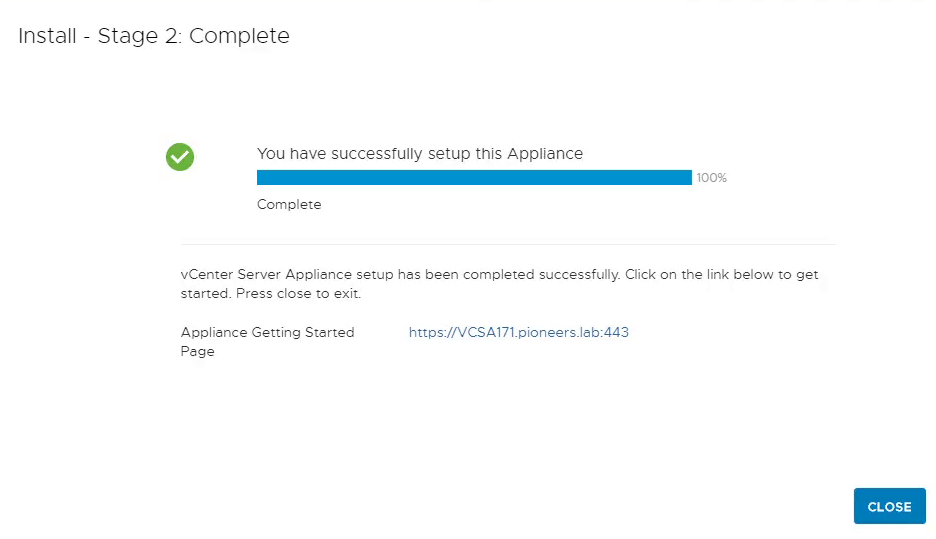
configure VCSA as vcenter application DONE , Congrats 🙂
Verify VCSA installation
VCSA171 has been installed as VM operating system
and configured also as as vcenter application
in networks pioneers always we recommend to verify any installation process : and VCSA installation is NOT an exception .
we can verify installation with many methods
fore example to verify VCSA171 is installation as VM > open https://ESXI152 and check VMs i installed
open ESXI152 and verify VCSA171 as VM installed
also we can access VCSA as VM it self
just we would like to bring your attention to the following:
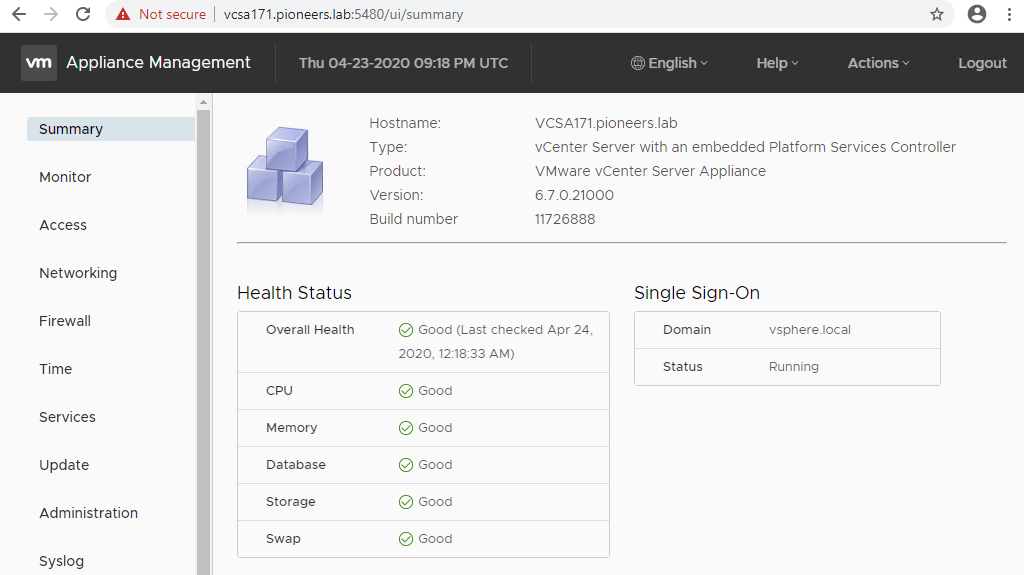
VCSA as VM is accessed by https://VCSA171:5480 and manged by account [ root ] like any linux operating system
VCSA as vcenter application is access by https://VCSA171:443 and managed by administrator@vsphere.local , this domain has been created during configuring vcenter application and used only to configure vcenter as application NOT as VM
later we can manage vcenter application by using administrator@pioneers.lab , when we discuss domain identity
now open https://VCSA171:5480
access https://vcsa171:5480 to manage VCSA as VM
VCSA Management
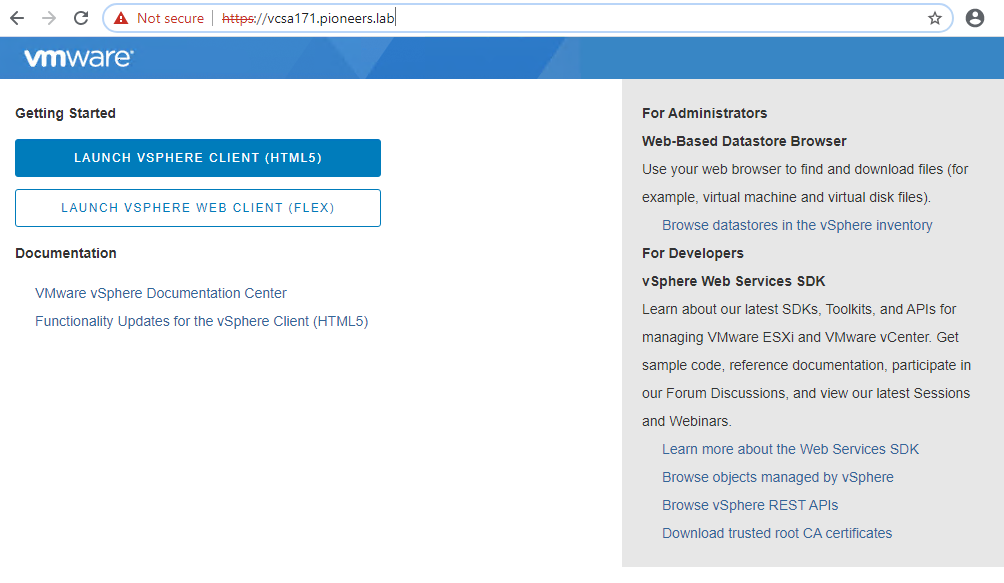
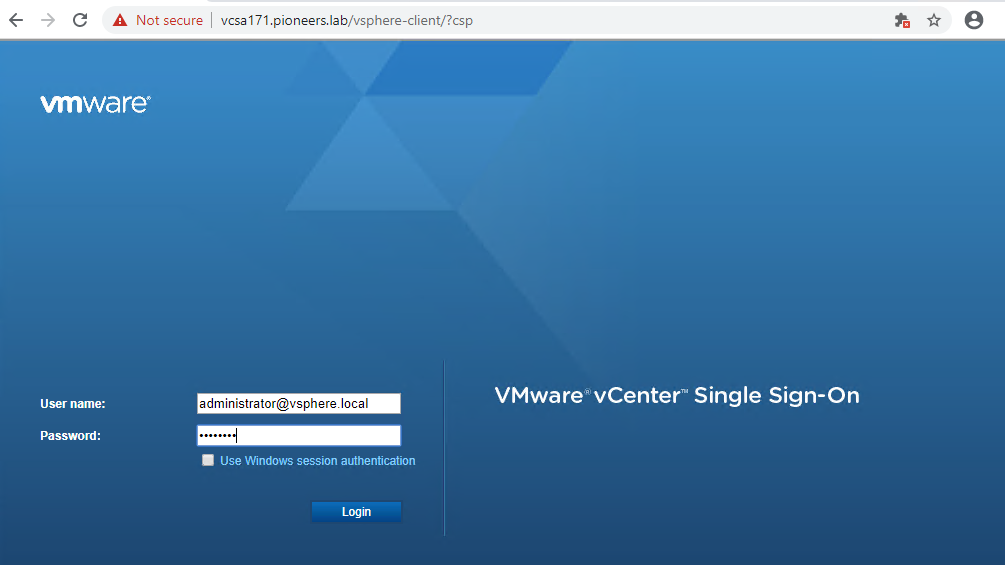
also we can access vcenter application by URL https://VCSA171:443
then provide credential
administrator@vsphere.local
open https://VCSA171:443 to access vcenter application
provide credential : administrator@vsphere.local
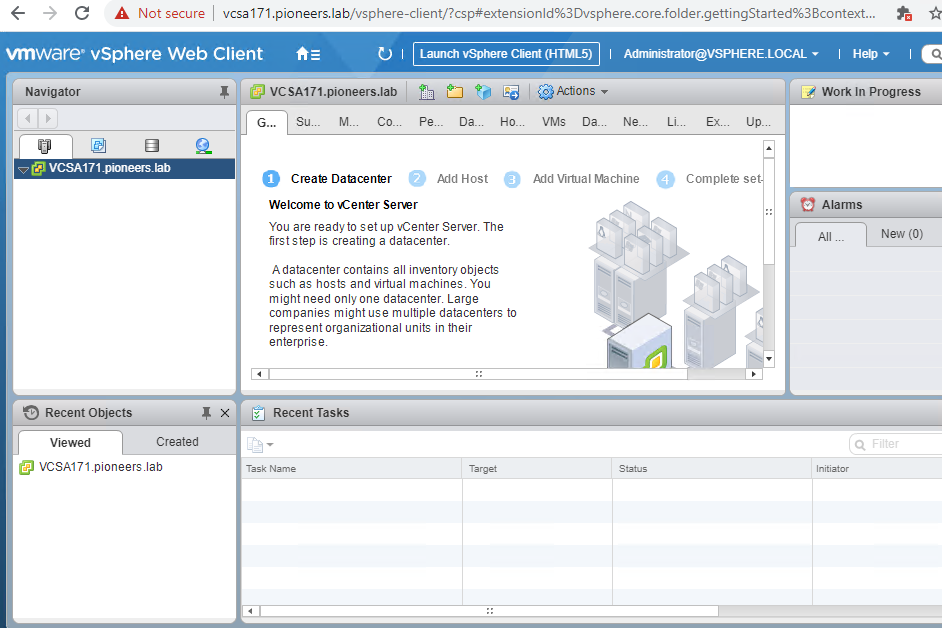
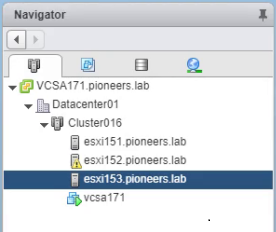
vcenter management interface
conclusion
in this article we have discuss how to install VCSA as VM operating system , and how to configure it as vcenter application
then we verify our installation process
this is very important article ,
and highly recommend to practice it many time until to make sure you have fully understand its concepts
next article we will discuss post VCSA installation : what is the early steps we should tp perform in order to manage vSphere environment effectively