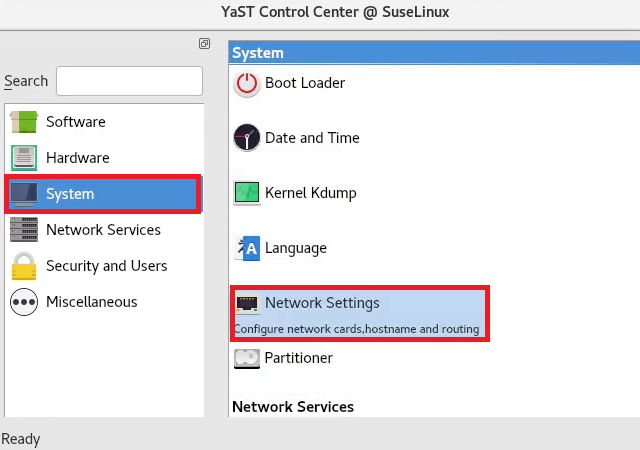
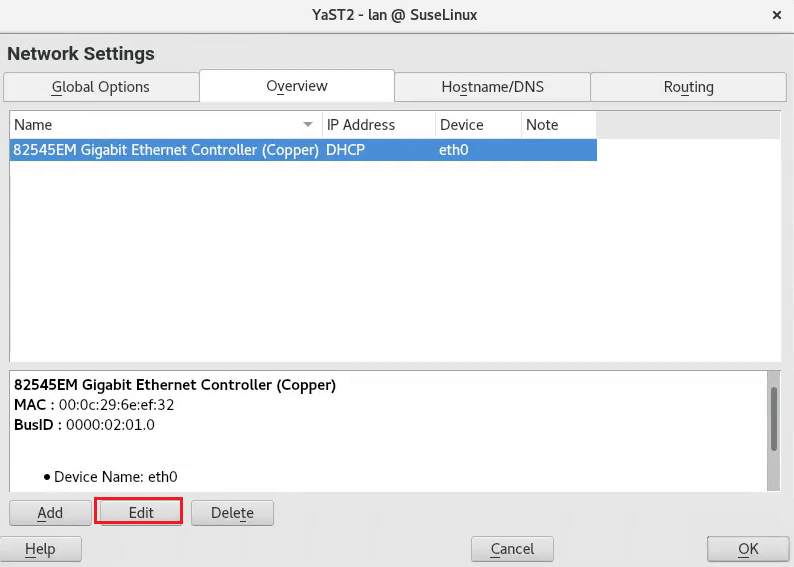
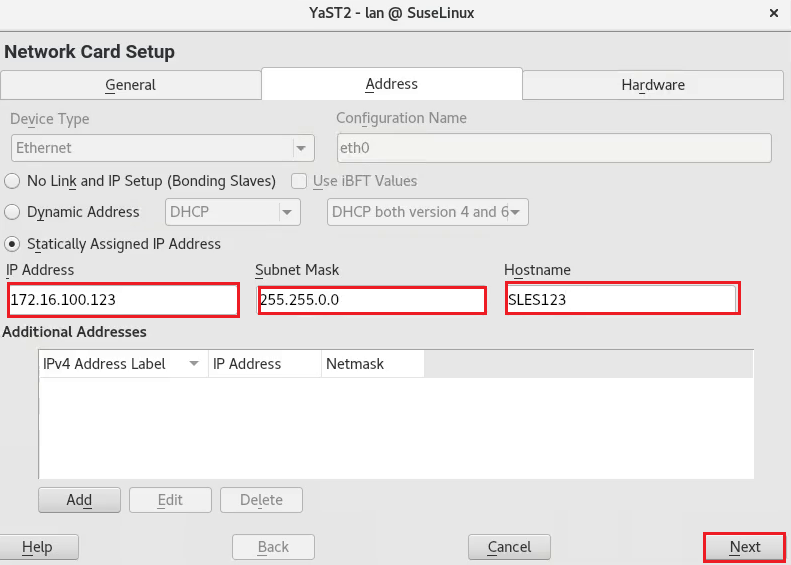
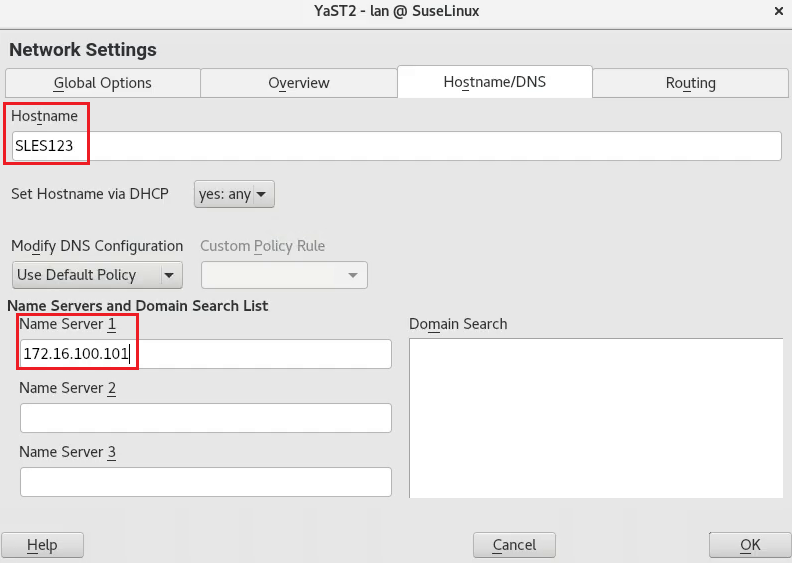
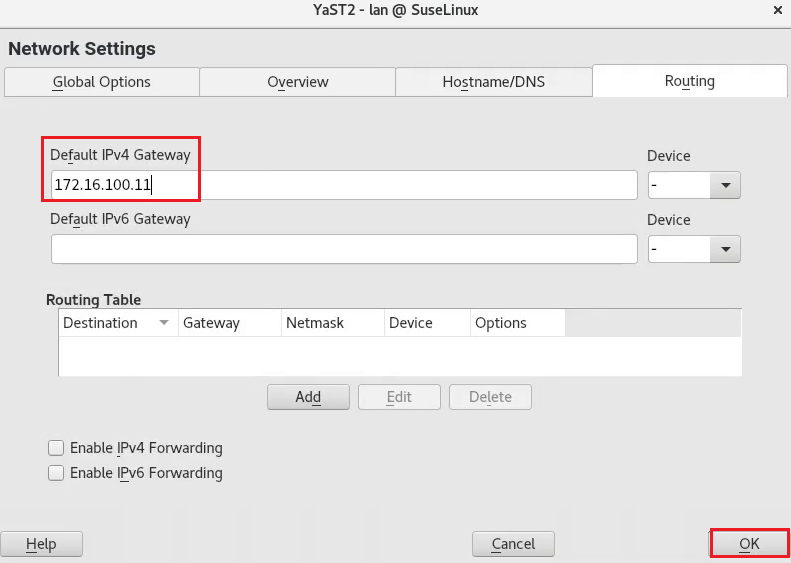
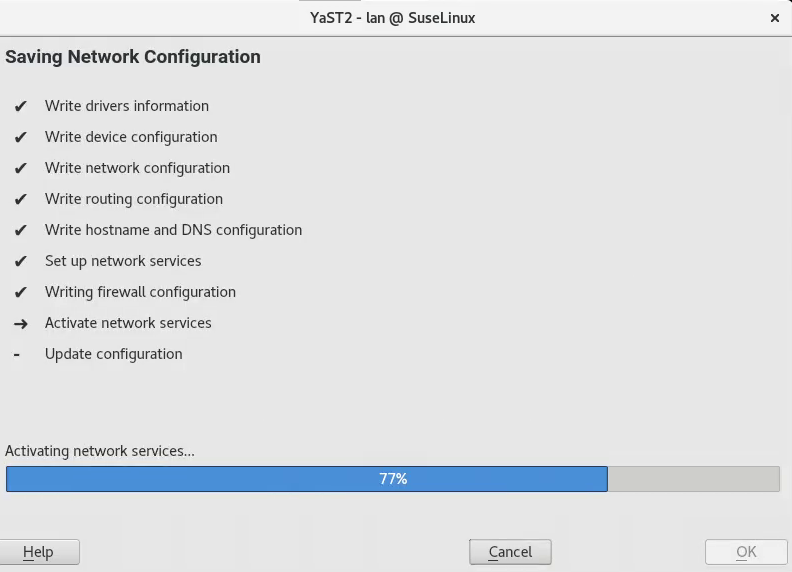
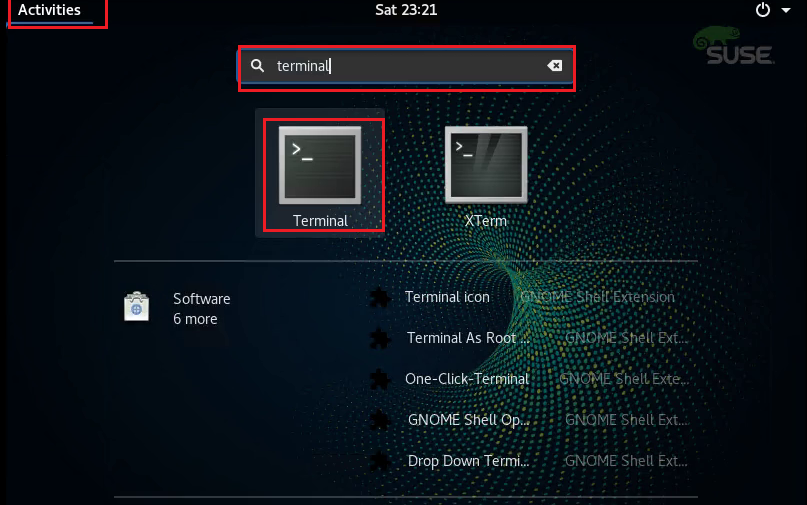
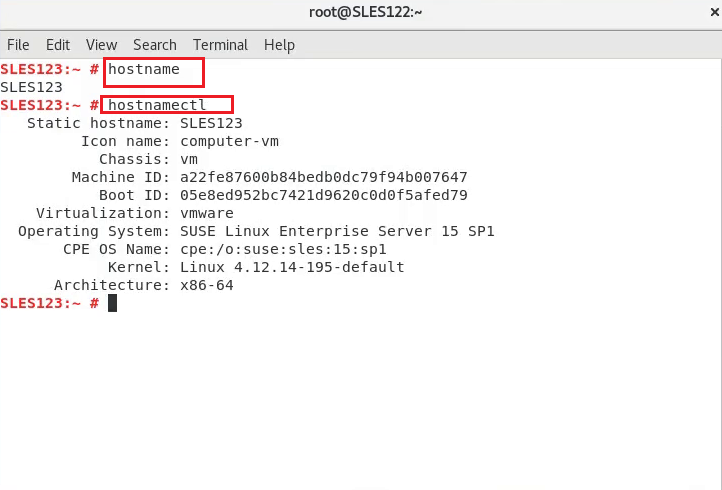
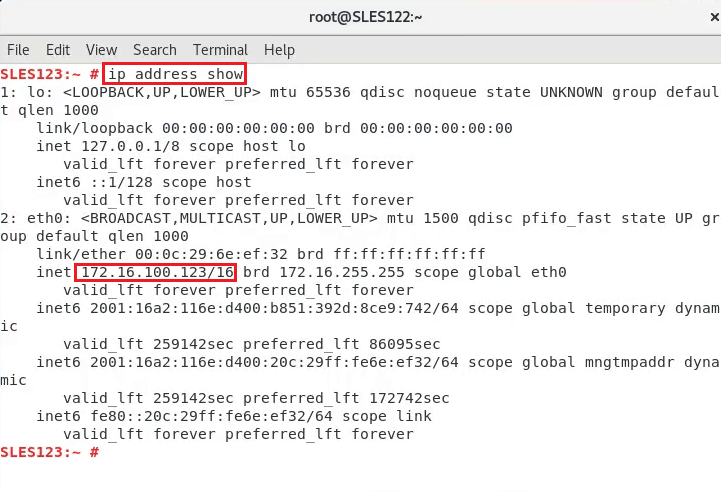
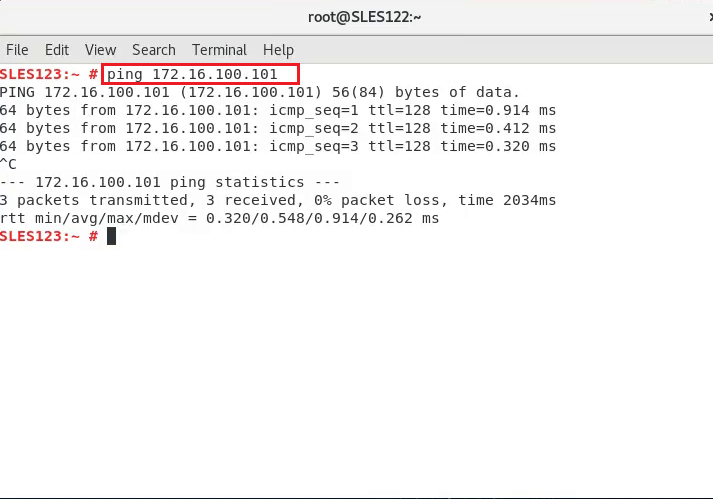
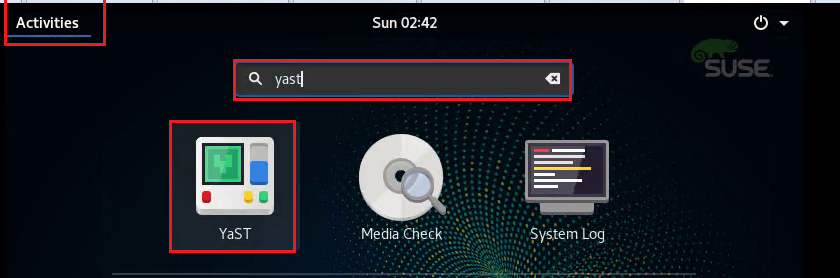
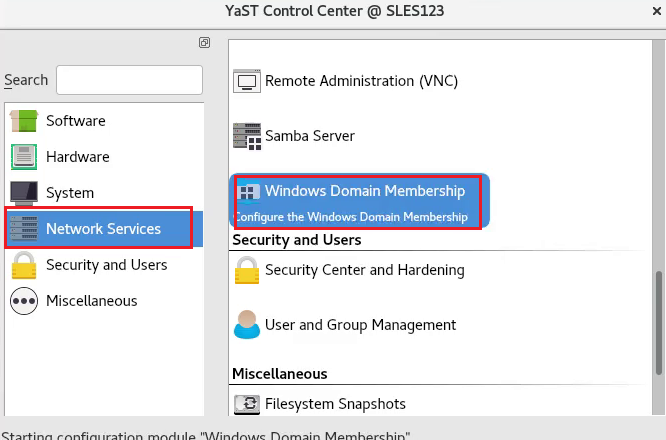
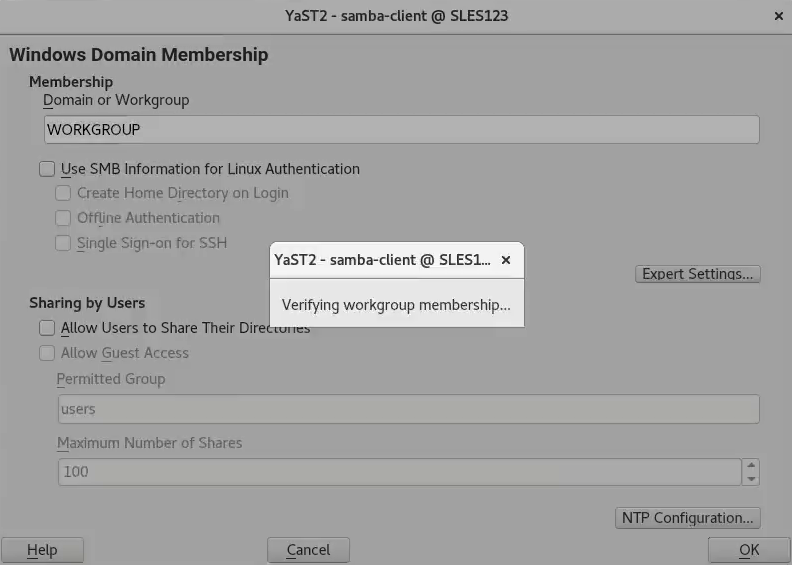
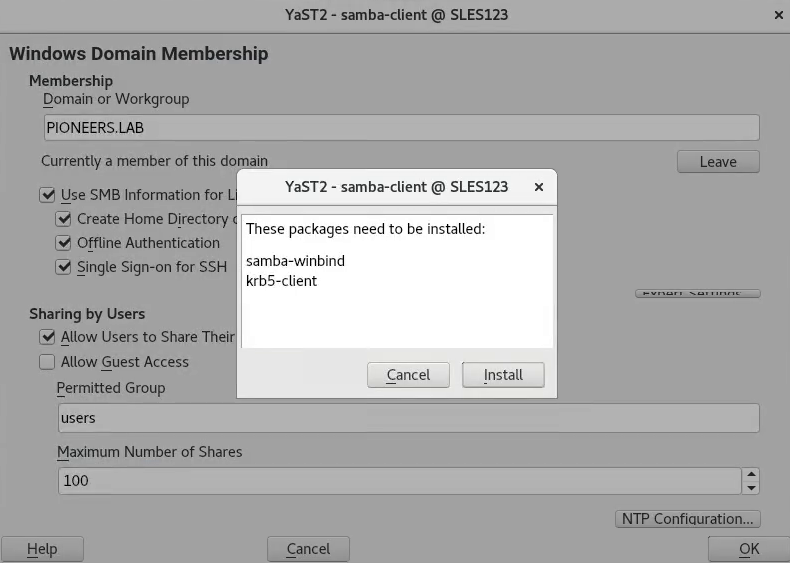
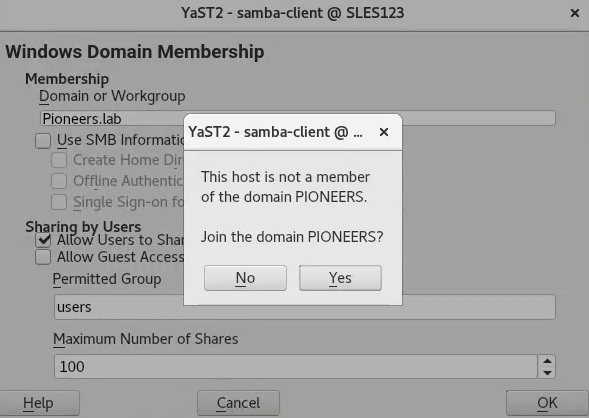
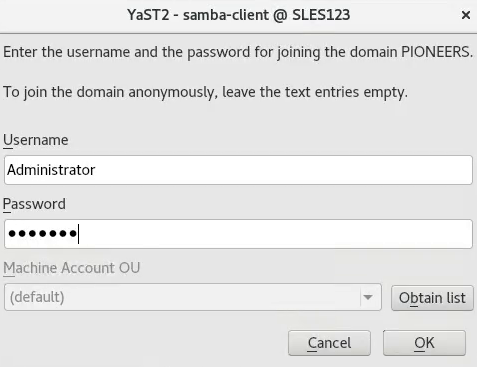
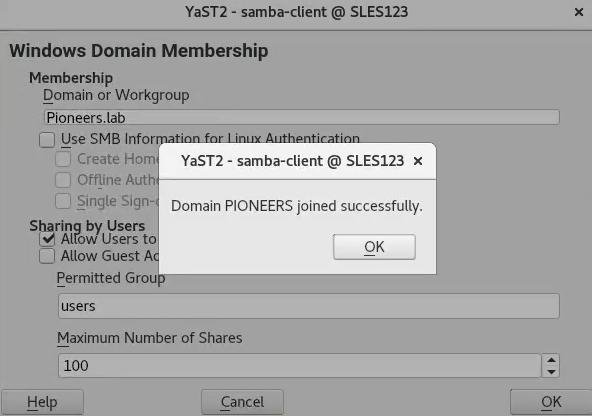
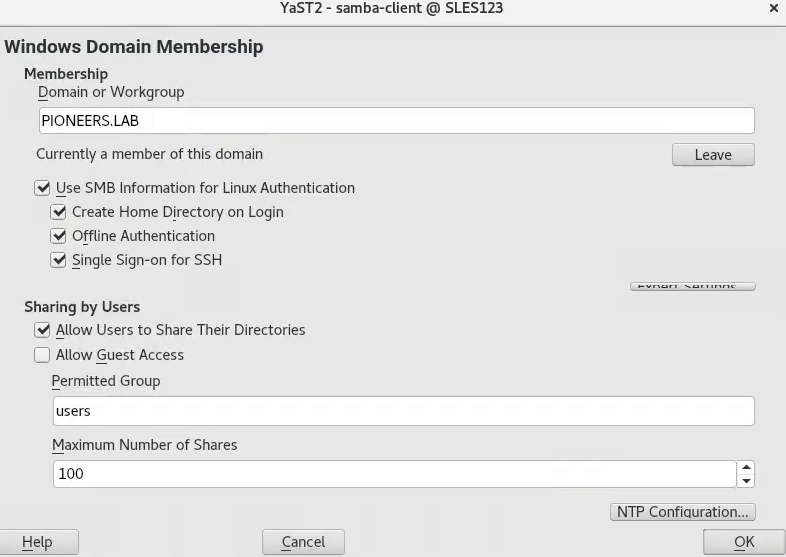
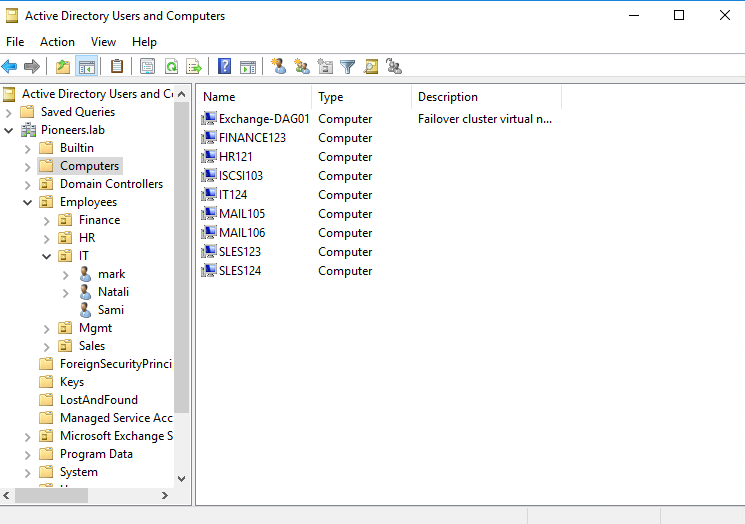
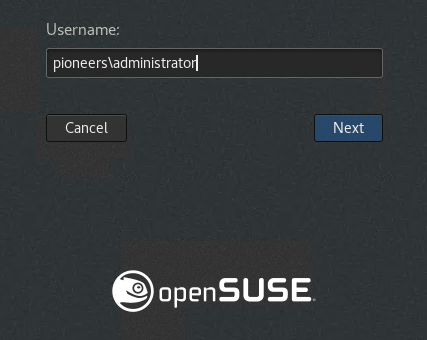
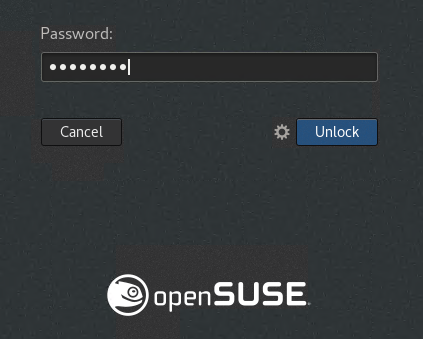
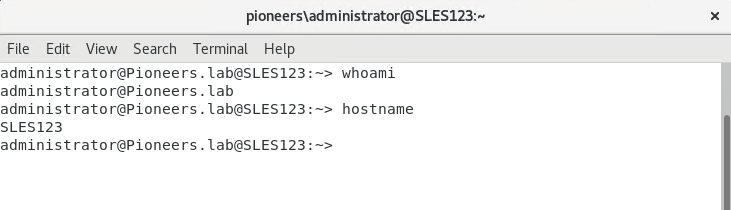
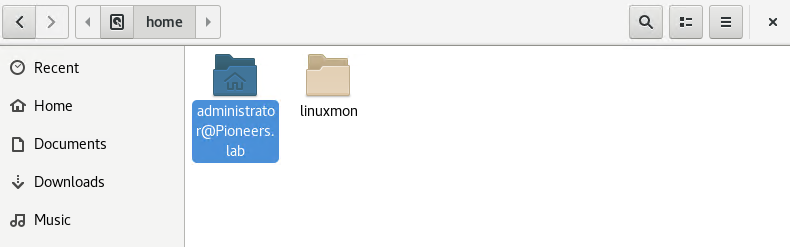
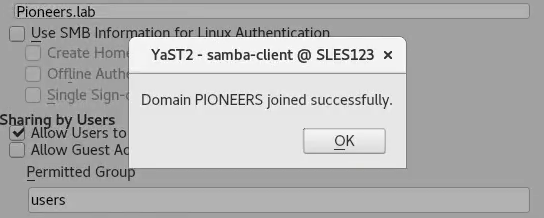
SLES Identity with Yast Suse April 11, 2020October 27, 2020 maher islaieh introduction Suse linux enterprise server identity include three perspectivesIP address V4 :Hostname Join LDAP : AD Pioneers.lab in this article : we set SLES123 identity using Yast Tool later : ALL these steps will be DONE using Text Command also IPV6 will have separate articles in advanced sources SLES Network Diagram SLES Network Diagram before move to configure three parts of SLES identity : let us to have a look above to Network Diagram we have 3 SLES server SLES 122 with version 15 SP1 and IP address 172.16.100.122 > has been configured during operating System installation SLES 123 with version 15 SP1 and IP address 172.16.100.123 > to be Configured with Yast SLES 124 with version 15 SP1 and IP address 172.16.100.124 > to be configured with Text Command Set Hostname and IP address with Yast in this section : we will set IP address for SLES123 with Yast login to SLES as root click activities > search for yast select system > network settings edit IP address insert static IP address with subnet mask and hostname open DNS Tab > insert DNS server and hostname in DNS open DNS Tab > insert DNS server and hostname in DNS click Routing Tab > insert IP addres of Default Gateway waite until proces done Verify Hostname and IP address to verify settings above click activities > search for Terminal [which is Command prompt ] check hostname cjeck ip address check default gateway Join Active Directory using Yast Join Active Directory using Yast involved the following steps : click activities > search for Yast select network services > windows domain membership wait until open SLES check which domain currently belong insert domain name Pioneers.lab and select use SMB > which require to instal Kerberos V5 confirm to join AD provide credential [administrator / password ] congrats : SLES join AD check your settings Verify Join Active Directory we can verify join Active Directory in many steps open active directory user and computer > SLES123 appear inside also try to login to SLES123 using domain account provide password whoami more over > check /home folder > there is new profile for administrator@pioneers.lab Conclusion in this article we have discussed how to set SLES identity [Hostname,IP,Join AD] for SLES123 with Yast tools in next article , we will do same thing with SLES124 > But with Text Command thank you For Better View > Open Image in different TAB