Each employee on your organization needs a user account before they can sign in and access Microsoft 365 services, such as email and Office.
If you have a lot of people,it will be much headache and boring to add each user one by one
>> the solution is to ALL add accounts at once from an Excel spreadsheet or other file saved in CSV format.
what is CSV format ?
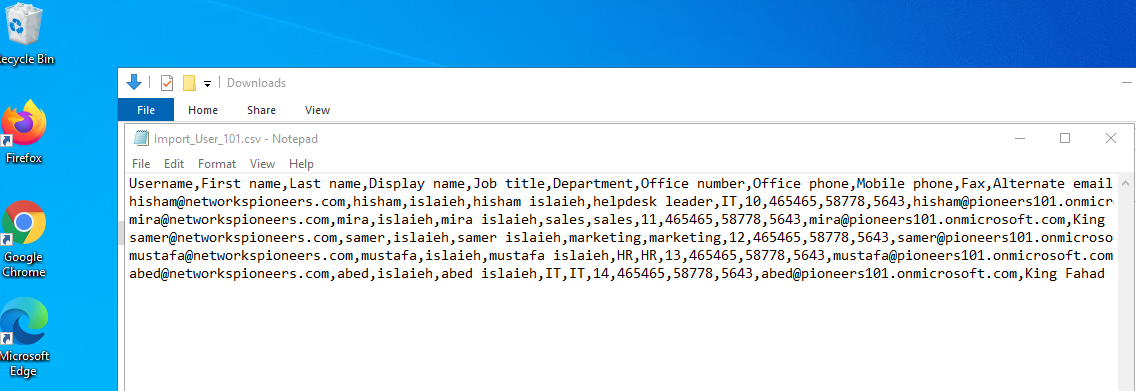
A CSV file is a file with comma separated values. You can create or edit a file like this with any text editor or spreadsheet program, such as Excel.
how to download sample CVS file
you can download this sample spreadsheet as a starting point. Remember that Microsoft 365 requires column headings in the first row so don’t replace them with something else.
Save the file with a new name, and specify CSV format.
When you save the file, you’ll probably get a prompt that some features in your workbook will be lost if you save the file in CSV format. This is okay. Click Yes to continue.
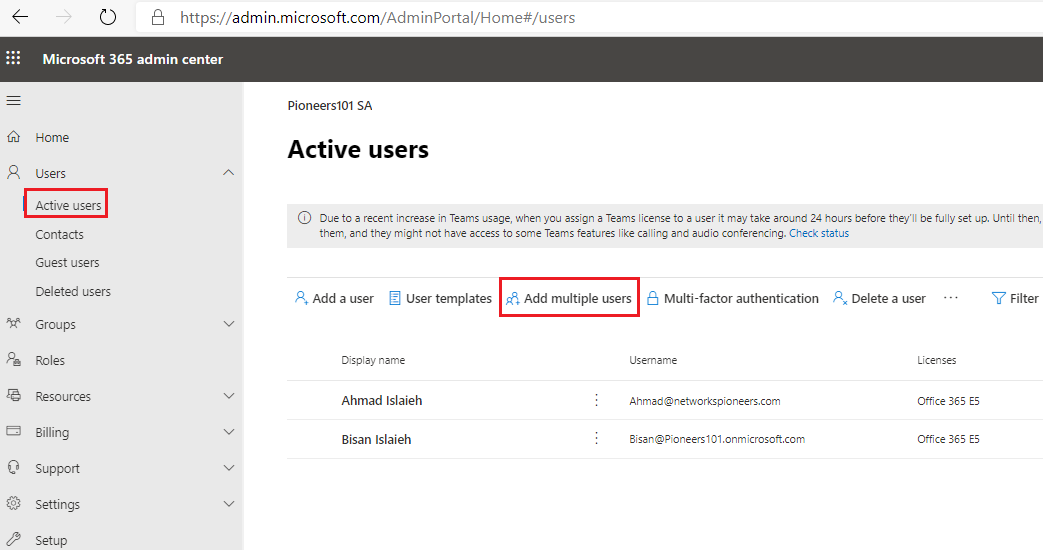
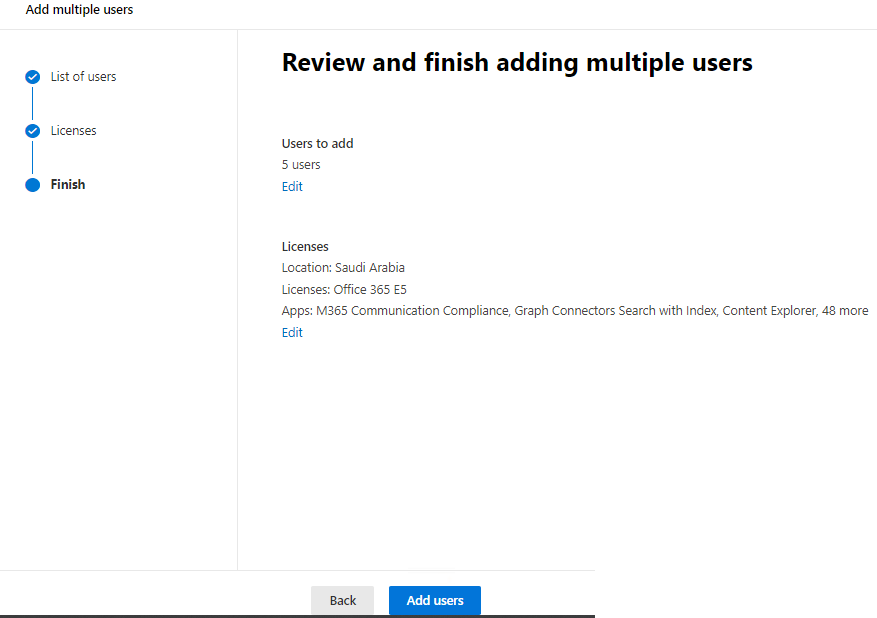
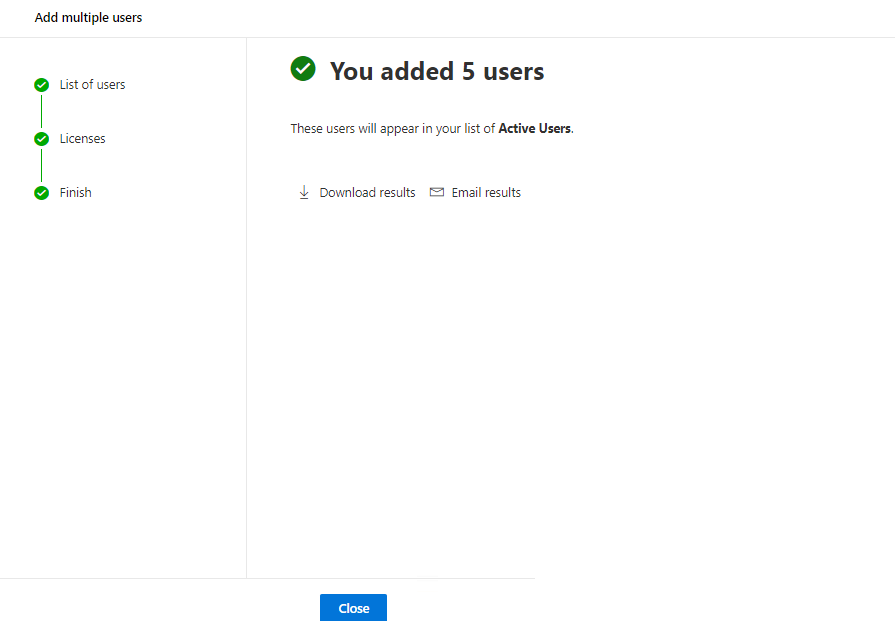
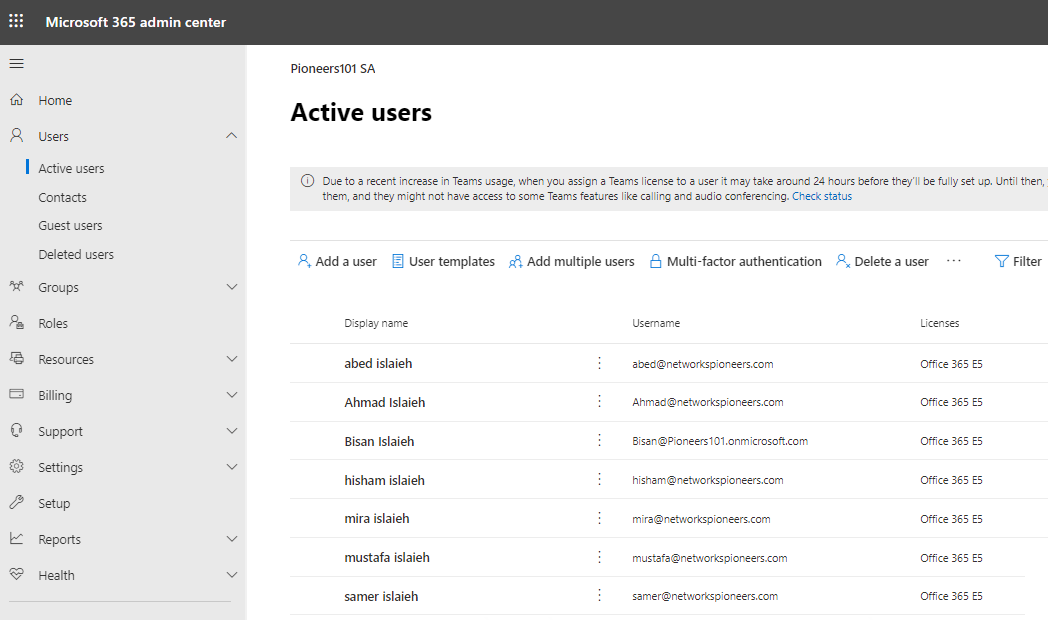
Add multiple users in the Microsoft 365 admin center
Sign in to Microsoft 365 with Global Admin account. ( Bisan@Pioneers101.OnMicrosoft.com)
In the admin center, choose Users > Active users.
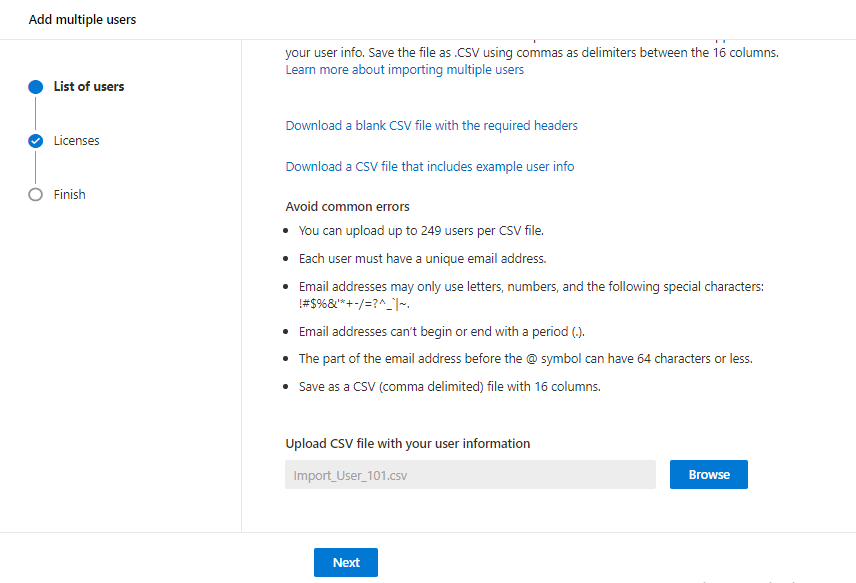
Select Add multiple users.
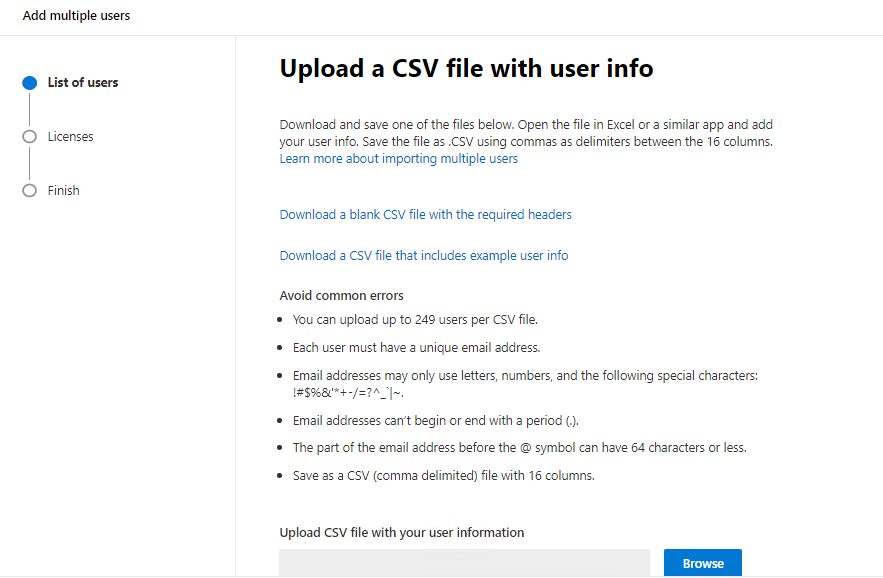
On the Import multiple users panel, you can optionally download a sample CSV file with or without sample data filled in.
Your spreadsheet needs to include the exact same column headings as the sample one (User Name, First Name, etc…). If you use the template, open it in a text editing tool, like Notepad, and consider leaving all the data in row 1 alone, and only entering data in rows 2 and below.
For Better View > Open Image in different TAB
For Better View > Open Image in different TAB
For Better View > Open Image in different TAB
For Better View > Open Image in different TAB
For Better View > Open Image in different TAB
For Better View > Open Image in different TAB
For Better View > Open Image in different TAB
For Better View > Open Image in different TAB
Some Consideration regarding CSV file
headings are required. For each user you want to add to Microsoft 365, create a row under the heading. If you add, change, or delete any of the column headings, Microsoft 365 might not be able to create users from the information in the file.
The user name and display name are required, and you cannot add a new user without this information. If you don’t have some of the other information, such as the fax, you can use a space plus a comma to indicate that the field should remain blank.
The spreadsheet must have at least two rows. One is for the column headings (the user data column label) and one for the user.
When you create your spreadsheet, you can enter user data column labels in any language or characters, but you must not change the order of the labels,