in previous article we have got an overview about ESXtop utility
this article we will see how to change default ESXtop configuration before see how to use this utility to monitor performance
run ESXtop
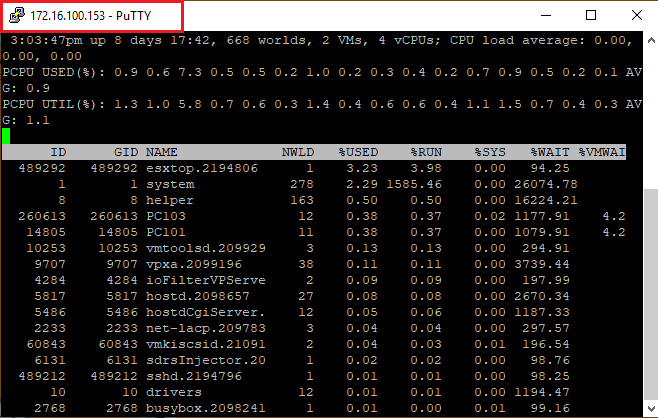
the best method is to run esxtop with SSH using putty
For Better View > Open Image in different TAB
also we can run esxtop command from direct shell
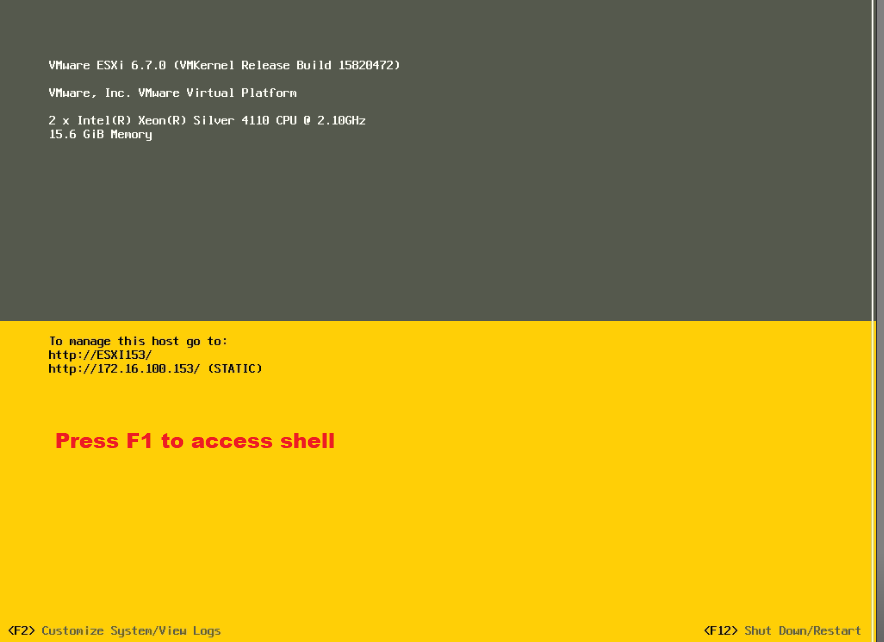
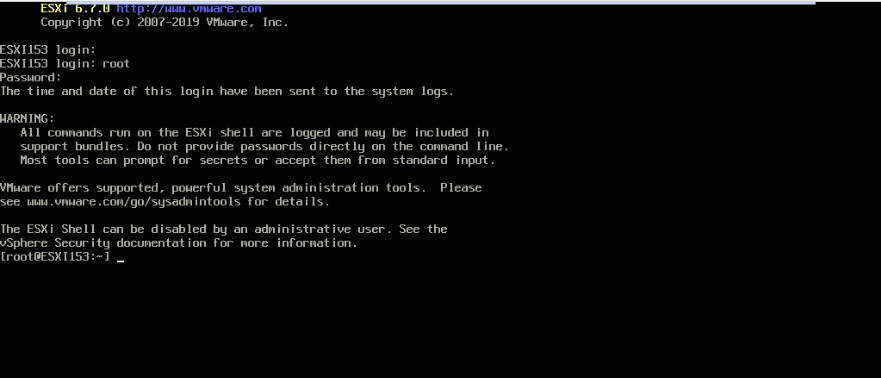
open DCUI > press F1 > provide root and password > press esxtop
For Better View > Open Image in different TAB
For Better View > Open Image in different TAB
For Better View > Open Image in different TAB
Configure esxtop custom profiles
esxtop configuration file stored at ~.esxtop50rc
Do not edit the .esxtop50rc file. Instead, select the fields and the order in a running esxtop process, make changes, and save this file using the W interactive command
fresh interval
By default the screen will be refreshed every 5 seconds, change this by typing:
s 2
change views
Changing views is easy, type the following keys for the associated views:
c = cpu
m = memory
n = network
i = interrupts
d = disk adapter
u = disk device
v = disk VM
p = power mgmt
r = rdma
x = vsan
Add/Remove fields:
to Add/Remove fields:
f
<type appropriate character>
please note field with * will be viewed
Changing the order:
to Change the order:
o
Saving the settings
Saving all the settings you’ve changed:
W
Keep in mind that when you don’t change the file-name it will be saved and used as default settings.