SLES Sharing Folder with NFS

Share on facebook
Share on google
Share on twitter
Share on linkedin
Share on pinterest
Share on print
Share on email
Table of Contents

introduction

The Network File System (NFS) is a protocol that allows access to files on a server in a manner similar to accessing local files.

SUSE Linux Enterprise Server SP1 installs NFS v4.2, which introduces support for :

  • sparse files,
  • file pre-allocation,
  • server-side clone and copy, application data block (ADB),
  • and labeled NFS for mandatory access control (MAC) (requires MAC on both client and server).


The Network File System (NFS) is a standardized, well-proven and widely supported network protocol that allows files to be shared between separate hosts.

The Network Information Service (NIS) can be used to have a centralized user management in the network. Combining NFS and NIS allows using file and directory permissions for access control in the network. NFS with NIS makes a network transparent to the user.

In the default configuration, NFS completely trusts the network and thus any machine that is connected to a trusted network. Any user with administrator privileges on any computer with physical access to any network the NFS server trusts can access any files that the server makes available.

NFS network diagram

For Better View > Open Image in different TAB

before moving to configure NFS

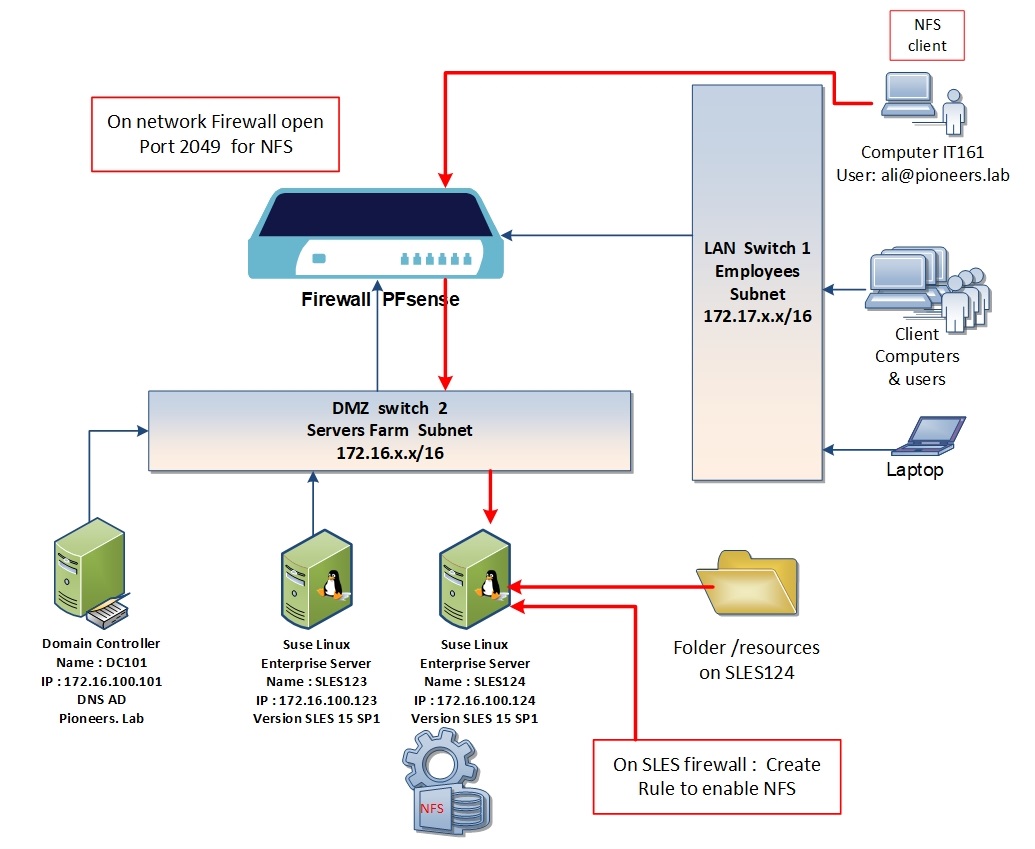
letus to have  a look to above network diagram 

we have user called ali@pioneers.lab from IT staff who is working on computer IT161 on subnet LAN 

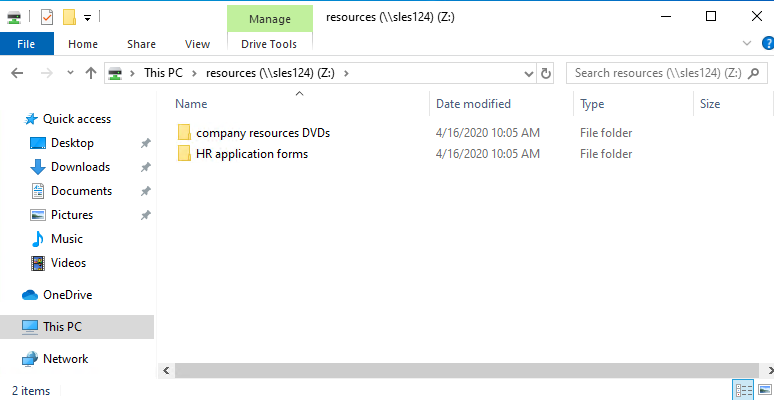
Ali would like to access folder called /resources on  SLES124 on subnet [servers farm ] 

OK, configuring NFS process involved with the following steps : 

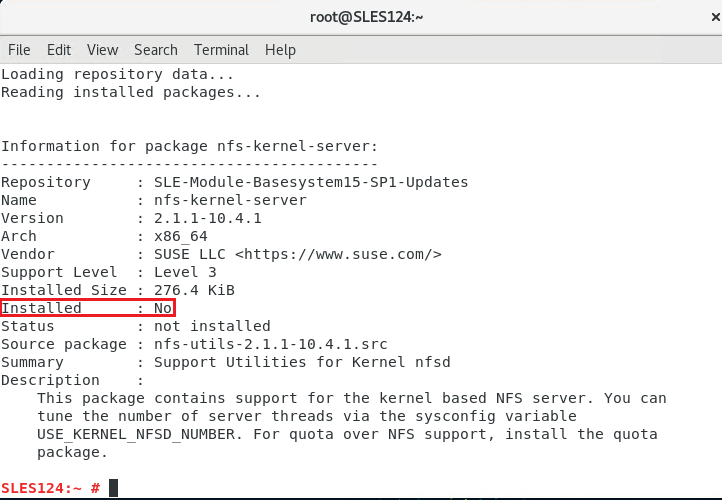
  • on SLES server install package  NFS 
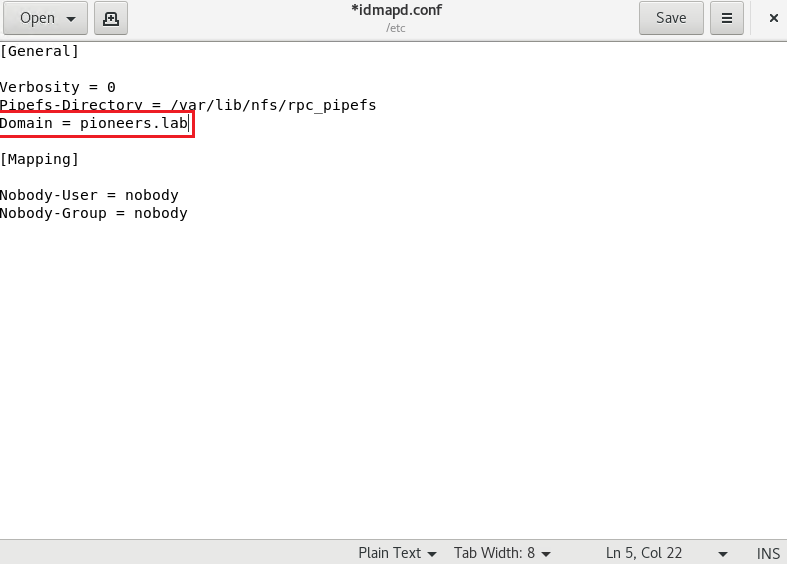
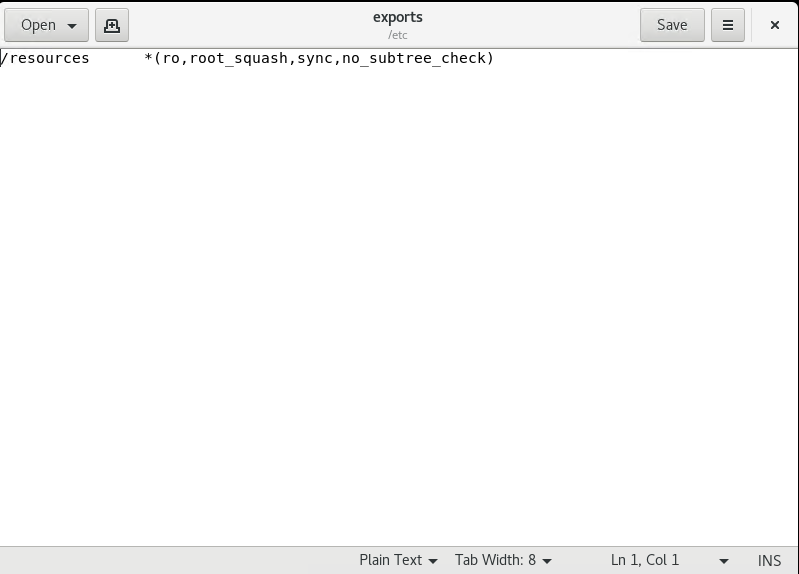
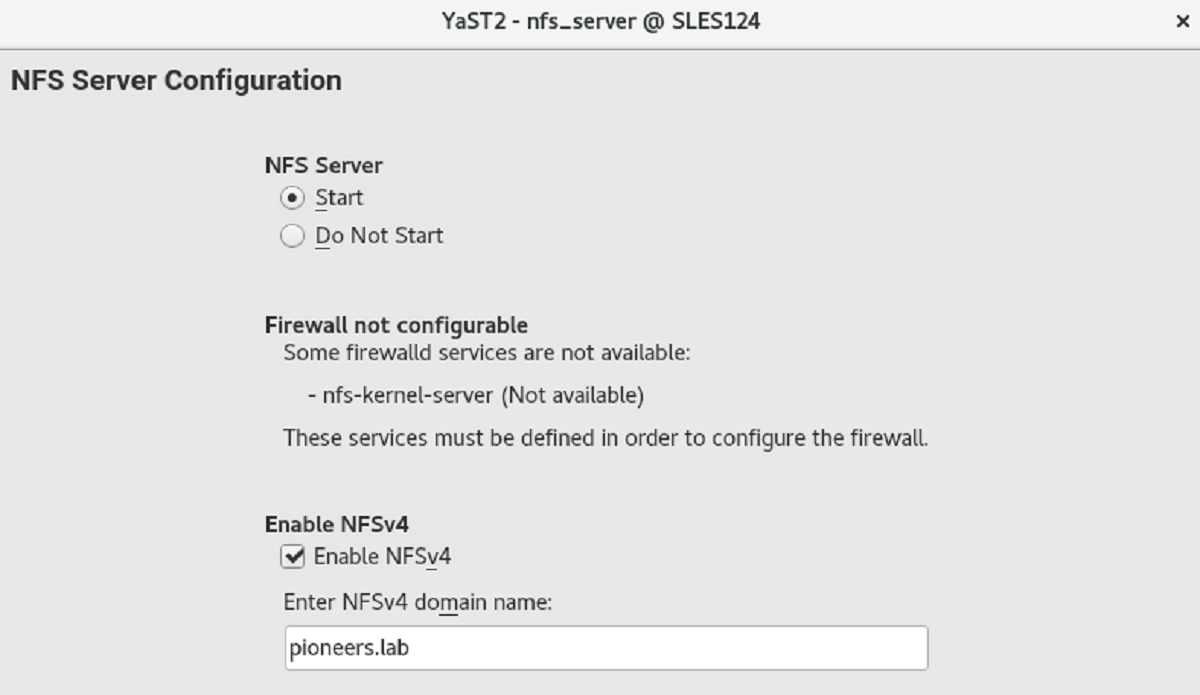
  • configure NFS [select domain : pioneers.lab ] + [what to share : /resources ] 
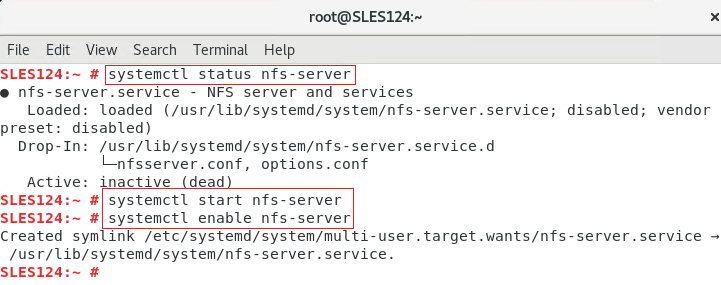
  • start service nfs [please remember d stand for daemon which meaning service ] 
  • open NFS on SLES firewall 
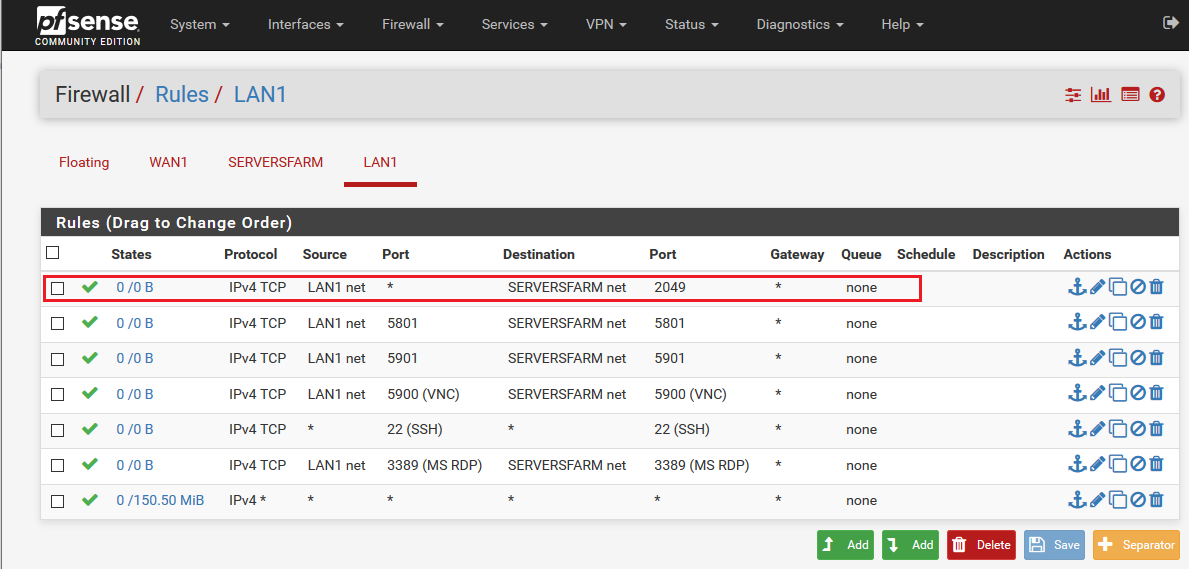
  • on network Firewall PFsense : open port 2049 for NFS 
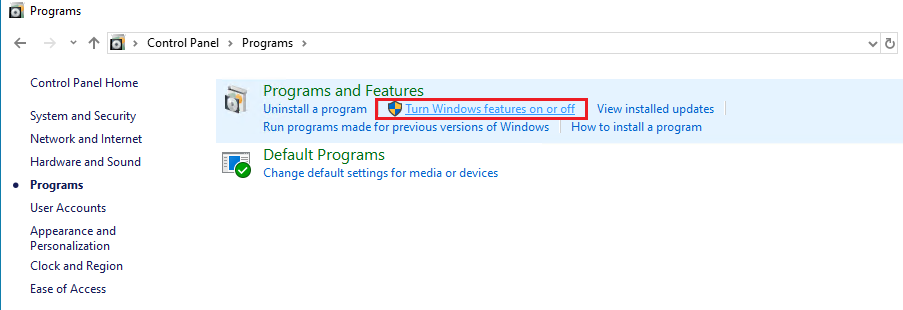
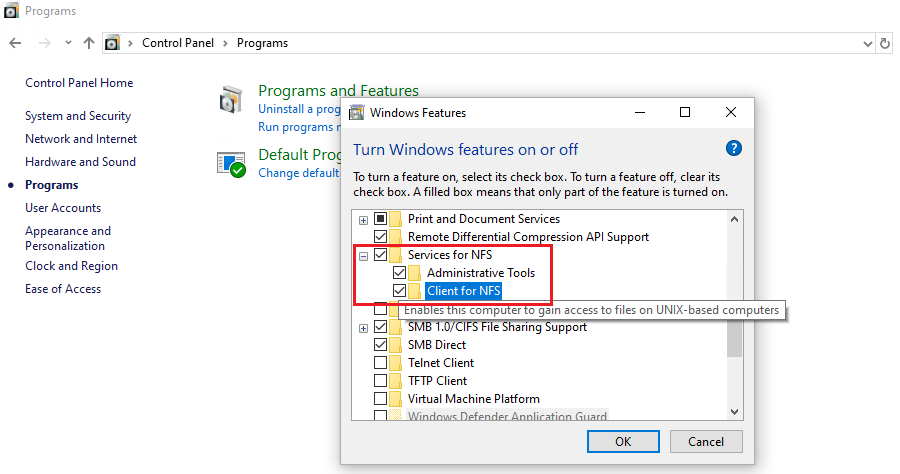
  • on client compute : install NFS client  
  • on client compute :  mount NFS folder  
  • connect to NFS folder [ /resources ] from  computer IT161  

Step 01 : install package [NFS] on SLES

first of all we have to check if package  nfs-kernel-server  [which is responsible of running NFS ] is installed or NOT 

use command : 

zypper info  nfs-kernel-server

if NFS is NOT installed > then simply install it using command 

zypper install --no-confirm nfs-kernel-server


command zypper info nfs-kernel-server > nfs is NOT installed
install nfs-kernel-server

Step 02 configure NFS

step02 involved configuring NFS by

  • open file  /etc/idmapd.conf and set domain name 
  • and also open file /etc/exports and set permission >

please note : for file permission > we will have fully separated article about it 

For Better View > Open Image in different TAB

Step 03 : start services nfs

now we have to check if service nfs is running  

use command : 

systemctl status nfs-server

if NOT started then > start it 

systemctl start nfs-server

also we have to Enable sshd during system startup

systemctl enable nfs-server
For Better View > Open Image in different TAB

Step 04 : Enable firewall rule for nfs

create  firewall rule to enable nfs

firewall-cmd --permanent --add-service={nfs3,mountd,rpc-bind}

then reload  firewall 

firewall-cmd --reload
For Better View > Open Image in different TAB

Step 05 : open port 2049 on firewall PF-sense

to it’s time to open port 2049 in network firewall

it’s depend on your network firewall , in networks pioneers : we are using network firewall PFsense

For Better View > Open Image in different TAB

Step 06 : on client computer IT161 install NFS client

on client computer [IT161] which is windows 10 ] >  install nfs client  


  • Open Start > Control Panel > Programs.
  • Select Turn Windows features on or off.
  • Select Services for NFS.
  • Click OK.
For Better View > Open Image in different TAB

Step 07 : mount NFS folder on client compute

mounting is straightforward step 

open CMD in computer IT161 

and run command 

mount -o anon \\sles124\resources z:


For Better View > Open Image in different TAB

Step 08 : access NFS folder from windows client computer

now just open Z: drive  on IT161 to access folder [ resources

For Better View > Open Image in different TAB
Share this post
Share on facebook
Share on google
Share on twitter
Share on linkedin
Share on pinterest
Share on print
Share on email

About Me

Our Power in Numbers

 17 

Courses

321

Articles

3,882

Images
and All configurations images are proudly made in Pioneers Lab

Articles By Course

Recent Articles

Subscribe

Contact us

have a challenge ? don’t hesitate to contact us