Active Directory Installation

Share on facebook
Share on google
Share on twitter
Share on linkedin
Share on pinterest
Share on print
Share on email
Table of Contents

Setup LAB Diagram

For Better View > Open Image in diiferent TAB

Our basic LAB setup will include the following

  1. Modem for internet connection with local IP address [192.168.100.1] which is X0 and E1 as  public IP address from ISP [internet service provider ]
  2. Firewall pfsense to control traffic between three networks
        • X0 à WAN  with IP address 192.168.100.11 /24
        • X1 à LAN  with IP address 172.16.100.11 /16
        • X2 à Servers Farm  with IP address 172.17.100.11 /16
  1. Windows 2016 server in servers farm to act as  domain controller [DC ] and [DNS] server  with IP address 172.16.100.101 /16
  2. Three windows-10  client computers in LAN subnet as the following :
        • HR121  with IP address 172.17.100.121 /16
        • IT123  with IP address 172.17.100.123 /16
        • Finance124 with IP address 172.17.100.124 /16

Firewall to control subnets

As we are going to divide network  into at least two subnet : we have to use firewall [ physical or virtual firewall ]

PFsense is virtual firewall that can fit our needs 

For installation and configuration > please press link

prepare server

The first step is to Install windows 2016  server  with desktop experience [standard or datacenter ] , which I think easy step and doesn’t require more clarification

Since we are using virtual machine [VMware or Hyper-V or even Virtual Box ] : then we have to  make sure that VM has unique  security identifier [SID]

Use Sysprep  , to create new SID for any VM and  to avoid conflict when join computers to domain

Run > SysPrep
Waite until server restart > set new administrator password
set IP address
this Computer > properties > rename serve

please note ,  in Pioneers LAB we have naming policy which is : Server Role + last digit in IP address 

for example :

  • DC101 : DC stand for domain controller , and 101 stand for 172.16.100.101 
  • Mail105:  stand for Exchange Server  , and 105 stand for 172.16.100.105 
  • Web108:  stand for Web server  , and 108 stand for 172.16.100.108 

your free to follow our policy or using your own naming policy 

Install feature Active Directory Domain Services and DNS

From the Server Manager Dashboard, click on Add roles and features

Select Role-based or feature-based installation and click Next.

Select Active Directory Domain Services and then select DNS and then select Next.

You shouldn’t have to select anything at the Select features, so just select Next.

On the confirmation window, review everything and then click Install.

Now installation will begin. And files we be downloaded from Microsoft site online , but we can save time  by specify alternate  source path ] to [E:\source\SXS\ ] on previous page

When the installation is complete, you need to now promote the server to a domain controller.

open serverManager.exe > add new role
select this serve >
role based feature
add ADDS + DNS
select ADDS
accept role requirement
add DNS requirement
select next
ADDS installation process
review > install
make sure windows 2016 DVD inserted > select altenative path D:\sources\sxs to accelerate installation
installation process starting
installation process finished > press close to promote DC

Promote server to a domain controller DC

Click Promote this server to a domain controller 

Select Add a new foresttype in a domain name Pioneers.lab

then click Next.

Type in a password you want to use for DSRM, then click Next.

DSRM password will be used in case AD failed to start

Click Next on the NDS Options page.

Click Next in the Additional Options page.

Click Next on the Paths sections.

Click Next on the Review Options screen, then click Install on the Prerequisites Check page

The installation (promotion process) will begin. The server will reboot during this process.

When the installation is complete, log back in (this time you will be logging into the server with domain credentials).

select promote this server to DC
this cross road step > in our case we will install new forest
root domain pioneers.lab
accept functional level to 2016 since we don't have 2012
set password for DSRM > which will be used in case active directory failed to stat
net-bios name Pioneers
installation path
review and select next
some tiny warning
promoting process started
For Better View > Open Image in diiferent TAB

Verify Active Directory installation

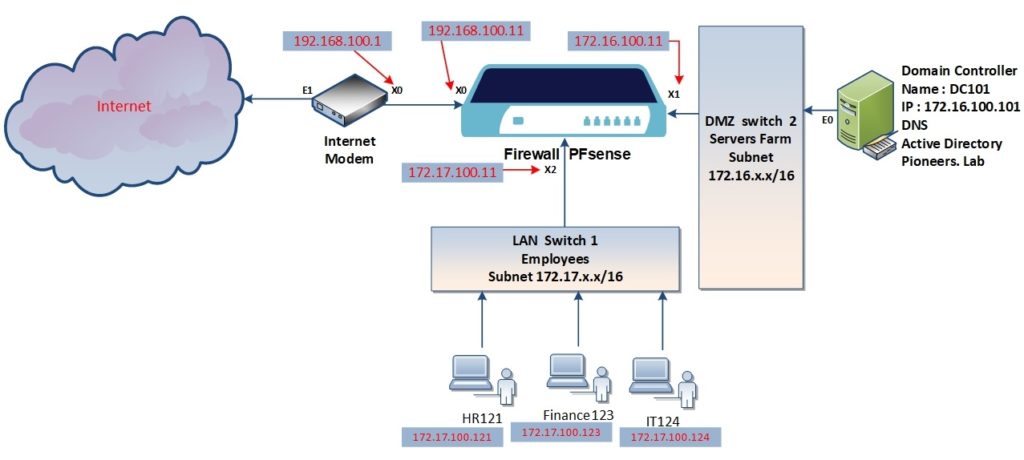
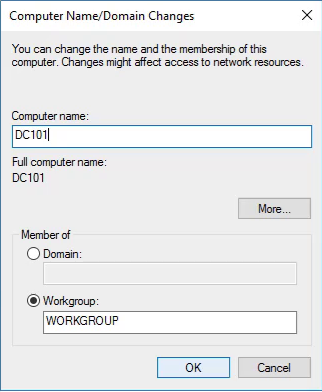
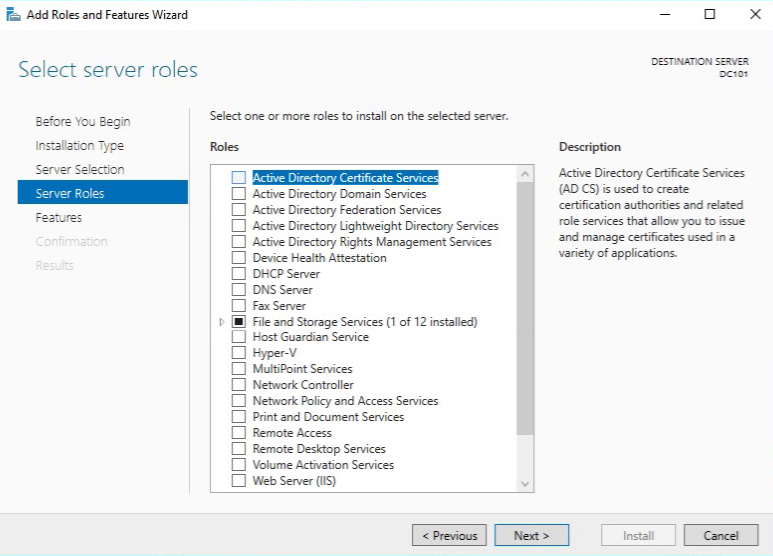
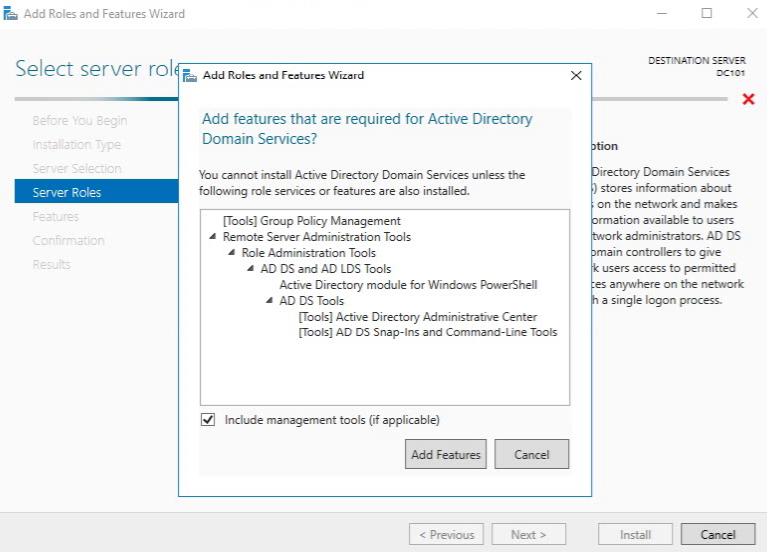
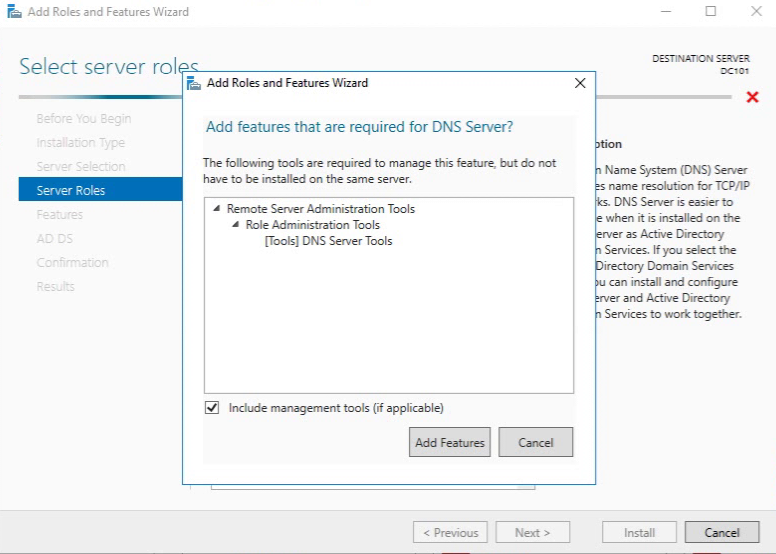
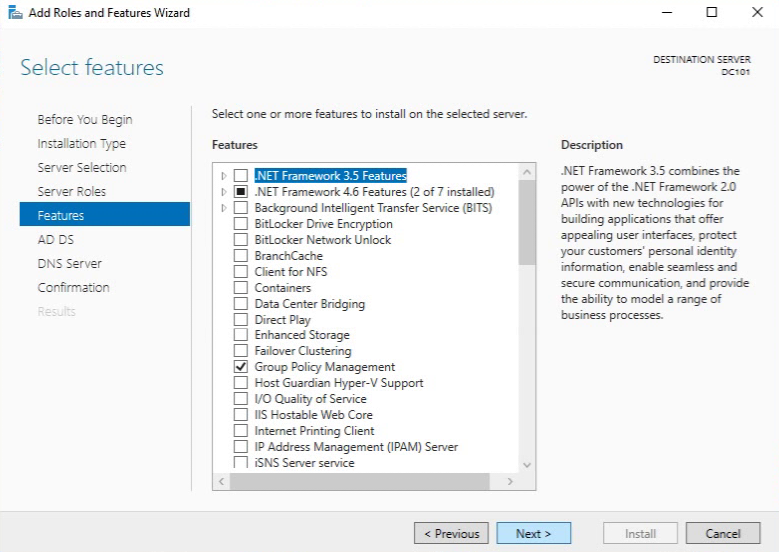
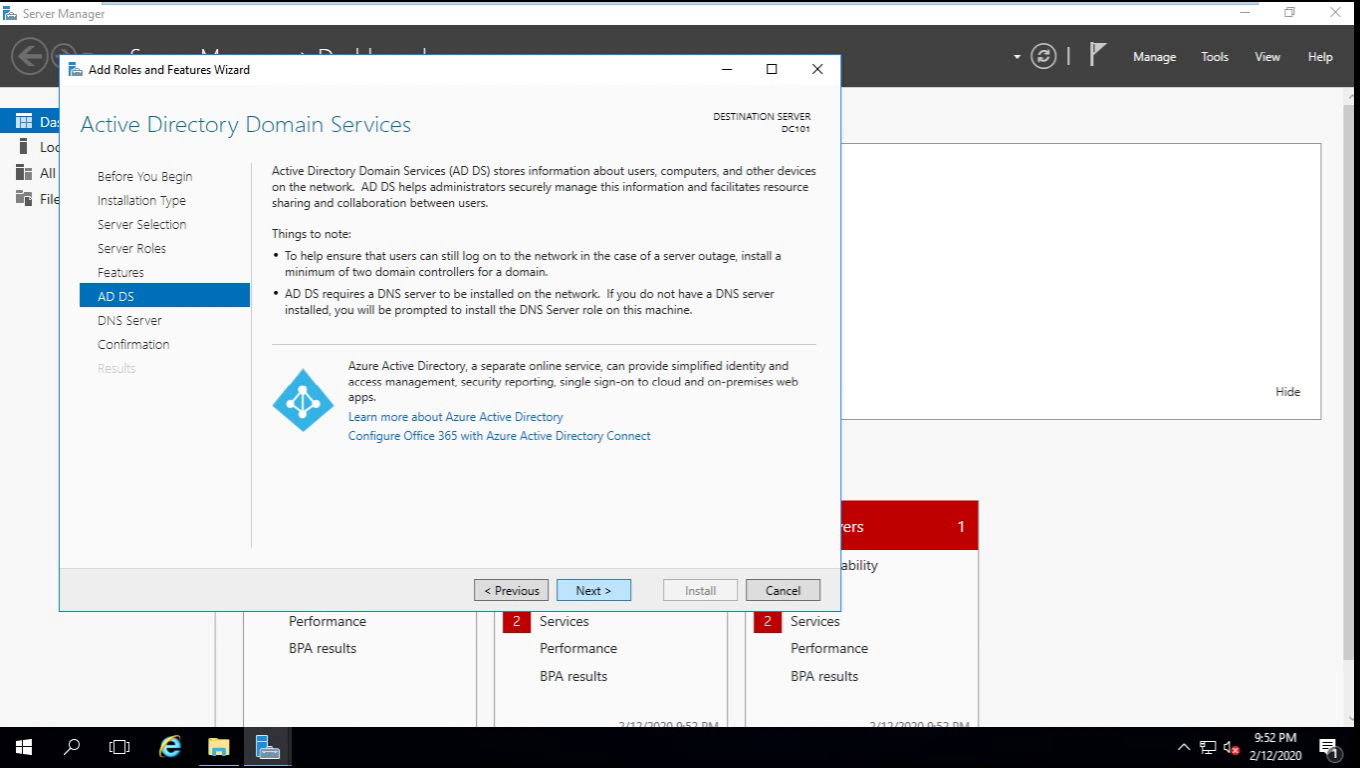
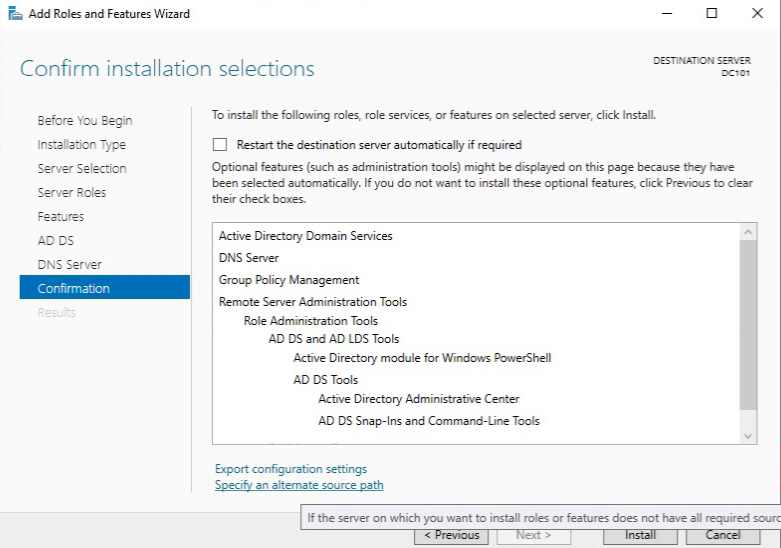
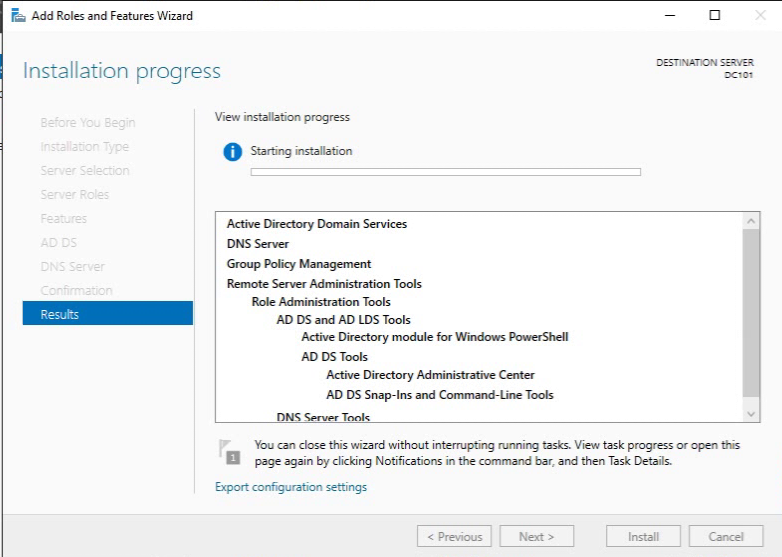
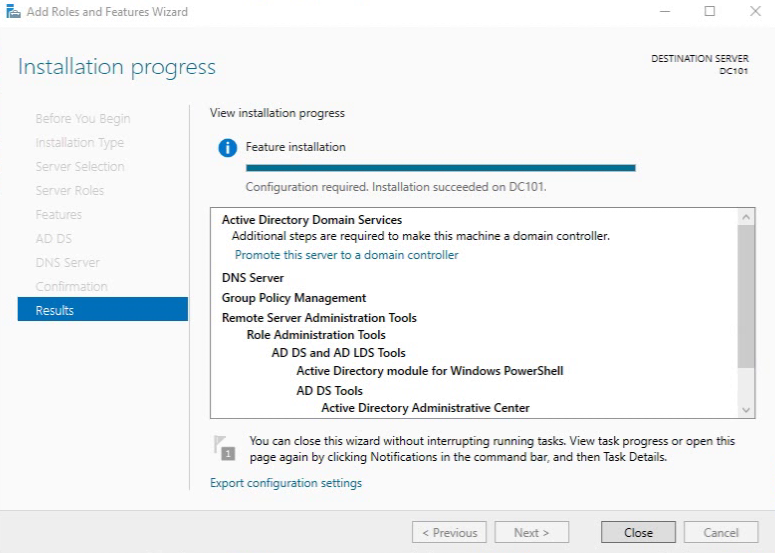
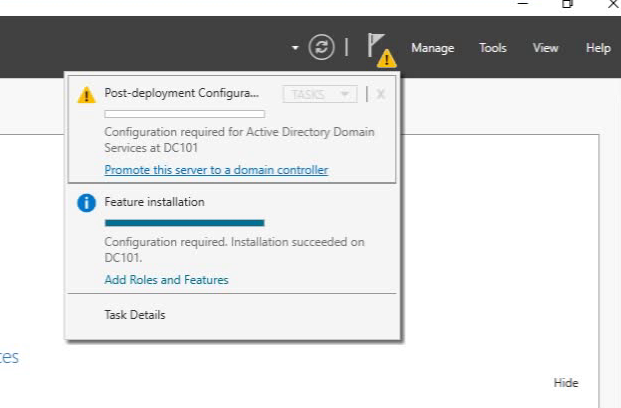
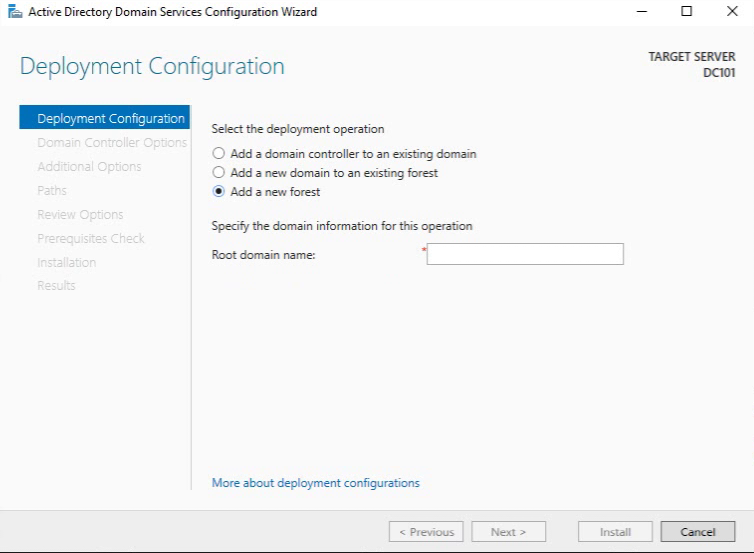
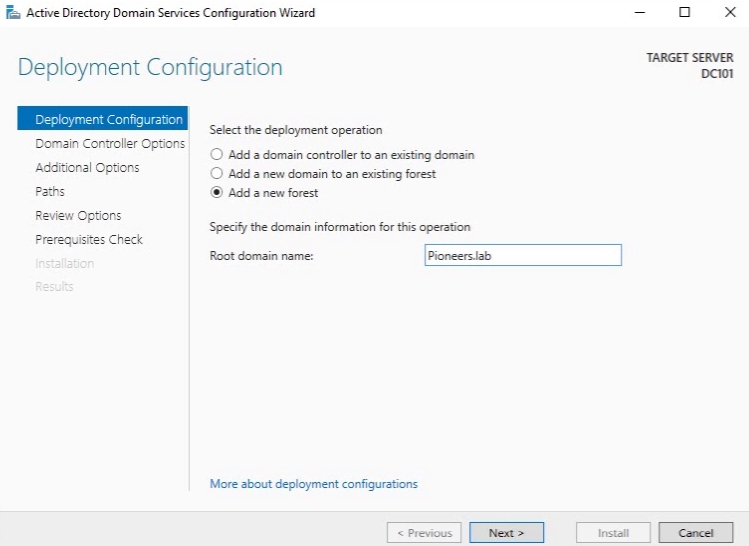
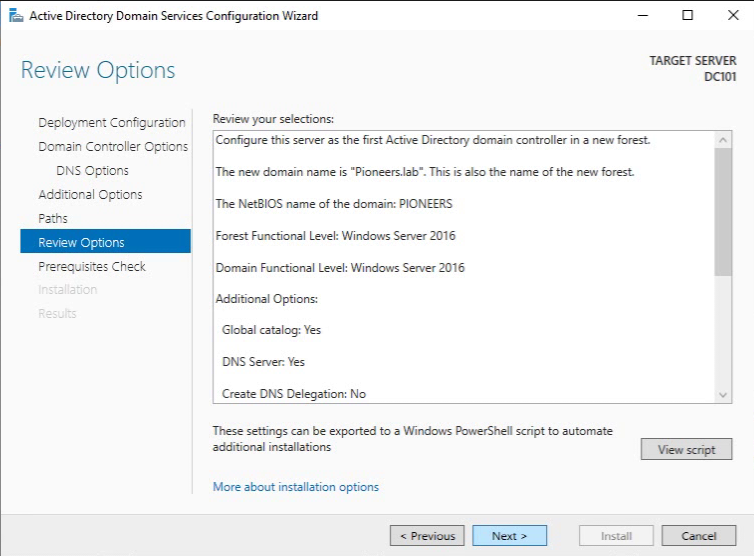
Now we have installed active Directory and DNS with domain name [pioneers.lab]

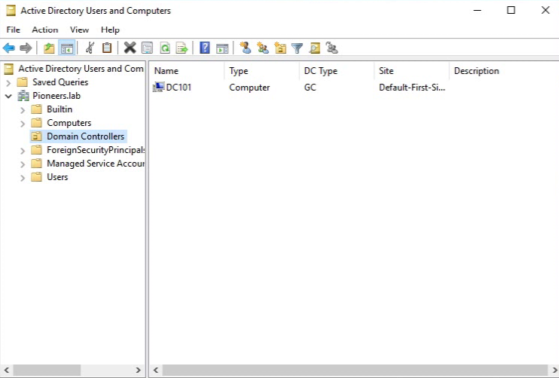
So server DC101 become [domain controller ]  for domain [Pioneers.lab]

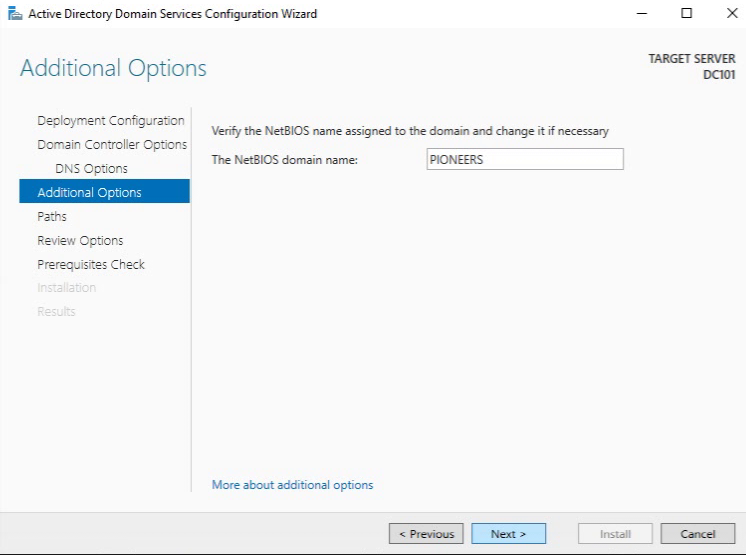
And DC101 has got full name [DC101.pioneers.lab] , this nme called Full Qualified Dmoani Name FQDN

Actually each computer will join domain , will have 2 names : the first name called NETBIOS name and full Name called FQDN

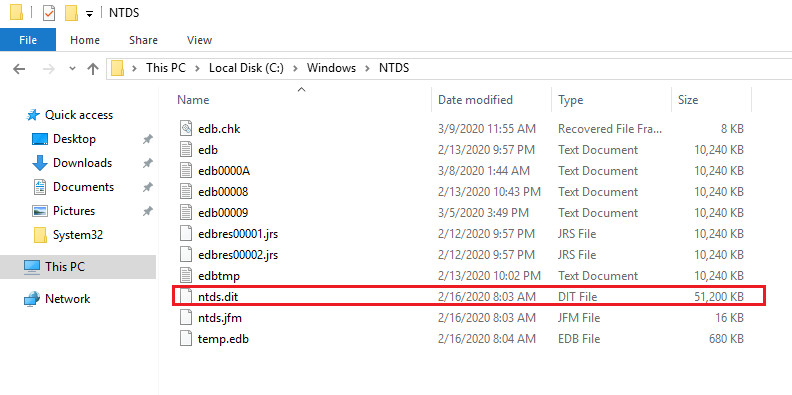
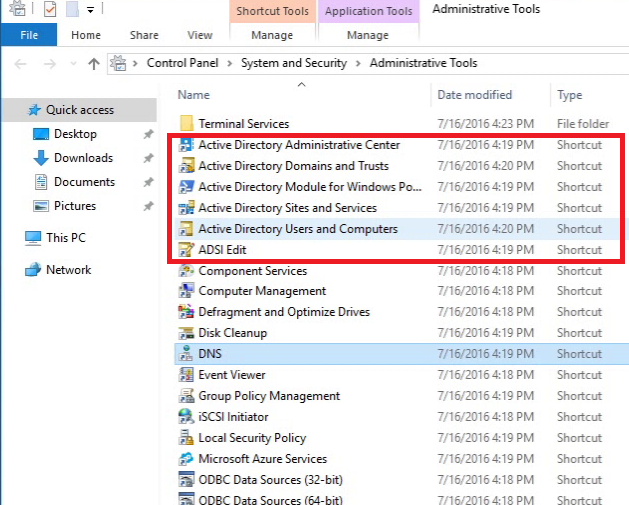
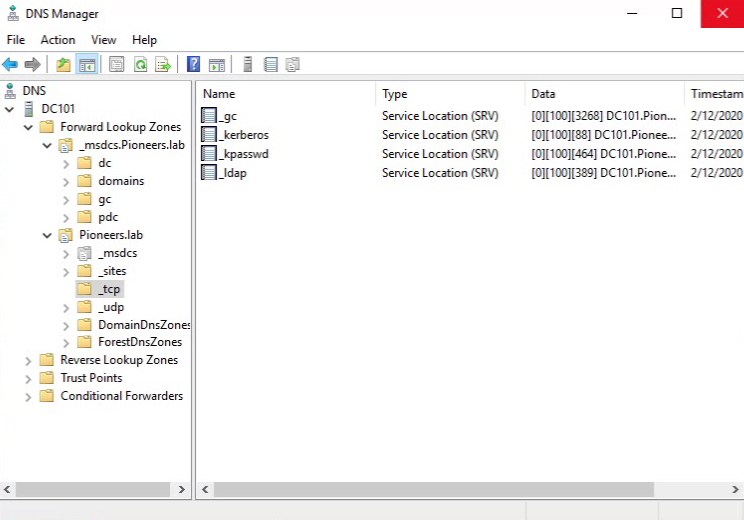
But how to verify that active Directory have been installed successfully ?

the first step is to open c:\windows\NTDS\  then we will find file [ NTDS.dit ]

this file is Directory service Data Base

this file is opened   and managed  by some consoles will be discussed later

NTDS stand for [New Technology directory Service]

open c:\windows\ntds > AD file ntds.dit

second step is to  open administrative tools à we will find a few console [snap-in] started with active directory like

  • Active Directory Users and computer : this console will be used for most administrative  tasks
  • Active directory site and services
  • Active Directory domain and trust
open administrative tools > new console added

From within Server Manager, click Tools then Active Directory Users and Computers.

Expand the domain root (in my case, it’s PIONEERS.LAB), then click on Domain Controllers. àThere is ONLY one domain controller called DC101

Also expand container called [computers ] à its empty since there is NO computer has join to domain up to the moment

open active directory user and computer ADUC >remember this console

Verify DNS installation

Sometimes verifying AD installation is NOT enough , we have also to verify DNS installation and configuration

From within Server Manager,  click Tools ,[or from administrative tools ]  then DNS to open DNS console

Open forward lookup zone –then  your domain zone [in my case pioneers.lab] 

this area where ALL computers will be registered

In same zone  open subfolder [_tcp] –> you will see that server DC101.pioneers.com has been registered will 4 record [_gc , _kerberos , _kpassword , _ldap ]

At the moment Don’t take much time to think about these record , since we will fully clarify it later

open dnsmgmt.msc > new SRV records added

Conclusion

Active directory & DNS server , is the core services for any network .

above we follow steps to install ADDS and DNS as best practice 

later : all next software and services will relay on AD , so make sure to mentian server and install replica [which will be discussed later ] 

more over : before install any software that could modify AD , try to take snap-shot 

Share this post
Share on facebook
Share on google
Share on twitter
Share on linkedin
Share on pinterest
Share on print
Share on email

About Me

Our Power in Numbers

 17 

Courses

321

Articles

3,882

Images
and All configurations images are proudly made in Pioneers Lab

Articles By Course

Recent Articles

Subscribe

Contact us

have a challenge ? don’t hesitate to contact us