Boundary tell client agent to which site server to assigned if we have many server
Boundary is more important to client [for auto site assignment join] more than SCCM site server
If boundary and boundary groups NOT configured > then auto deployment is useless , since we have to configure client agent manually to be assigned to site server
If we are going to install client agent manually > then boundary is useless
Boundary and discovery methods
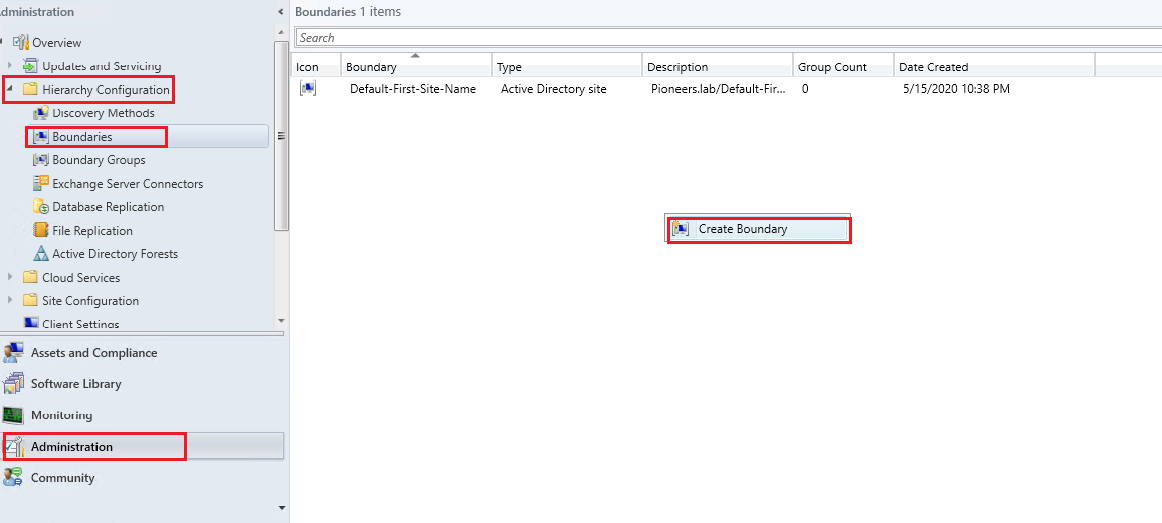
site discovery method [ which have been configured in previous article ] will auto create [Boundary] , so we just create [Boundary group] and connect it to auto created boundary
Boundary Area
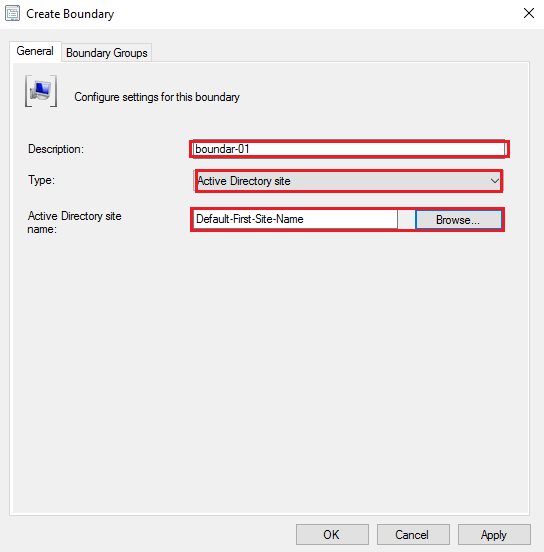
we Use Boundary to customize client auto join based of specific criteria like
- IP Subnet
- AD site [part of AD_site_And_forest console]
- IPv6
- Range of IPs
Boundary and distribution Point
Boundary is useful also to communicate with [Distribution Point] DP which we will discover later
Boundary and Fallback point
The client uses fallback to the default site boundary group as a safety for content that is not available from any other location
You can’t edit anything. The use of this when no DP found it fall on this boundary network
Boundary default stings
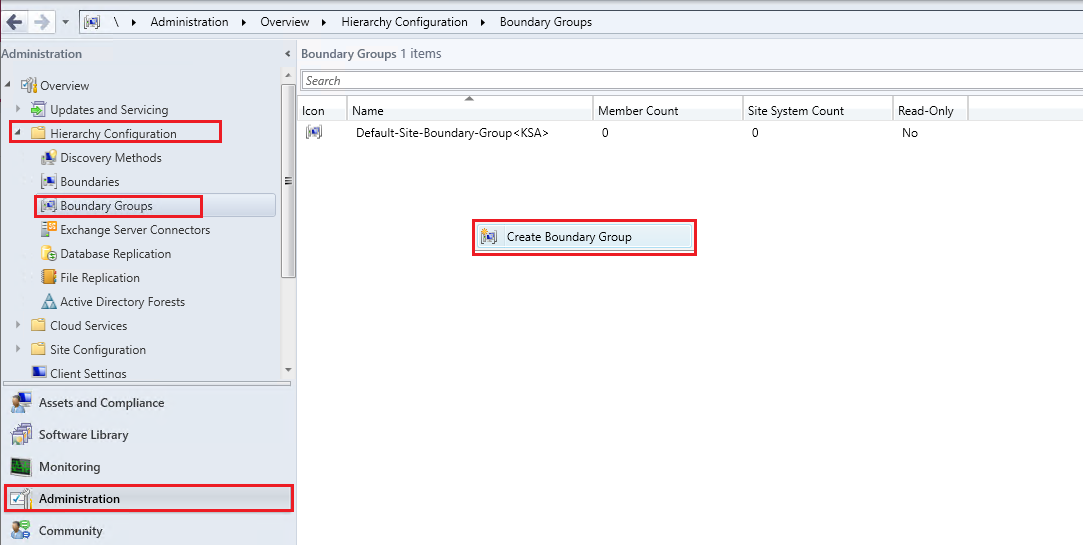
By default, Configuration Manager creates a default site boundary group at each site.
You can create your own boundary groups, and each site has a default site boundary group that Configuration Manager creates. This group is named Default-Site-Boundary-Group<sitecode>.
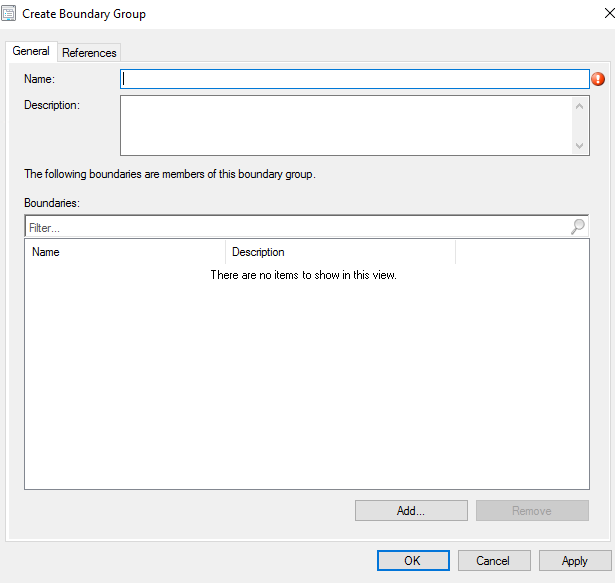
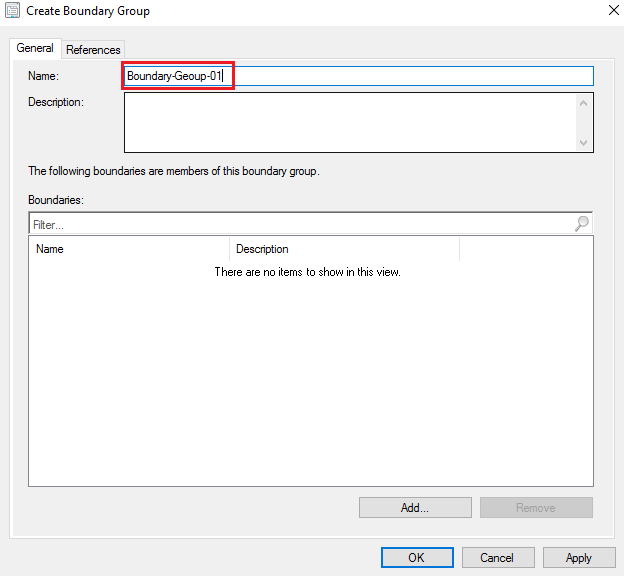
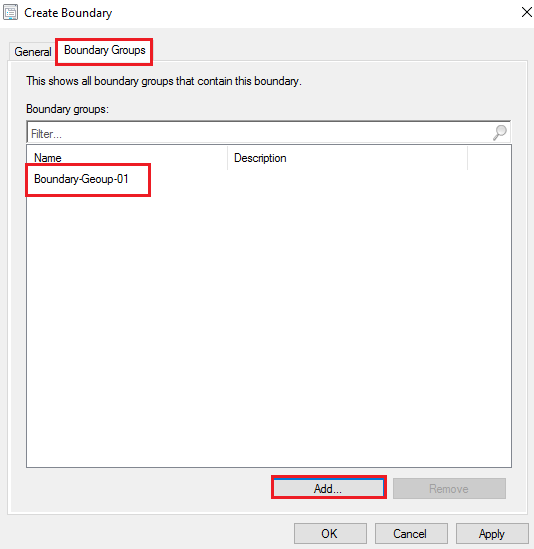
Boundary should be connected to [boundary group ]
To increase the availability of servers to a wider range of network locations, assign the same boundary and the same server to more than one boundary group.
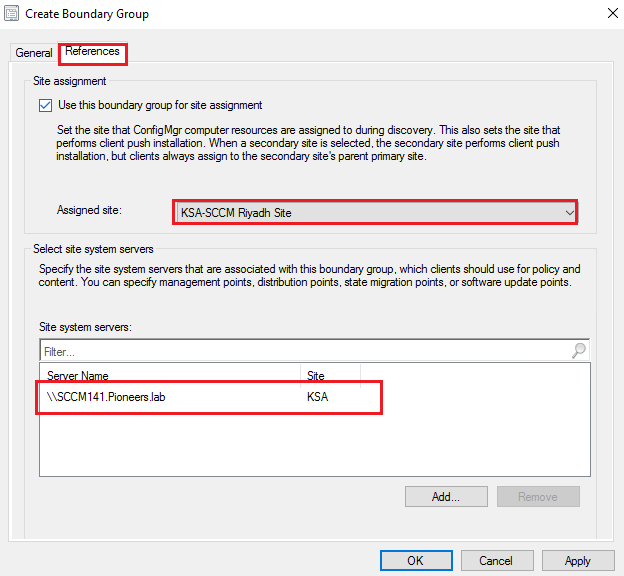
Boundary and Site Assignment
A newly installed client that uses automatic site assignment joins the assigned site of a boundary group that contains the client’s current network location.
After assigning to a site, a client doesn’t change its site assignment when it changes its network location. For example, a client roams to a new network location. This location is a boundary in a boundary group with a different site assignment. The client’s assigned site doesn’t change.
When Active Directory System Discovery discovers a new resource, the site evaluates network information for the resource against the boundaries in boundary groups. This process associates the new resource with an assigned site for use by the client push installation method.
When a boundary is a member of more than one boundary groups that have different assigned sites, clients randomly select one of the sites.
Changes to a boundary groups assigned site only apply to new site assignment actions. Clients that previously assigned to a site don’t reevaluate their site assignment based on changes to the configuration of a boundary group (or to their own network location).