Connect ESXI to NFS storage Part II :Configure NFS server

Share on facebook
Share on google
Share on twitter
Share on linkedin
Share on pinterest
Share on print
Share on email
Table of Contents

NFS server Steps

Configure SLES123 as NFS server include the following step: 

  • install NFS services 
  • start and enable NFS service 
  • create firewall rule on SLES to pass service NFS 
  • create folder /store/DS05 [you can set any name ] and set permission 
  • share  folder /store/DS05  
  • export file
  • verify NFS folder exported 

Step 01 : install package [NFS] on SLES123

irst of all we have to check if package  nfs-kernel-server  [which is responsible of running NFS ] is installed or NOT 

use command : 

zypper info  nfs-kernel-server

if NFS is NOT installed > then simply install it using command 

zypper install --no-confirm nfs-kernel-server


open SLES with shell > service SSH with port 22
NFS is NOT installed > we will install it
install NFS

Step 02 : start services nfs

now we have to check if service nfs is running  

use command : 

systemctl status nfs-server

if NOT started then > start it 

systemctl start nfs-server

also we have to Enable sshd during system startup

systemctl enable nfs-server
 
service is NOT started > start it wit command systemctl
enable service to start automatically when SLES restarted

Step 03 : Enable firewall rule for nfs

create  firewall rule to enable nfs

firewall-cmd --permanent --add-service={nfs3,mountd,rpc-bind}

then reload  firewall 

firewall-cmd --reload
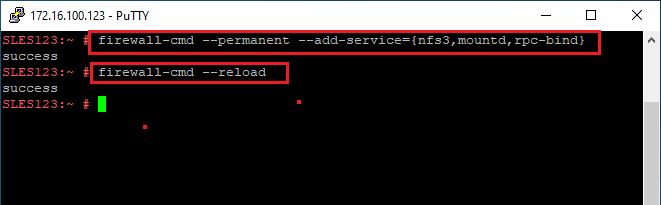
create SLES firewall rule to open service and reload firewall

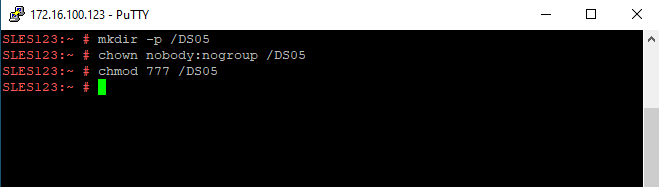
Step 04 : create folder to be shared

we have folder /store mounted to HDD with capacity 2TB

so we create a directory to be share /DS05

mkdir -p /DS05 

, then we changed the ownership and permissions on it.

chown nobody:nogroup /DS05
chmod 777 /DS05


create folder and set permission

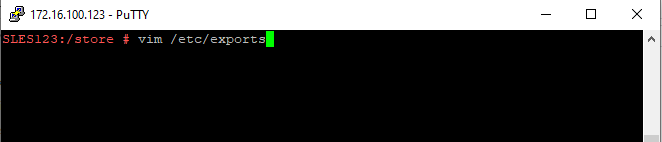
Step 05 share folder on NFS

file /etc/export  is responsible of NFS sharing 

so we open file /etc/export with text editor vim [note vim like notepad in windows ] 

vim /etc/exports

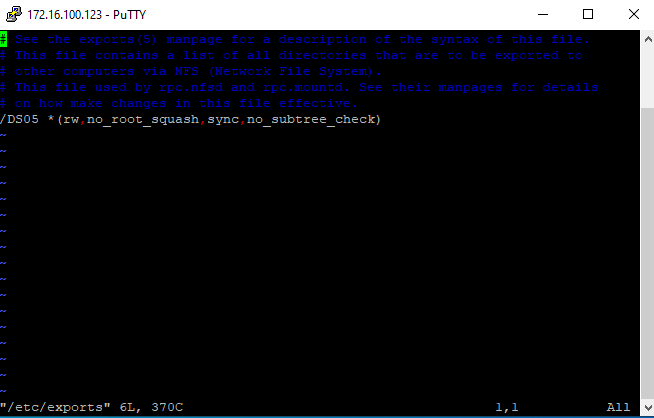
 and enter the following entry in files:

/DS05 *(rw,no_root_squash,sync,no_subtree_check)

The “*” allows any IP address to access the share,

and rw allows read and write operations. There are many other operations that can be used with NFS that  yo can check it online 

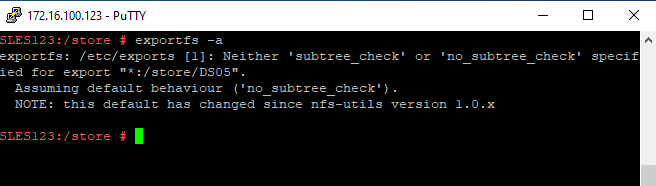
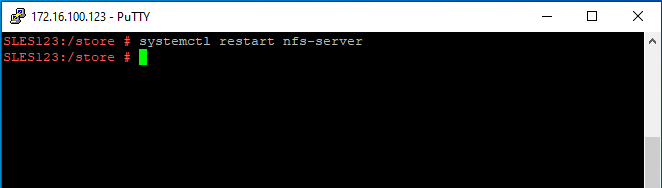
then  exported the files, and restarted the NFS server  following commands:

exportfs -a
systemctl restart nfs-server


open file /etc/exports with text editor vim
add line /store/DS05 * (rw,synch infile exporters and save
For Better View > Open Image in different TAB
restart servie to take effect

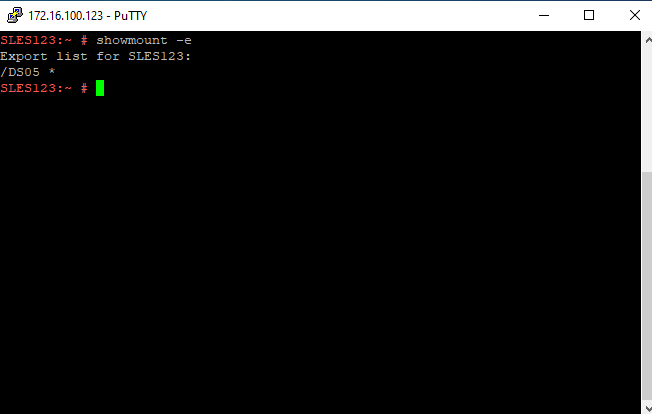
Step 06 : verify NFS shared folder

then entered showmount -e to see the NFS folders/files that were available

showmount -e


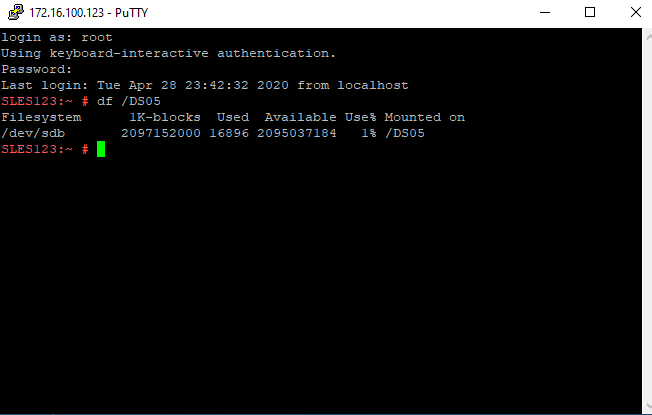
also we can check folder capacity with command


df /DS05
verify NFS folders
check folder capacity

Conclusion

in this article Part 2 of connect ESXI  to NFS : we have seen how to configure  NFS server 

you can configure windows server as NFS server > but here in networks Pioneers we would like to show the beauty of SLES Sue Linux Enterprise Server  server as NFS Server 

please join us article in part 3 here to see how to configure ESXI as NFS client and how to create NFS datastore 

Share this post
Share on facebook
Share on google
Share on twitter
Share on linkedin
Share on pinterest
Share on print
Share on email

About Me

Our Power in Numbers

 17 

Courses

321

Articles

3,882

Images
and All configurations images are proudly made in Pioneers Lab

Articles By Course

Recent Articles

Subscribe

Contact us

have a challenge ? don’t hesitate to contact us